Hi, my name is Hanley, and I’m a dice goblin.
<Goblins>: Hi Hanley…
This post is about making sprue molds. We’ve also made cap molds!
I play a lot of D&D, a bit of Vampire the Masquerade, and several other TTRPGs, so I LOVE dice. Mostly blue dice, but any dice are good if they sparkle.

I saw tweets from the likes of Dicey_Dungeons and Soulbound Dice and yearned for them. Then I realized they’re not *that* hard to make.
As of writing this post, I’d consider myself a barely-intermediate dice maker. I’ve done enough pulls to understand the theory of the process, but I haven’t done enough that I’d feel comfortable charging money for the dice I produce. That said, I’ve been photographing our trek through it so far, and figured I’d share. NOTE: your experience may differ; this is just how we’ve done it. Also, this is not the cheapest hobby out there–quite a bit of up front costs, and a pressure pot (discussed/linked below) will make your life a LOT easier, but is not required.

If you want the source of our information, check out Rybonator’s YouTube Channel – everything we’re doing is based initially on his tutorials and our own trial and error. We are also members of an amazing Facebook group called Dice Making Discoveries, where people post about the best ways to make dice all over the world. You can get access to the files, wisdom, and inspiration as the members document themselves testing out new ideas and asking how to improve. If you’re just looking to buy or sell dice, there are other groups for that–no commercial activity is allowed in DMD.
Dice making consists of these main steps:
- Making molds (or buying them)
- Mixing and pouring resin for the dice into the molds
- Waiting for the dice to cure in the molds (it’s hard to be patient)
- Pulling dice from the molds & further curing
- Finishing the dice (snipping sprues, sanding, polishing, and painting)
- Optional: designing dice masters
FYI, sanding is the worst part.
Everything else is fun and creative, but sanding is where the work is and why (1) it’s not easy to churn out tons of dice unless you’re a factory, and (2) why people charge upwards to $70 for a set of 7 polyhedral dice.
Choosing Dice for Your Molds
You can start off by buying pre-made molds online, but you can also make your own based on dice you already have.
Legal Note: I’m a lawyer, so I have to say this: there are copyright issues associated with selling dice (or dice from molds) that you didn’t design. Font and dice design (i.e. specialized dice) are usually protected by copyright. If you use someone else’s dice, fonts, or molds, just know you would likely (legally) be restricted from selling those dice. Even if you don’t sell them, you could potentially run into trademark or trade dress problems if you’re circulating them to big enough (or influential enough) crowds.
Your best bet (although this is not legal advice) is to have fun with making dice, share with your friends, but eventually get your own masters 3d printed with a commercial-use or licensed font and design once you get the hang of the whole dice making process. I suggest that over commercial-use molds because then you can make your own molds over time as they wear out instead of relying on someone else to still be making them (or just make a “master” set of dice from those molds and use them only to make more molds in the future).
Here are some examples of specialized dice:


Also note: Don’t buy Wish/Ali Express molds. Just…don’t. You get what you pay for, and 95% of the time you’re going to get a giant d10 that will never match the size of your other dice no matter how much people complain about it. Try Esty or ask in the Facebook group for suggestions for good pre-made molds if that’s the route you want to take. Also, Wish/Ali molds don’t come with reservoirs (discussed later), so they will often require additional modifications to make dice well.
Making Molds
Quinn and I went with Rybonator’s mold-making process, which are standard silicone molds with sprues (a channel through which resin is poured into a mold).
UPDATE: We later made Cap Molds! Feel free to check them out.
Below are some of the various molds we’ve made.

There are other types of molds, such as squish mold, which forms around the dice and I think has a lid on top. Because we saw Rybonator’s video first, we have stuck with his sprue method. We did individual molds for each type of dice, but you can also do them all as one, like Patrick M. did:

I won’t do a video on making molds, but will just outline the process (again, Rybonator’s YouTube is fantastic and he’s a good narrator).
Prepping Masters in Cups
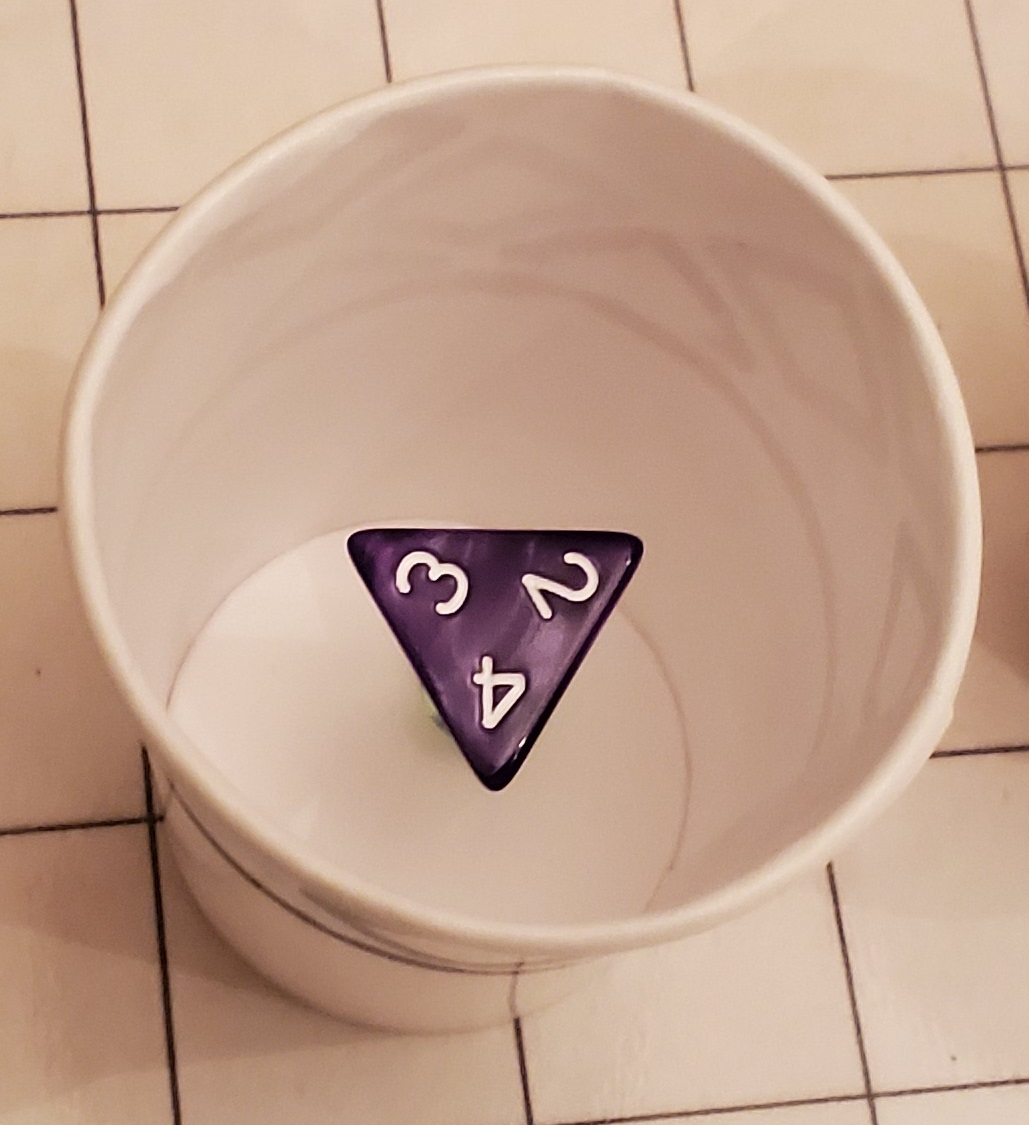
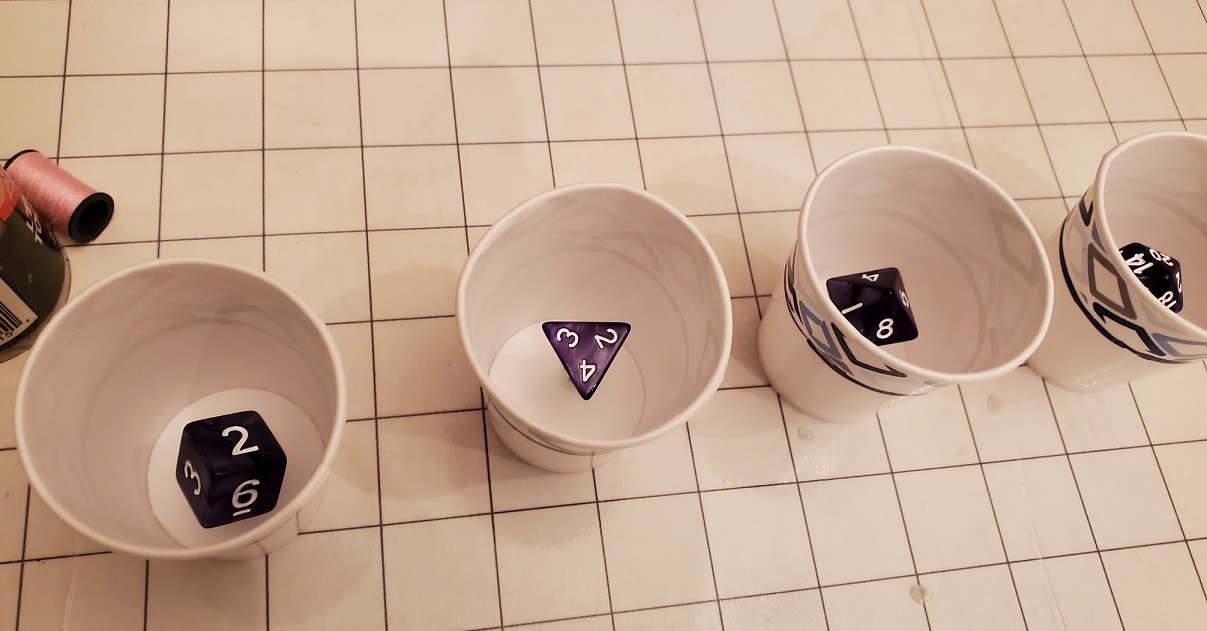
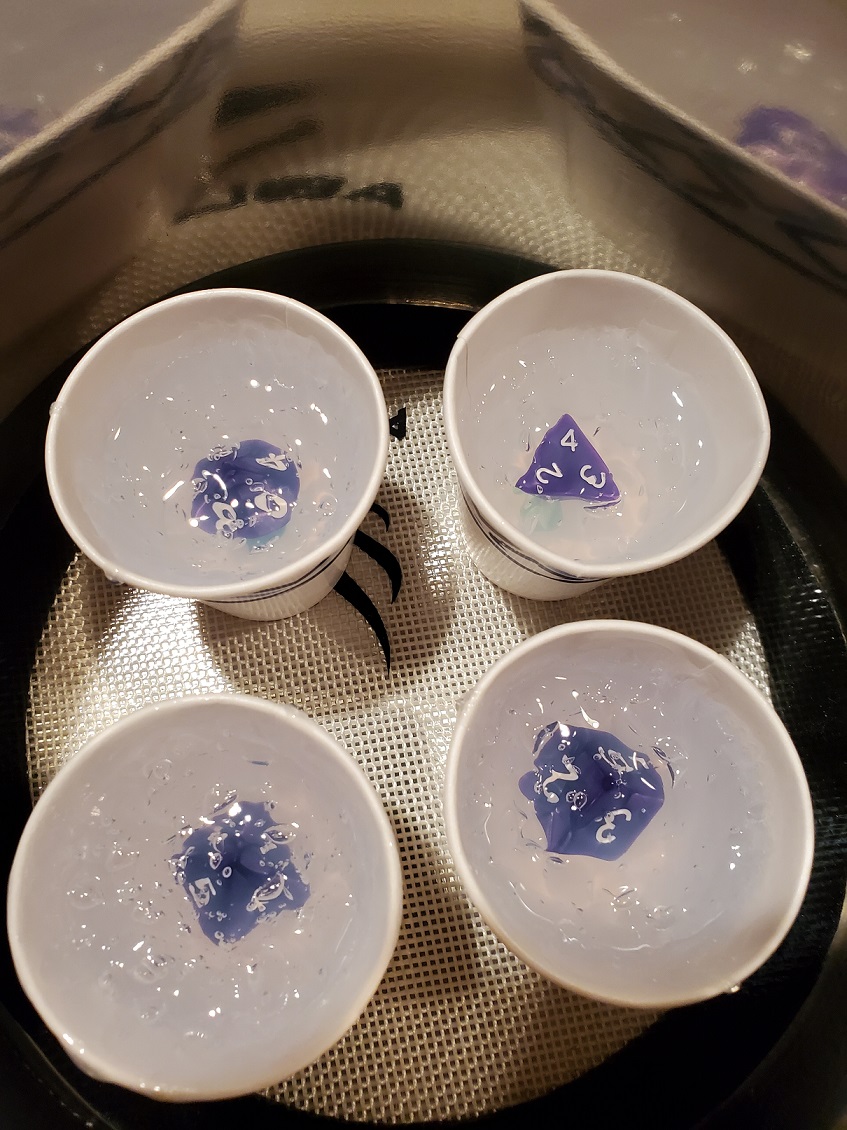
To start, you need some dice. We picked a set I had lying around and hot glued beads to the edges–some people use mini 6 sided dice, we later used 3/16″ sticks–and then glue that to the bottom of a shot glass sized cup. This becomes your “sprue”, where you’ll pour or pipe in the resin later on. I recommend against a toothpick, because then you’ll have to use a needle or something painfully thin to pour your resin – plastic pipettes are cheap, so glue something they’ll fit through, or you’ll have to cut into your mold later on (like we did). Also, small cups reduce the amount of silicone you have to use and you get more bang for your pour.
We recommend gluing your sprue item to an edge, not a corner (the pictures below are from before we learned that lesson). The fewer faces you have to sand, the better. When you have a corner touching 10 faces on a d20, it’s a b*tch to sand because there are 8-10 grits of sandpaper for each face of each dice. If you do an edge, you just have 2 faces to sand per dice. For a set of 8 dice, using the edge strategy and a dremel with sanding heads, it took me a little over 2 hours to sand through all the grits of sandpaper. Without the dremel, it was taking us 6-9 hours for a set when there were numerous sides per dice. Glue an edge, not a corner, I’m urging you. (sorry, galleries below keep going vertical for no reason).
PRO TIP: If you’re using clear silicone, DO NOT USE A WAXED CUP (like the Dixie cups above) to pour your molds. The sides of the molds will be frosted and you won’t be able to see through them clearly. Pictures illustrating this are a bit further down in the post.
We prefer the clear molds because it’s easier to deal with inclusions (foil, glitter, alcohol ink, etc) when you can actually see what you’re doing. But, we’ve also tried an opaque silicone just to see if the softer material was any easier to manipulate (it’s meh).
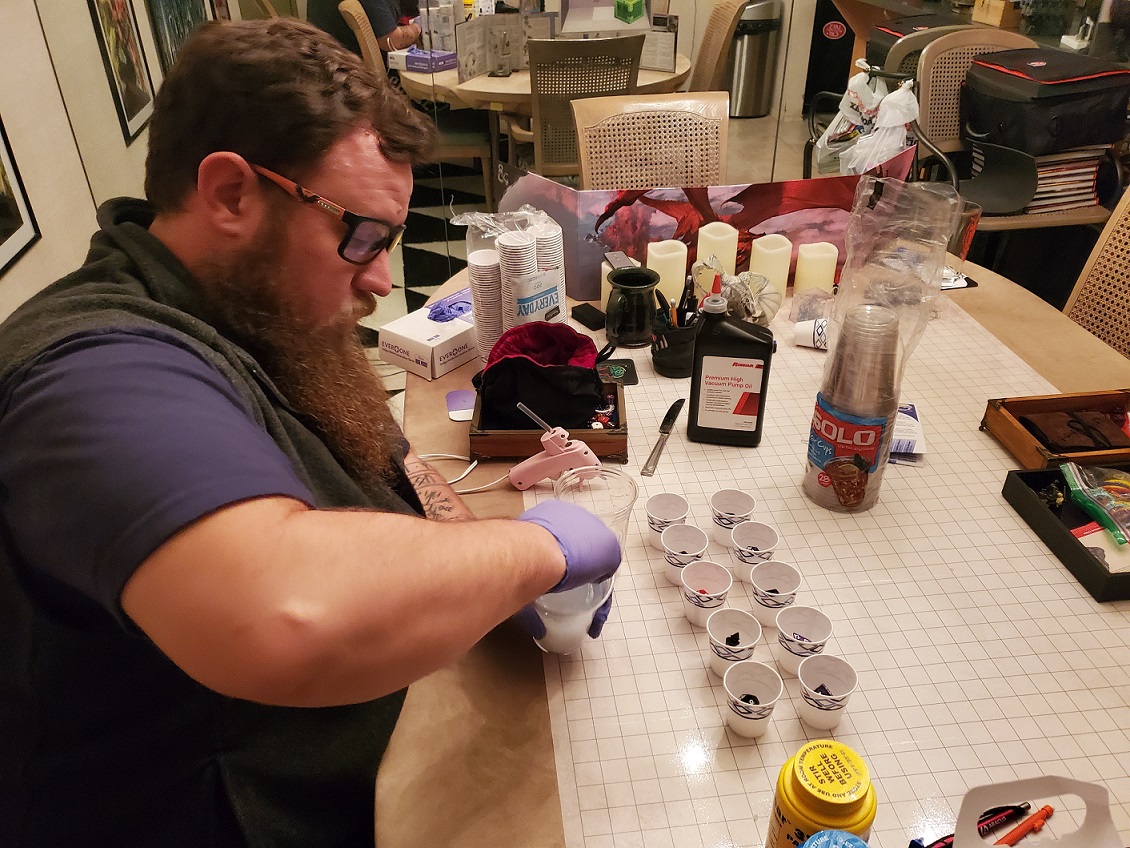
Mixing and Pouring Silicone
We use Sorta Clear 37 Silicone Mold Rubber and have also worked with 15 Slow (opaque green). Sorta Clear 37 has a relatively short pot life of 25 minutes (how long you have between initial mixing and it solidifies), but it’s food safe grade and is sturdy AF after it cures. 15 Slow has a pot life of 50 minutes and is easy to mix/pour, and is kind of squishy when it cures. Both of these have a 1:1 ratio of bottle A and bottle B, so it’s easy to figure out.
Of course, I can’t find my notes on how much to pour of each (we don’t make molds often anymore), but about half of each the bottle got us 7 dice – we ended up having to mix some more this last time because we had 8 dice we wanted molded (a “special” d20 and a regular one).

We usually pour the bottles into separate cups first because none of the cups we’ve used have the right measurement lines we need. Then, pour into one of them and mix. For the slower cure time silicone, you can do a cup swap to be absolutely sure your mixture is perfect. For the faster cure silicone, we end up just doing the 1 mixed.
TIP: Mix for as long as it says and be thorough about it. It’s a workout, but if you mess this part up, your molds will be useless. Also, ensure you have good ventilation. Silicone isn’t as bad for you as resin, but generally it’s a good idea to have ventilation when mixing chemicals.
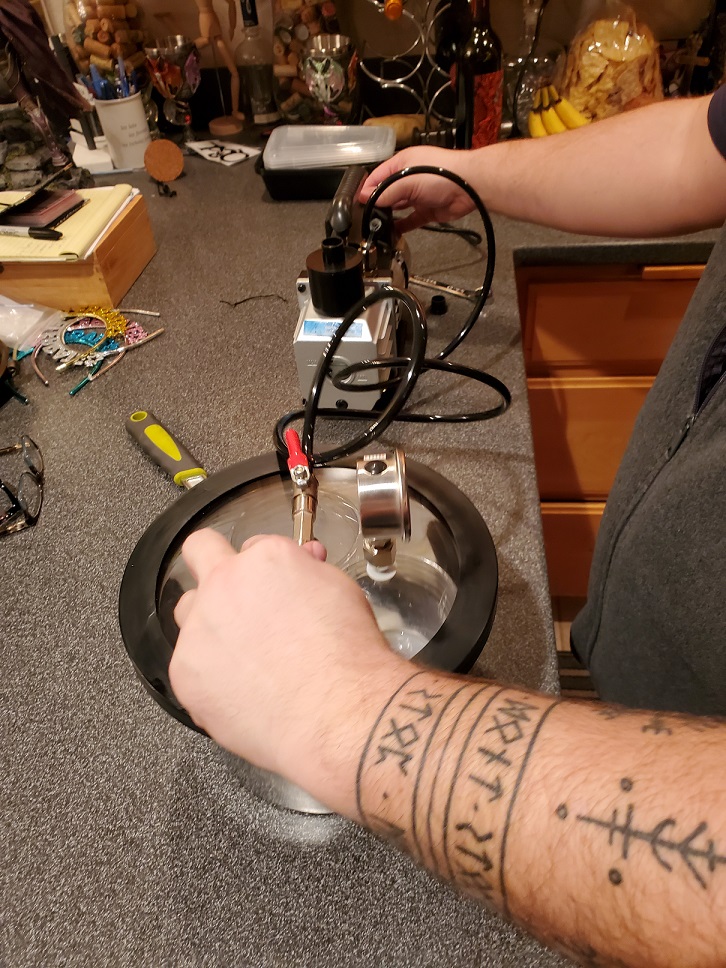
Optional: Vacuum Chamber to Remove Air
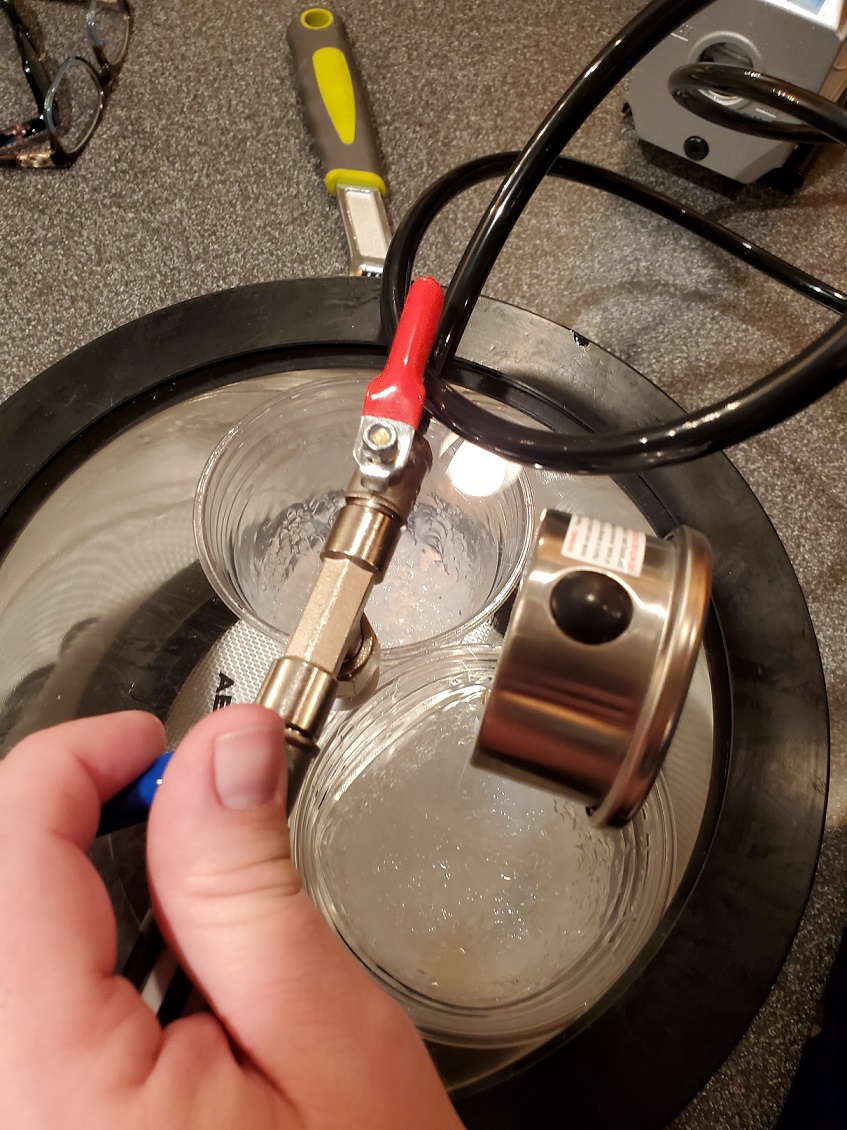
You can use the vacuum chamber discussed by Rybonator to pull air from your molds. Honestly (and I see he has a video about it now), we just use the pressure pot to cure the molds. Initially, the theory was that vacuum chambers will remove air from your molds, while the pressure pot just makes them too small to see, and could lead to pitting when you pour resin.
We tested the pressure pot on our most recent master molds and it was fine. Also, the vacuum chamber takes a while to complete because pulling air out of silicone is a stop and go process (there’s a lot of air after thorough mixing, and the silicone will overflow if you don’t release and build up pressure over and over). That’s an issue with fast-curing silicone because it’s extra time spent not pouring after mixing. Both ways worked fine for us.
I’ve also read on the Facebook forums that fridge curing of dice molds can have the effect of removing air from molds.

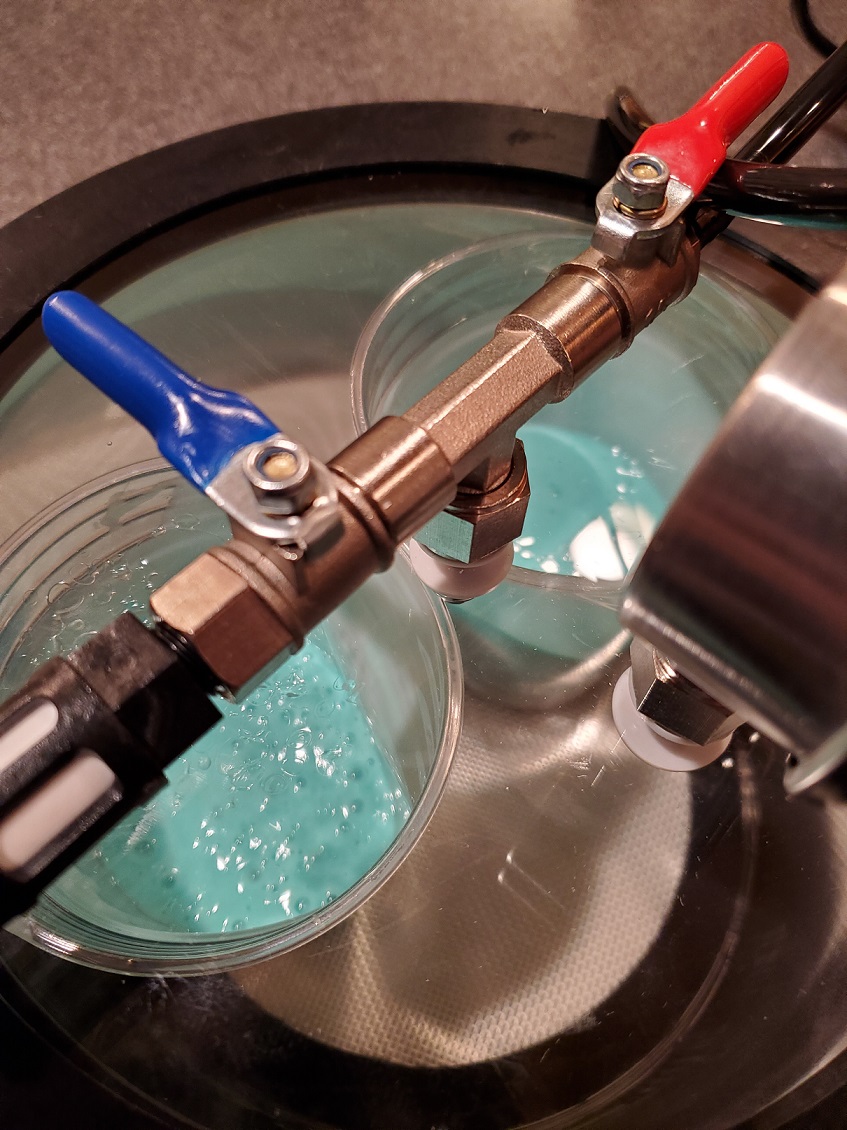
Pour the Silicone into the Cups
Cover the glued dice with the silicone. It’s recommended too use a high, thin pour along the walls of the cup for an even ribbon folding effect (like this or below) to make a steady pour around the dice and reduce air being added in (in fact, the air is torn out as the string of the pour is elongated). If we had time, we’d use the vacuum chamber on the molds after pouring, but, again, we don’t really do this as much anymore.

Let the Silicone Cure
Regardless of your method, silicone usually takes 4-6 hours to cure before you can cut your molds — read the instructions associated with your silicone.
Now, here’s the photo comparison between the waxed cup and a clear cup for pouring clear silicone (i.e. frosted vs clear):

A Note About Sprues/Reservoirs
Our sprue in this later mold (the stick mold above) ended up being longer and wider than we probably needed, but it’s a good reservoir for extra resin, as resin contracts a little when it cures (and so you want it to have more resin to pull from, otherwise you can get holes like the below from Kelly M. — I’ve had this happen to me too, but didn’t have a photo).

Remove Dice From Molds
Once your silicone cures, you need to remove the dice from the molds. Make an incision line from the top on either side of the mold (preferably along an edge) so as to get the dice out – don’t cut all the way down to the bottom. This is a bit unnerving when you’re new at it, and even when you’re experienced, there’s a whole new level of stress when cutting around your custom 3d printed masters that *may* have cost a pretty penny to have made.
It’s preferred to do the cut along an edge of the dice because if extra resin leaks out the side, it’ll create “flashing”, which is a thin layer of resin that, when removed, can leave a score mark on the dice–you don’t want that on the flat face, as it’s sometimes impossible to fix with sanding.
Also, don’t be like us and use the same dice for your first-ever molds to be your model for your next molds. We inadvertently scored the dice with the razor and then used them for more molds. Every set we made from those later molds had the same slashes on them that sanding can’t fix and it’s really noticeable when you paint the numbers. <whoops!> This is another reason we prefer clear molds – easier to see wtf you’re doing.

Above: the mold is scored so you can pry it open and pull out your cured dice. Once you slice the mold, take out your masters — you now have an empty mold ready for pouring!

Tada! You’re done with the mold-making process! Don’t worry, you’ll immediately forget how it works and then re-learn it in 6 months when you re-do the molds.
Next Post: Mixing Resin & Pouring
lauren-hanley-brady-la-mesa-attorney lauren-hanley-brady-san-diego-attorney lauren-hanley-brady hanley-brady