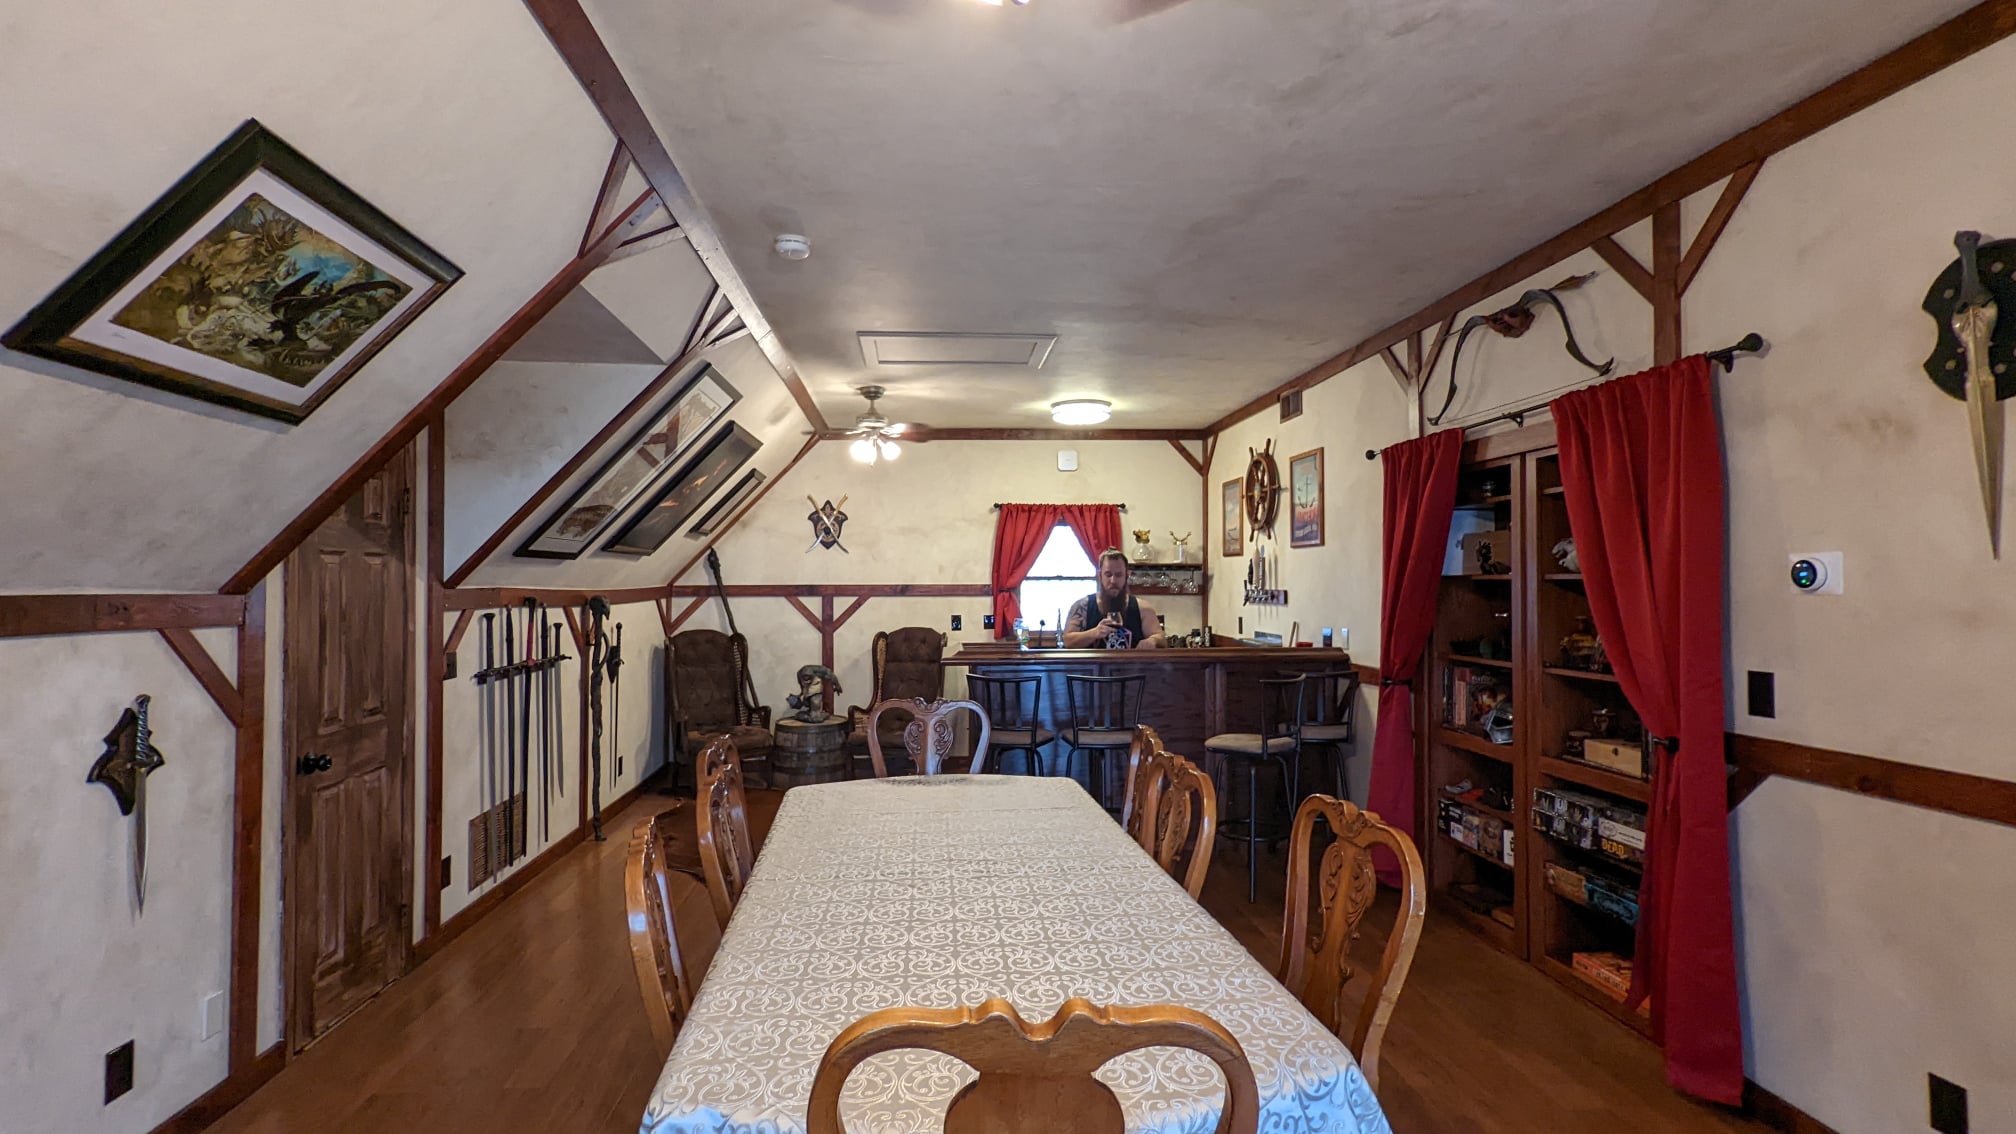
WE HAVE A TAVERN (OVER OUR GARAGE)!!!!!
Quinn and I became first-time homeowners in the summer of 2021, much to our surprise. The house came with a 1 bed/1bath ADU (alternate dwelling unit) over the garage. We briefly considered doing the “responsible thing” of renting it out to help with the mortgage, but with the pandemic raging, and the lack of a kitchen or direct access from the front, we decided the best thing to do would be to convert it into a fantasy medieval tavern.

Initially, we were thinking more of a dungeon theme, rather than tavern, like Joe Manganiello made for his D&D games. But, eventually, the idea of “free” beer on tap appealed more and more to Quinn, and the ADU already had a bar bench so…tavern!
Quinn and I have daydreamed for years about how we would one day own and run a pub. We’ve talked about how we’d decorate it (rustic/Viking), what we’d serve, the music vibe, etc. But, we’ve watched enough ‘restaurant rescue’ shows to know it would be a stupidly crazy financial risk to *actually* buy a pub, and seeing as neither of us had that kind of money or the desire to basically live there to make it thrive, talking about it has been a fun way to pass the time over dinner.
We’re calling it “The Empty Void Tavern,” after a nearly decade-long running D&D group joke. It was one of those things where Quinn needed a name for a tavern one time, and that was the name he came up with, and every game our group’s played since has managed to have an “Empty Void” tavern in it somewhere. So…
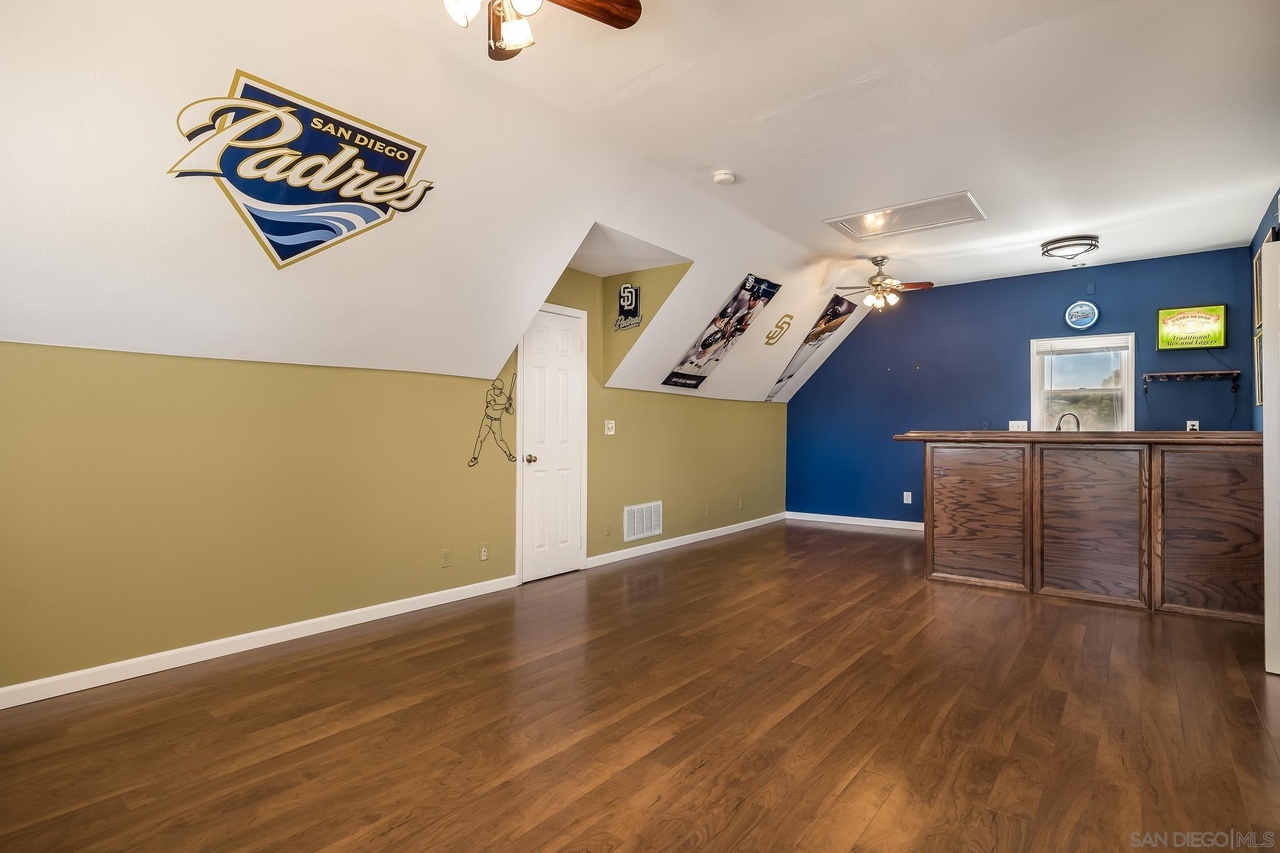
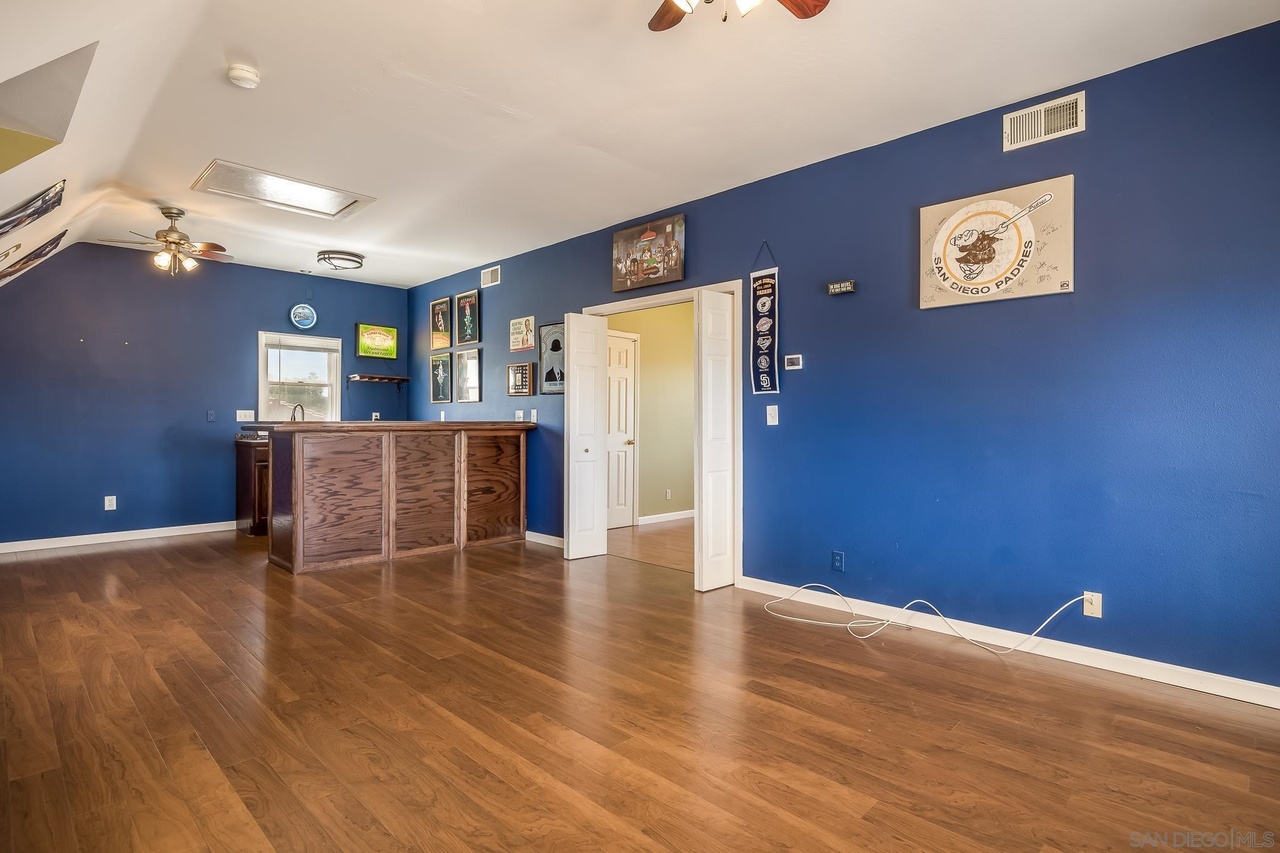
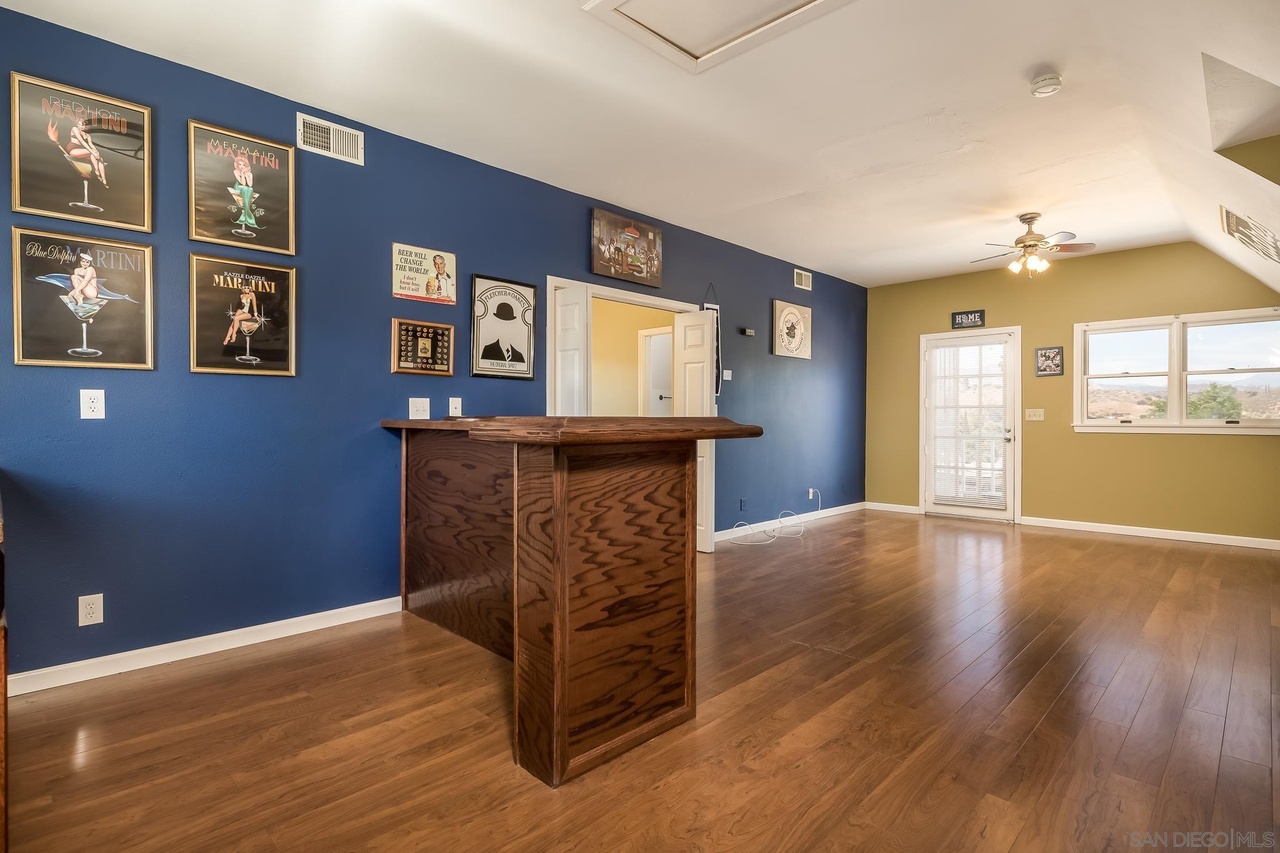
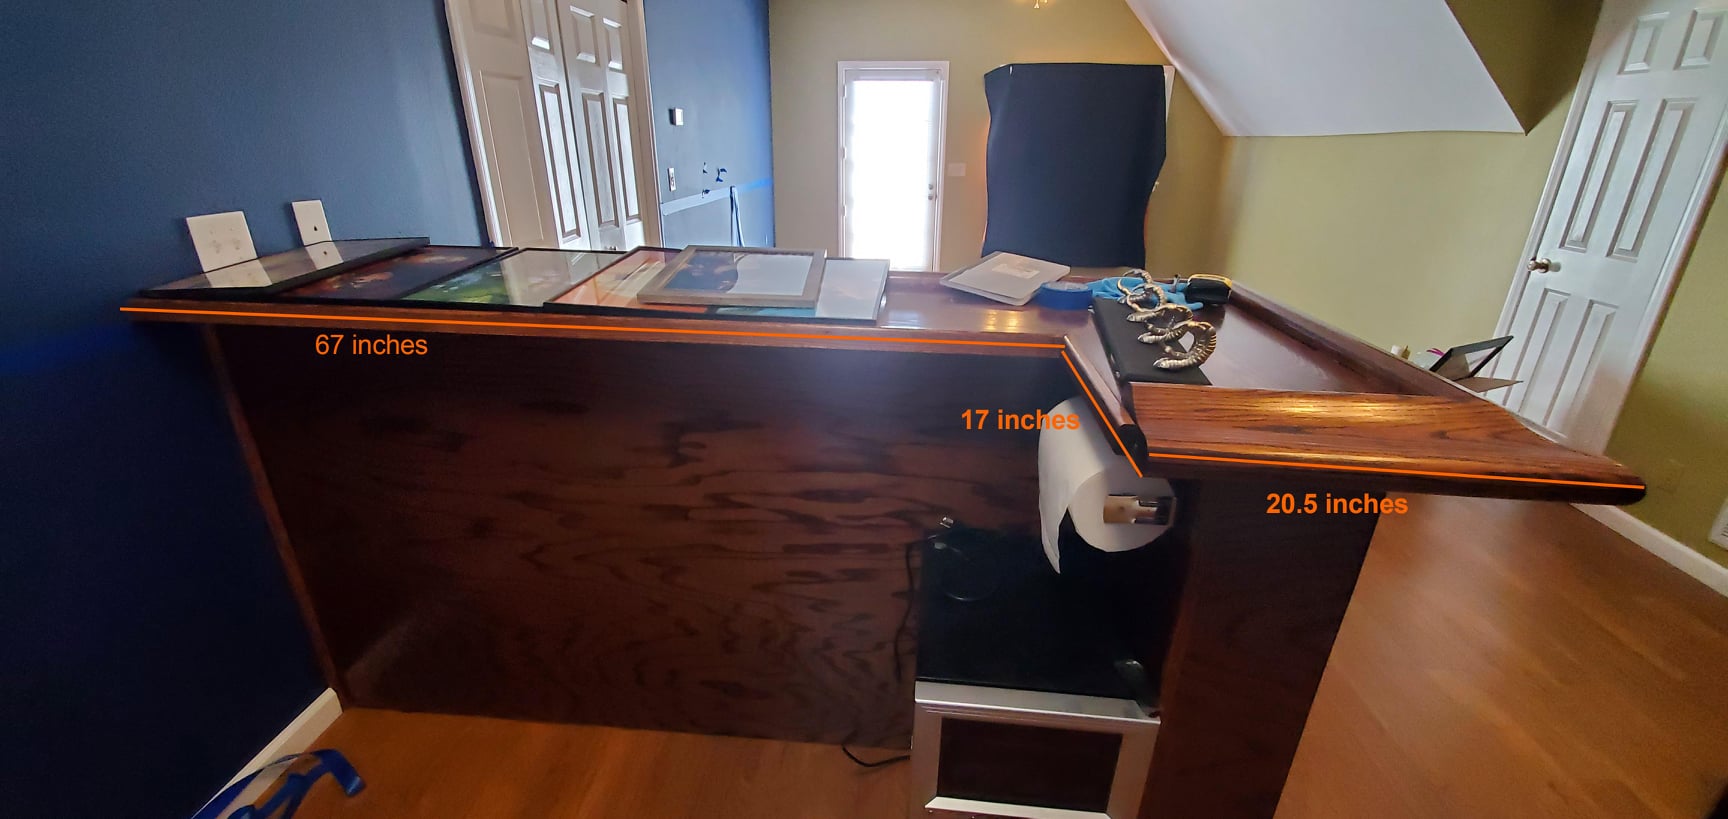
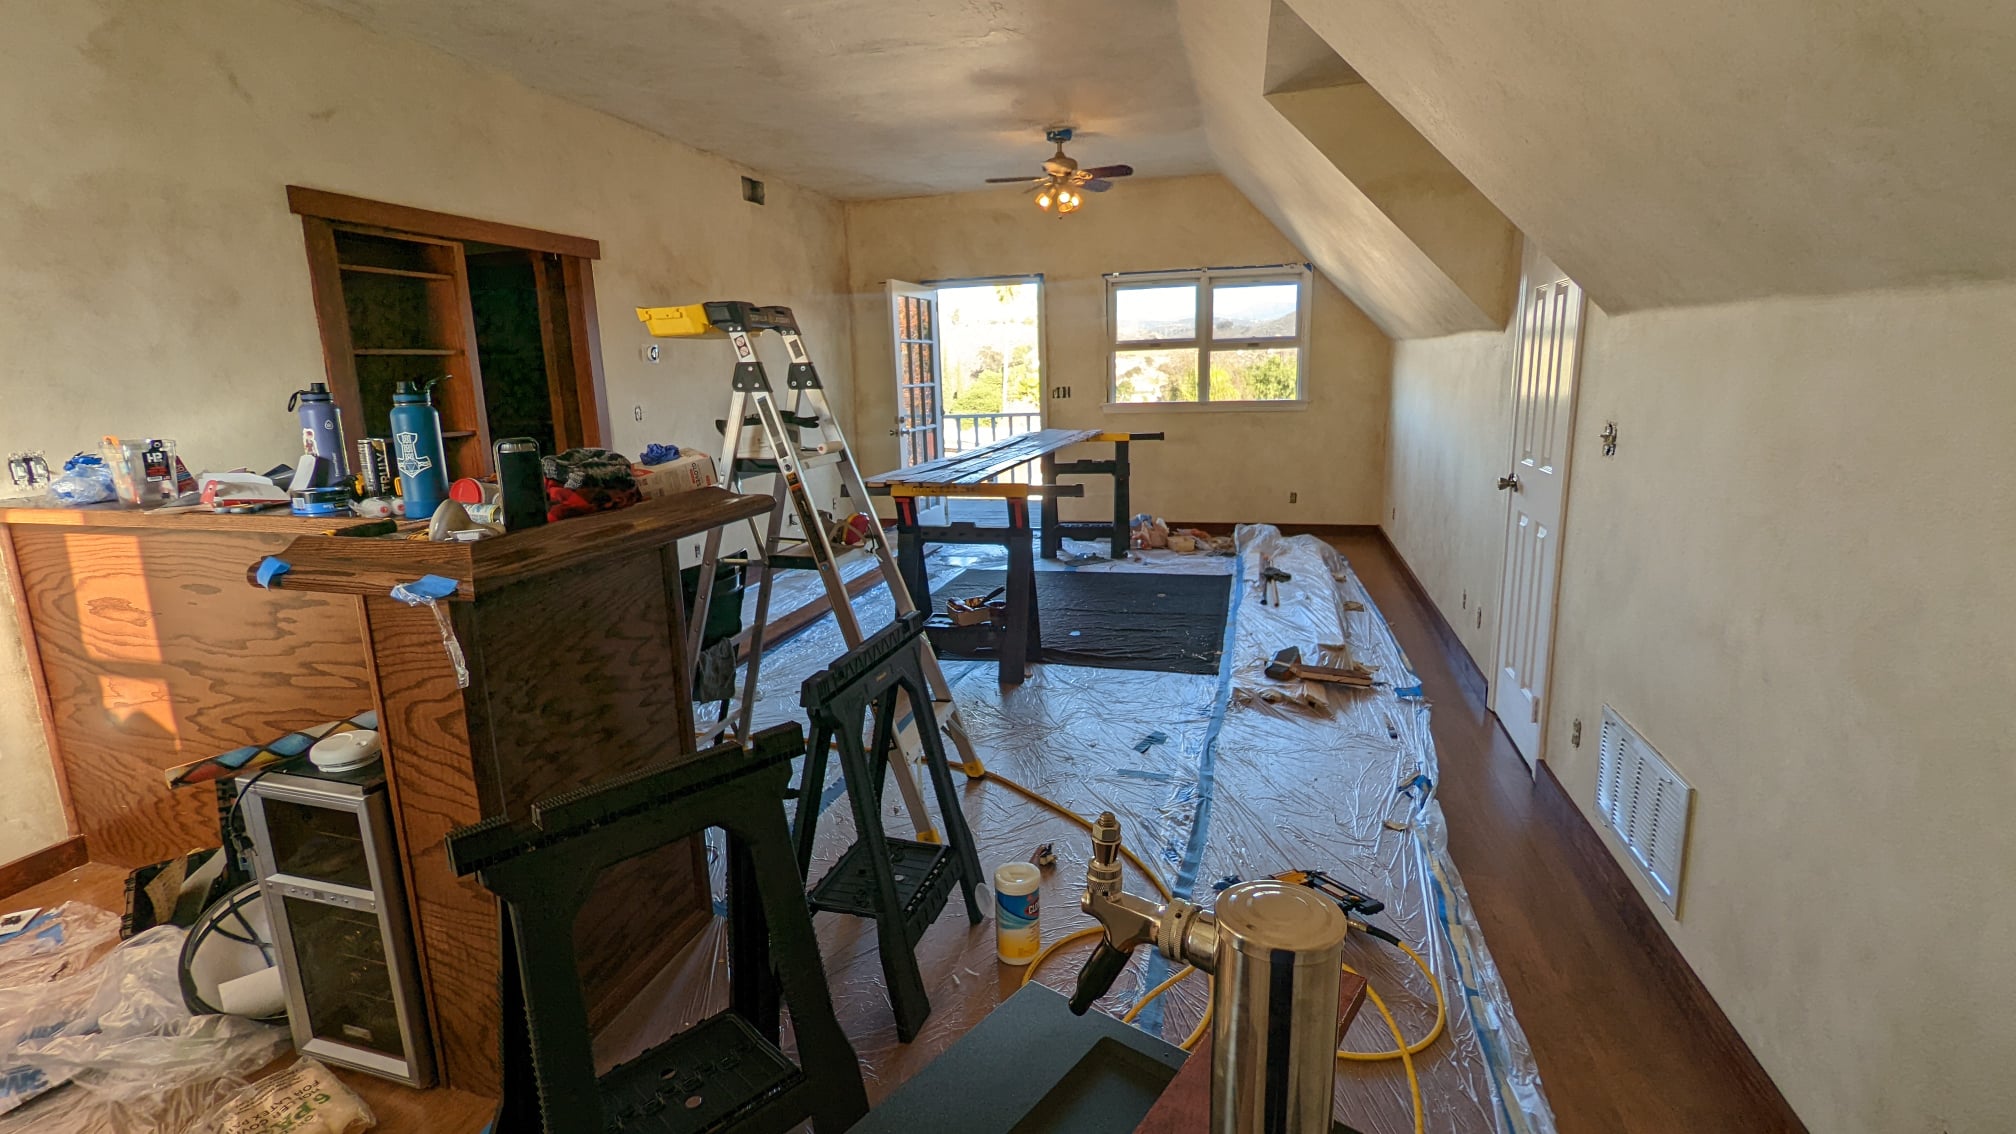
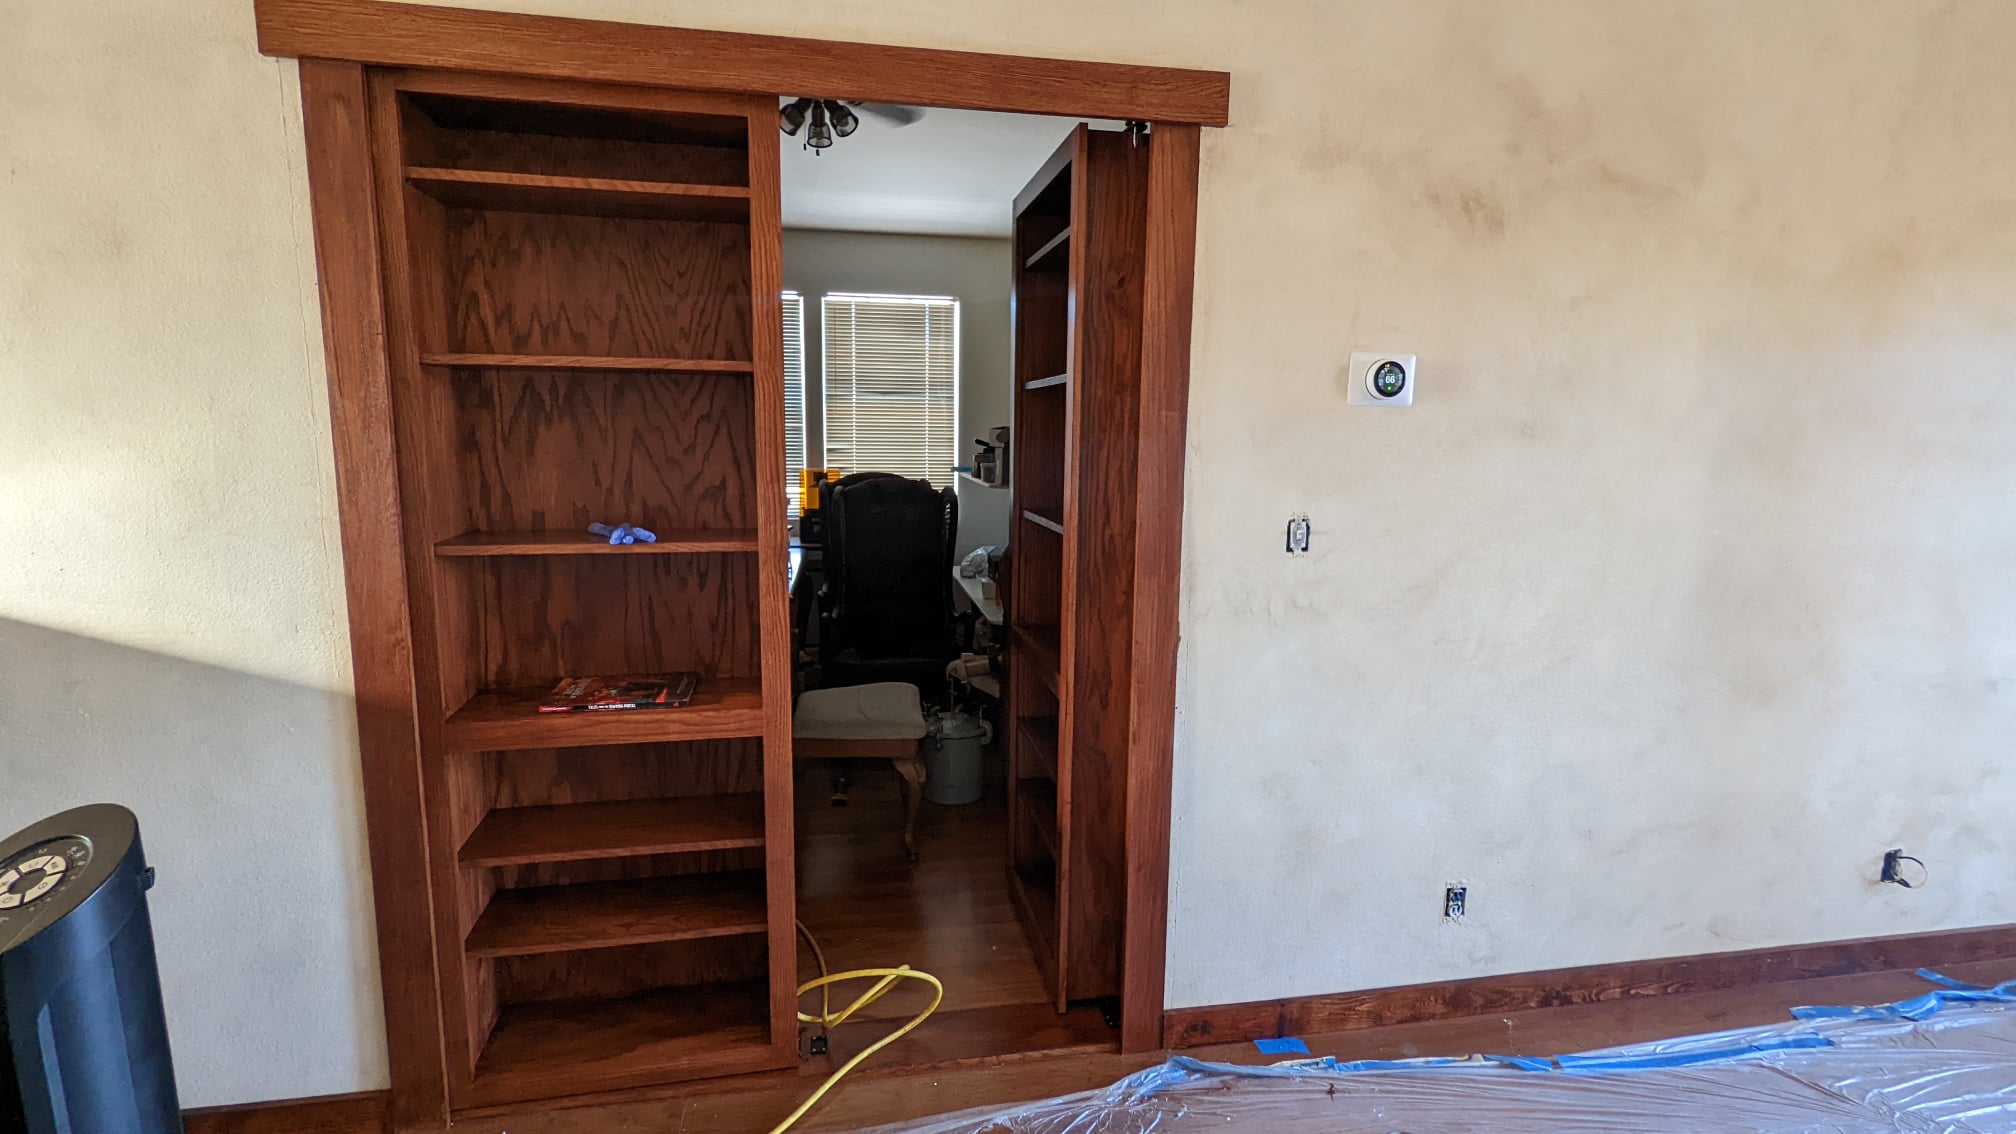
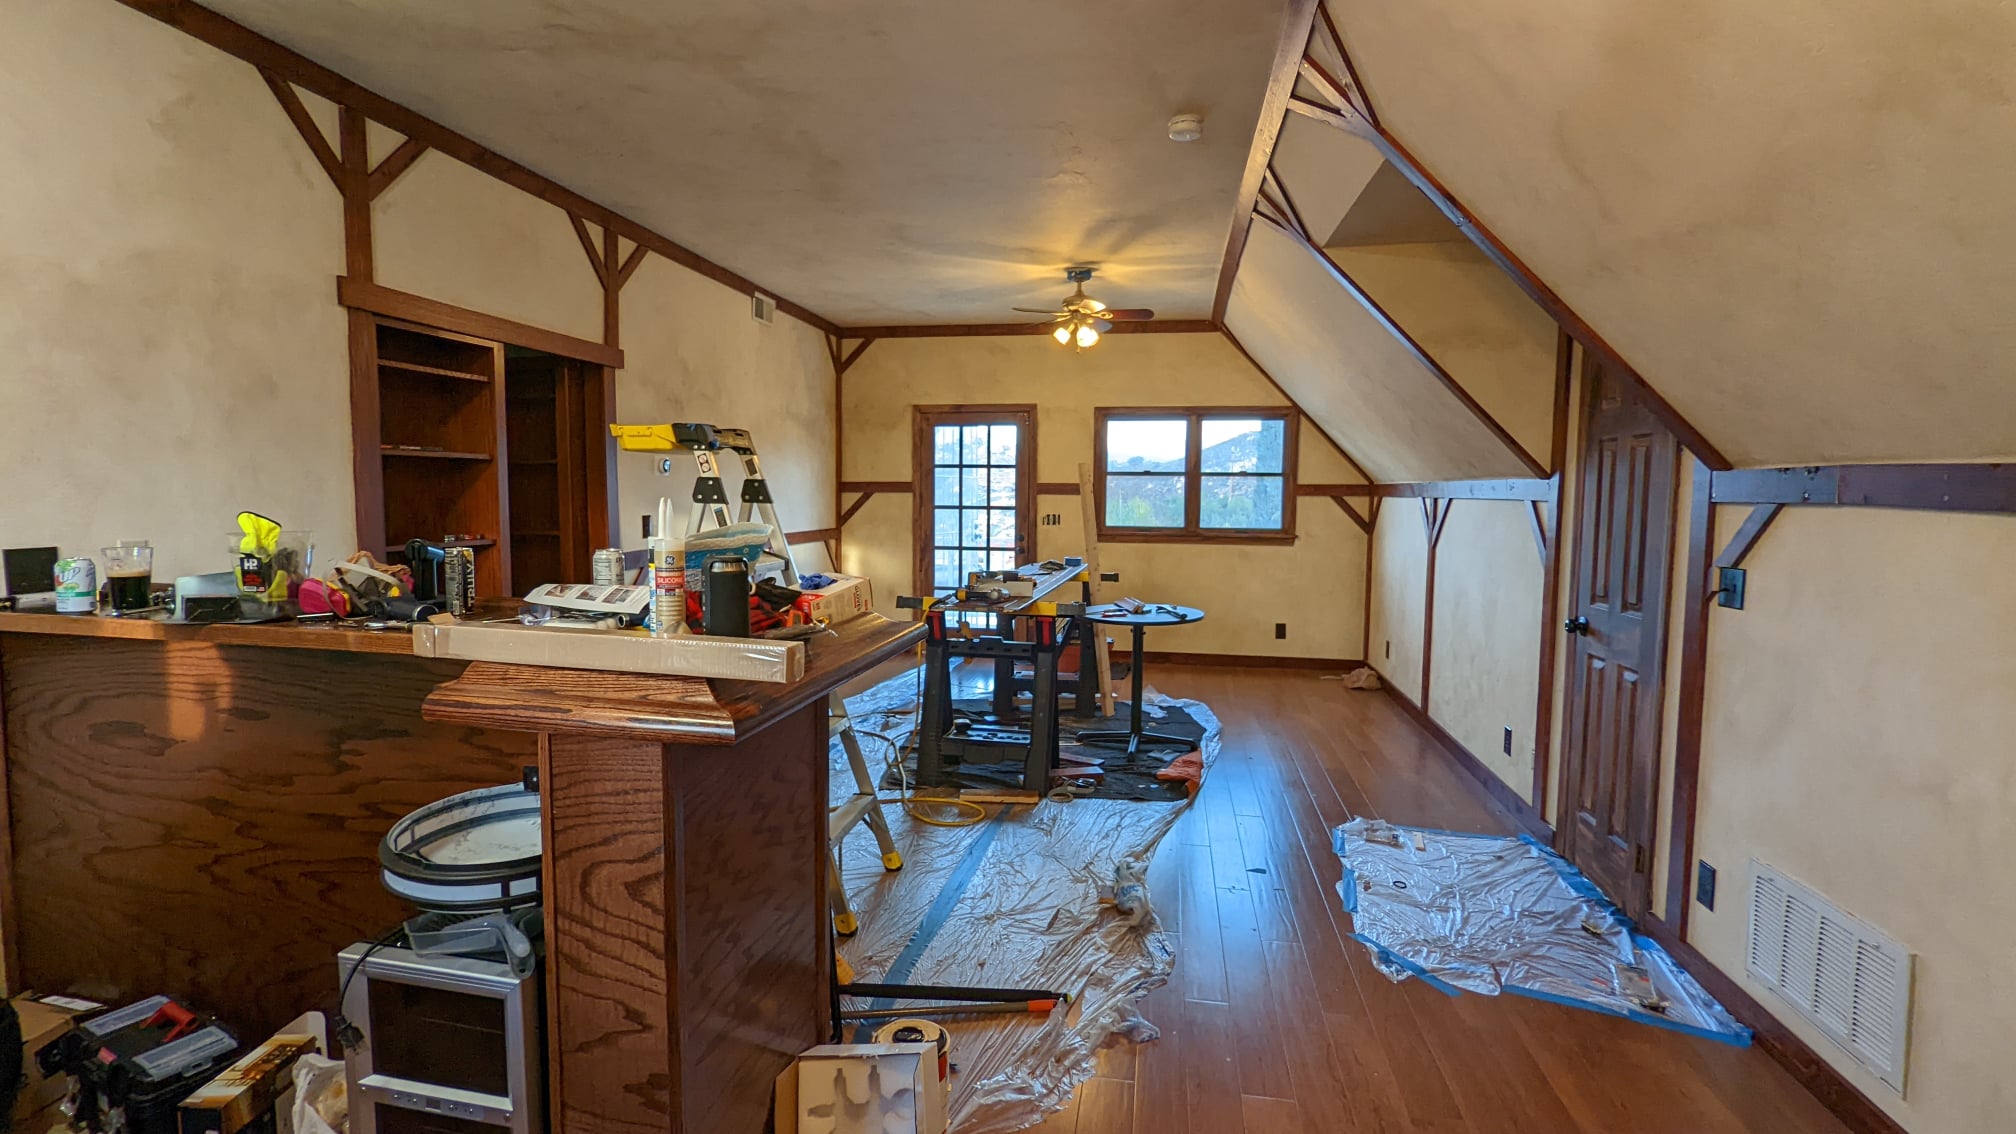
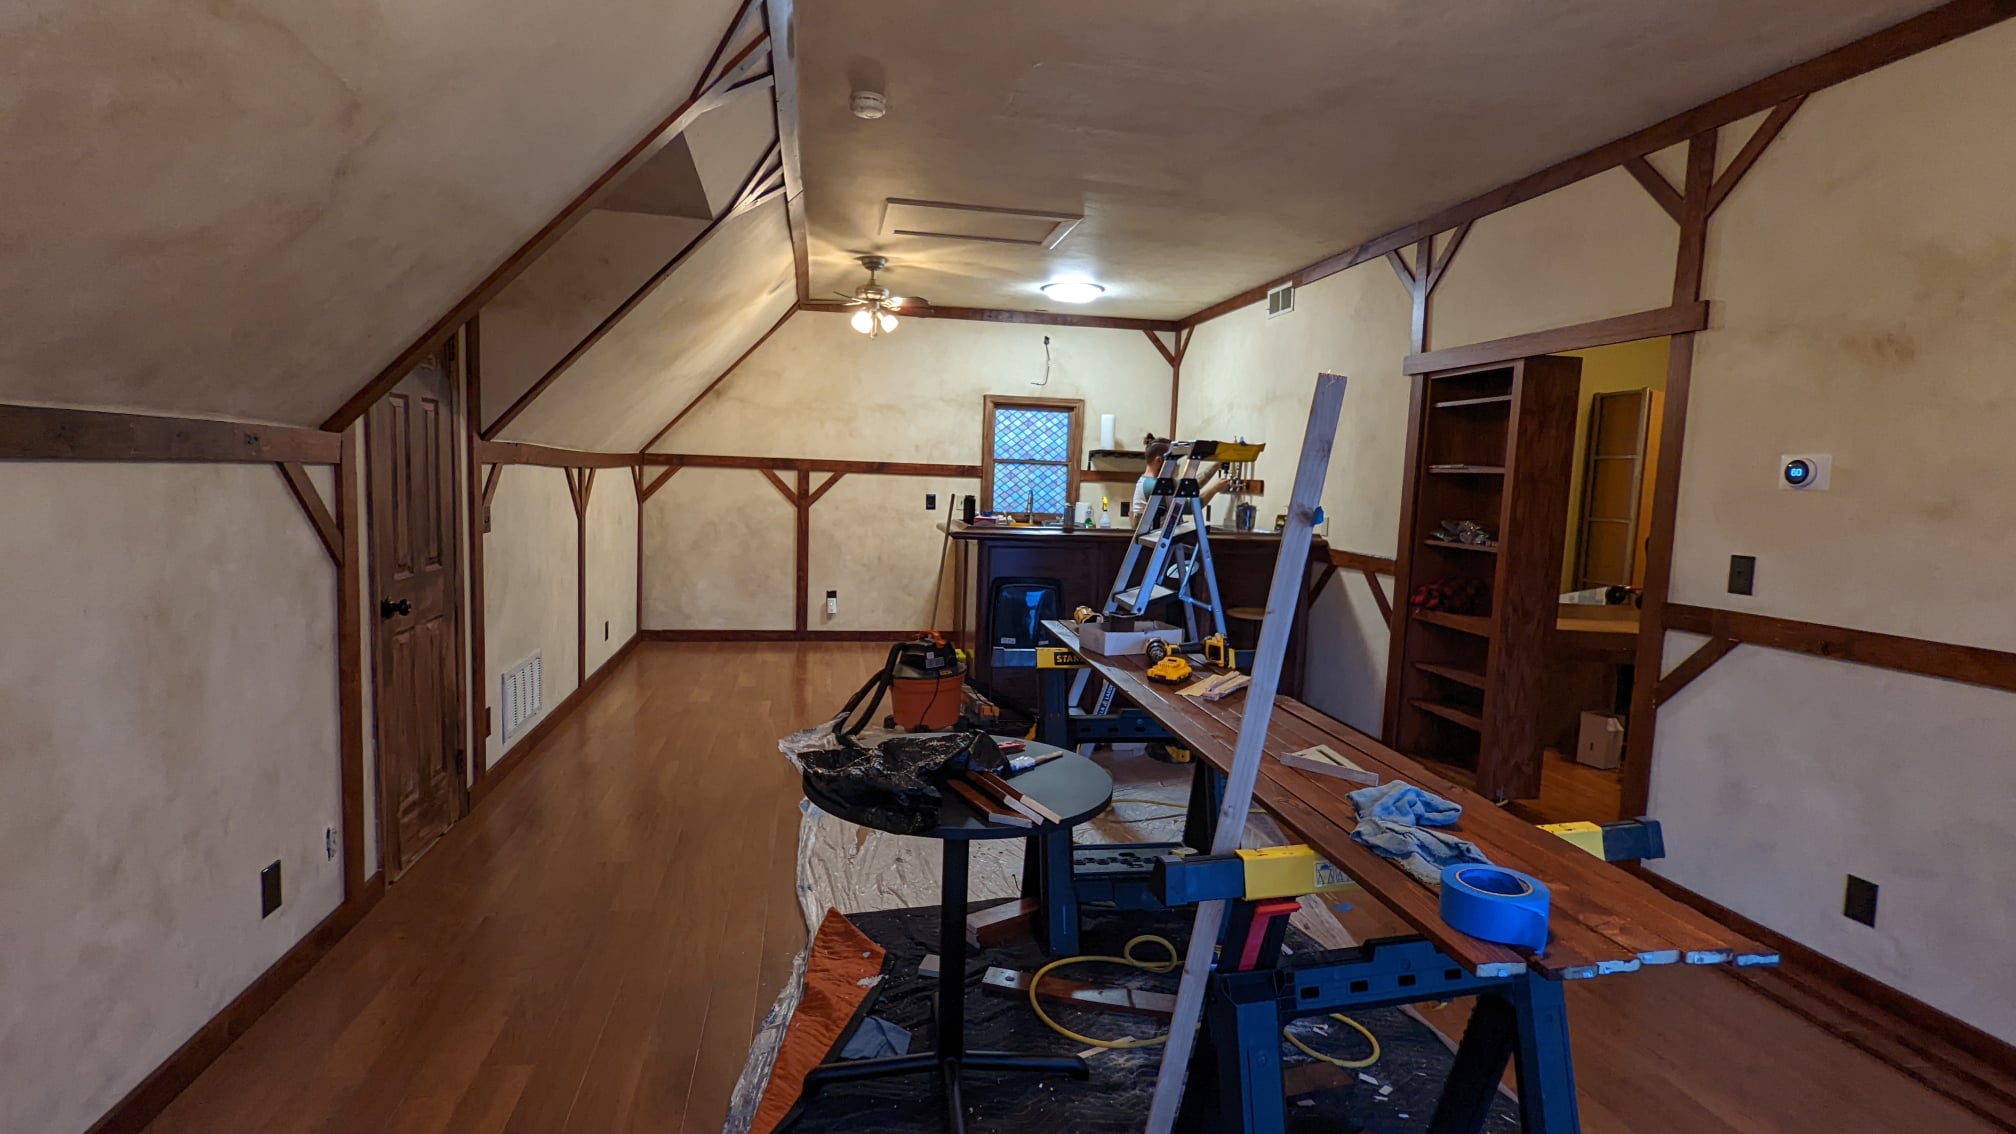
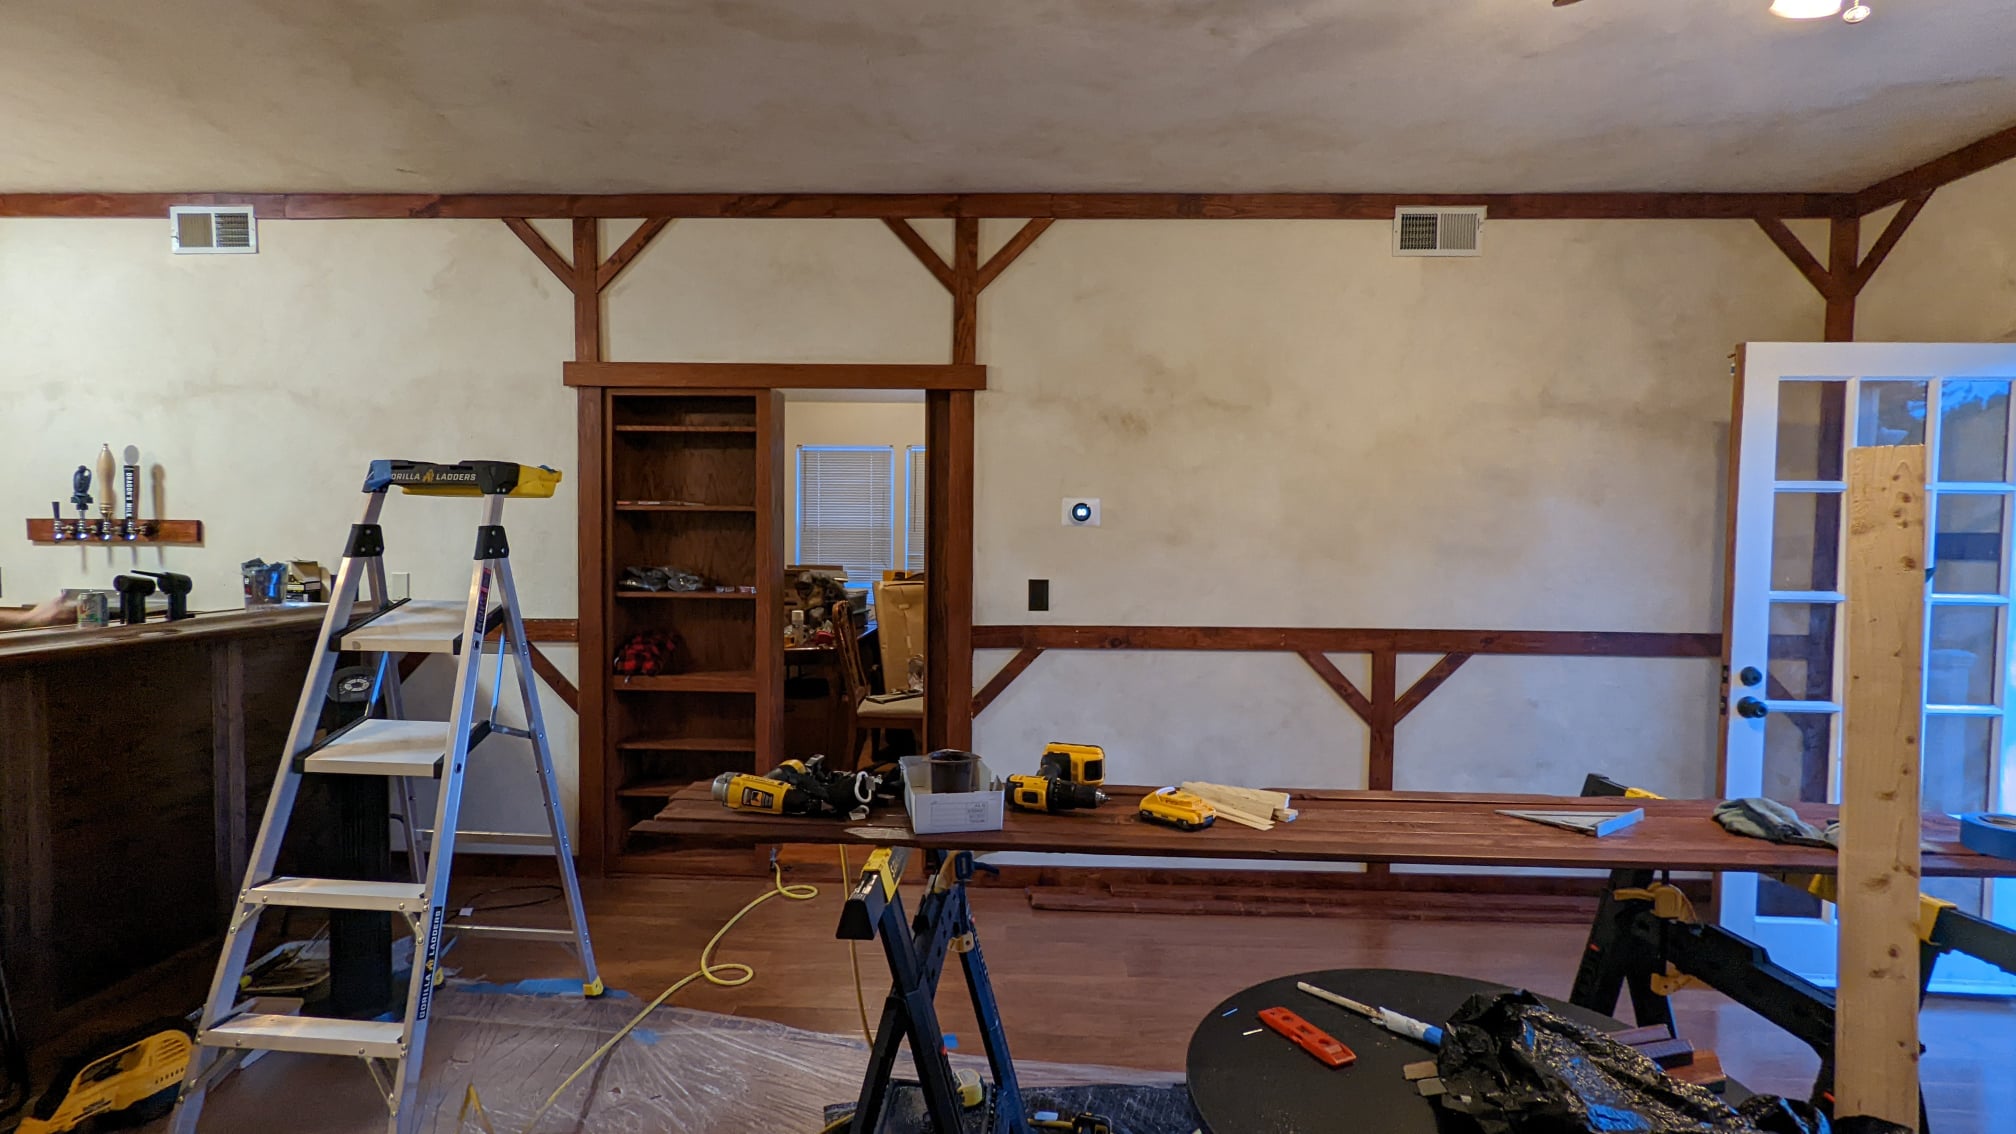
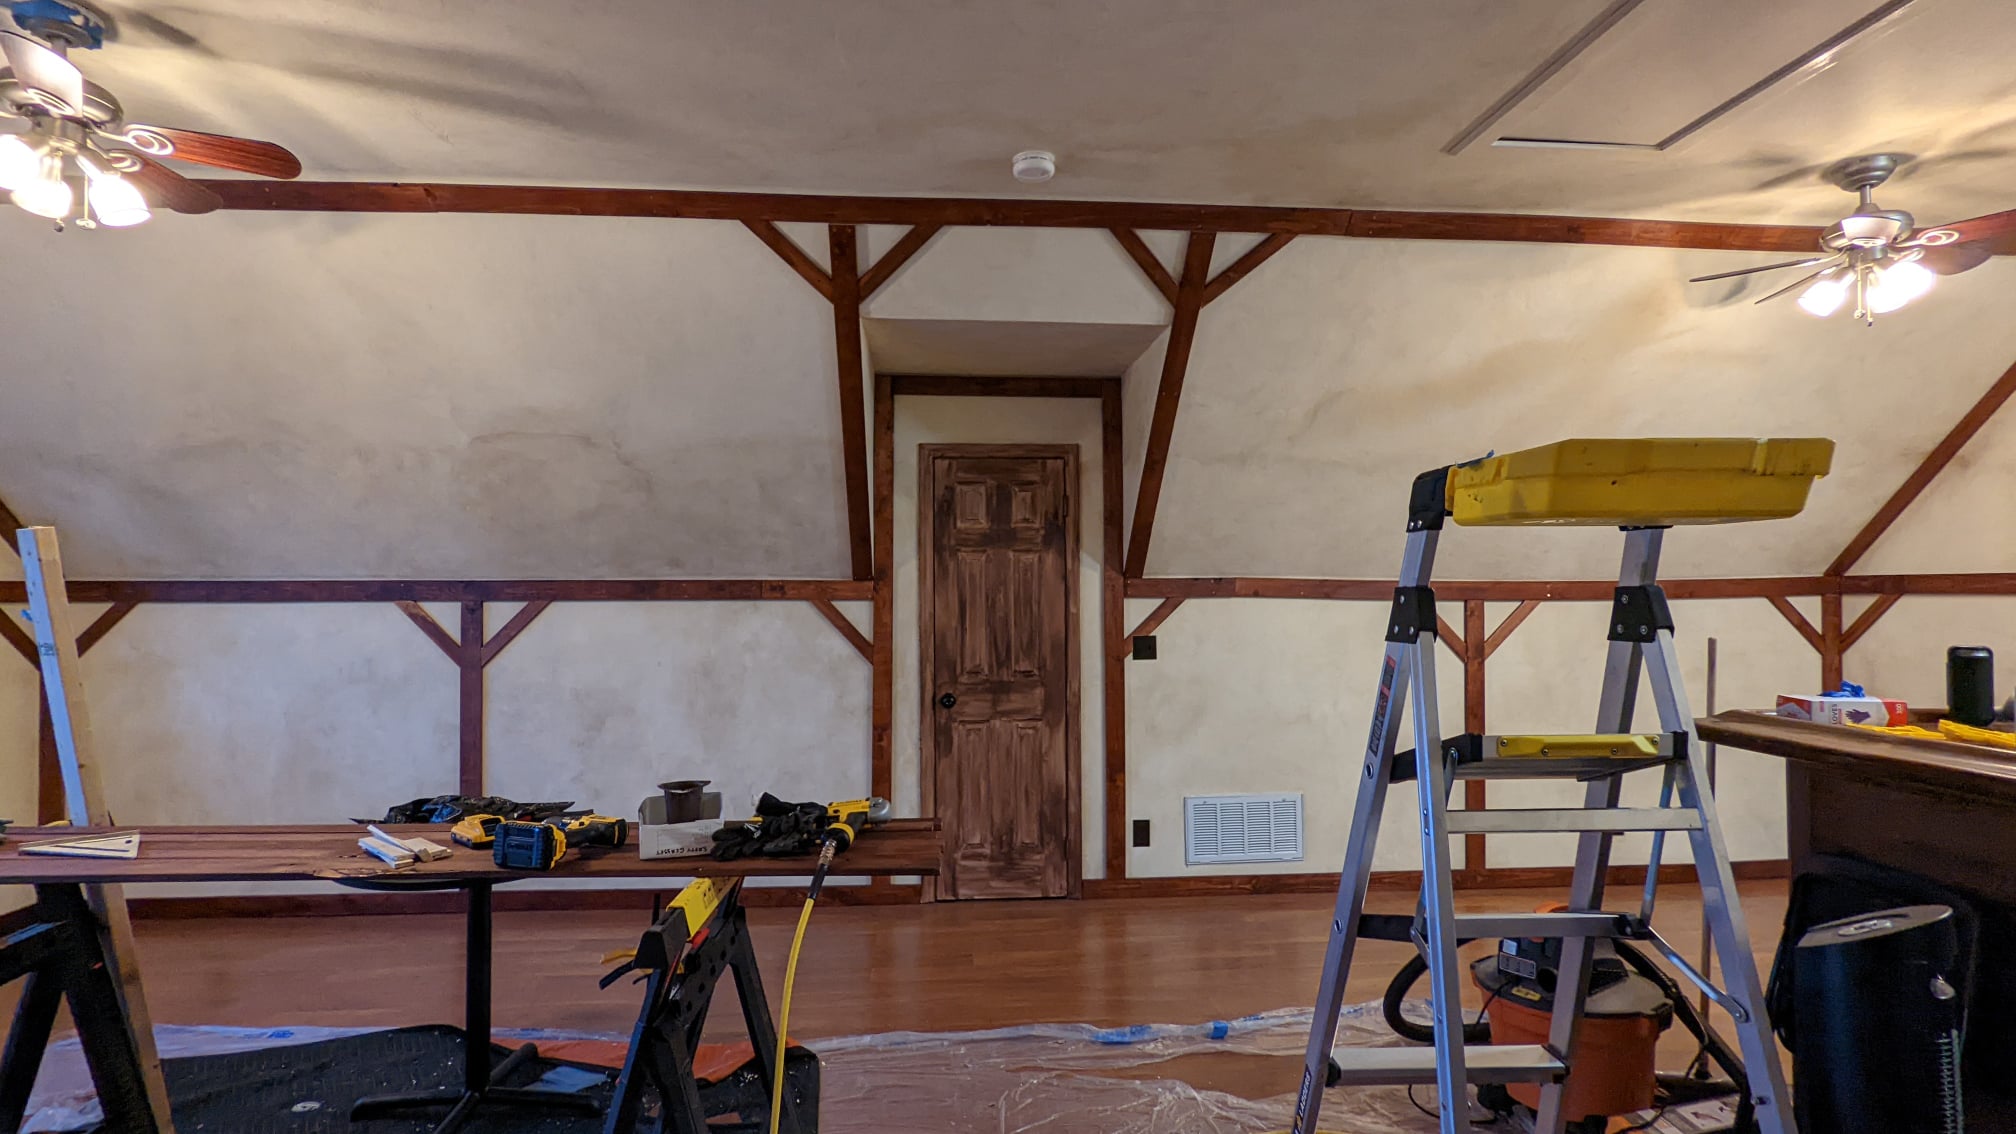
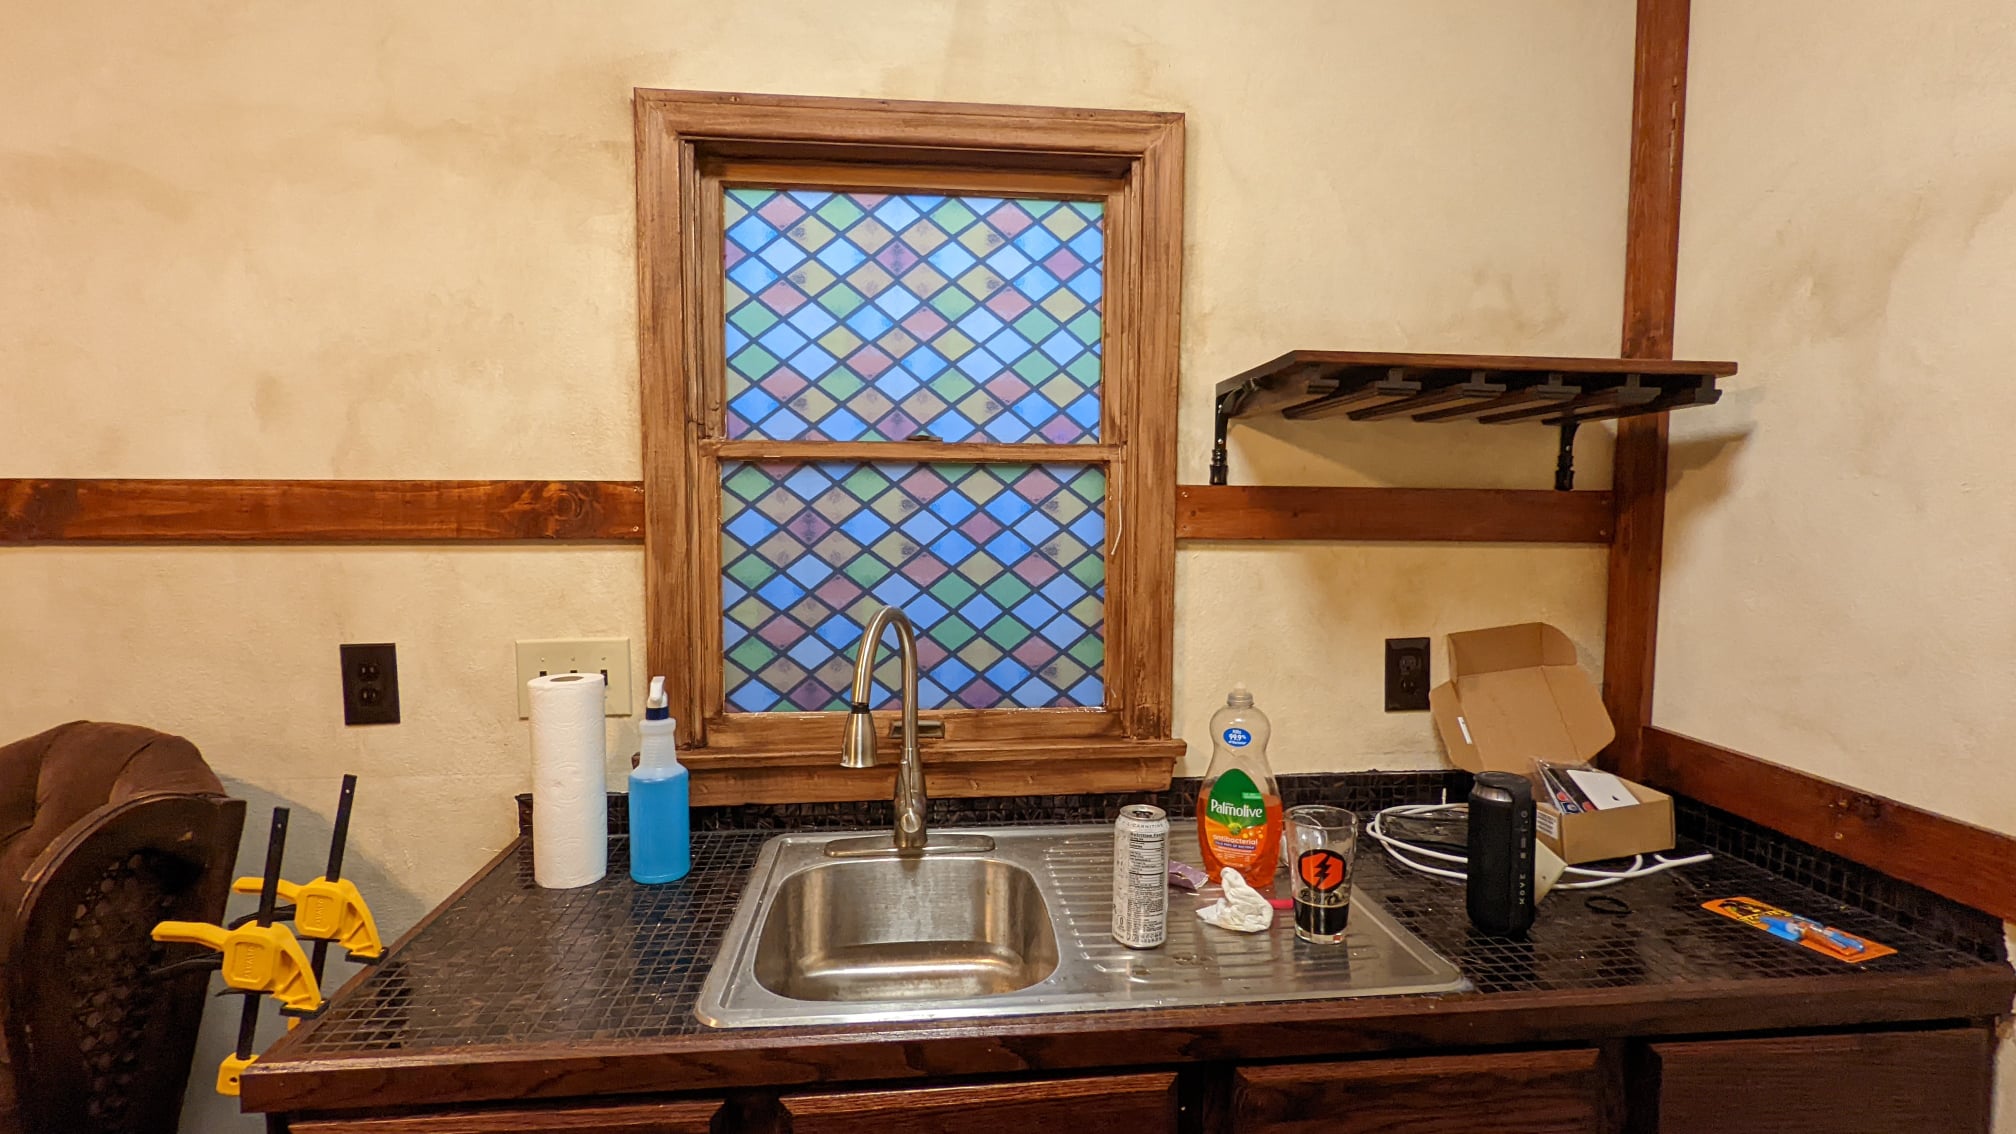
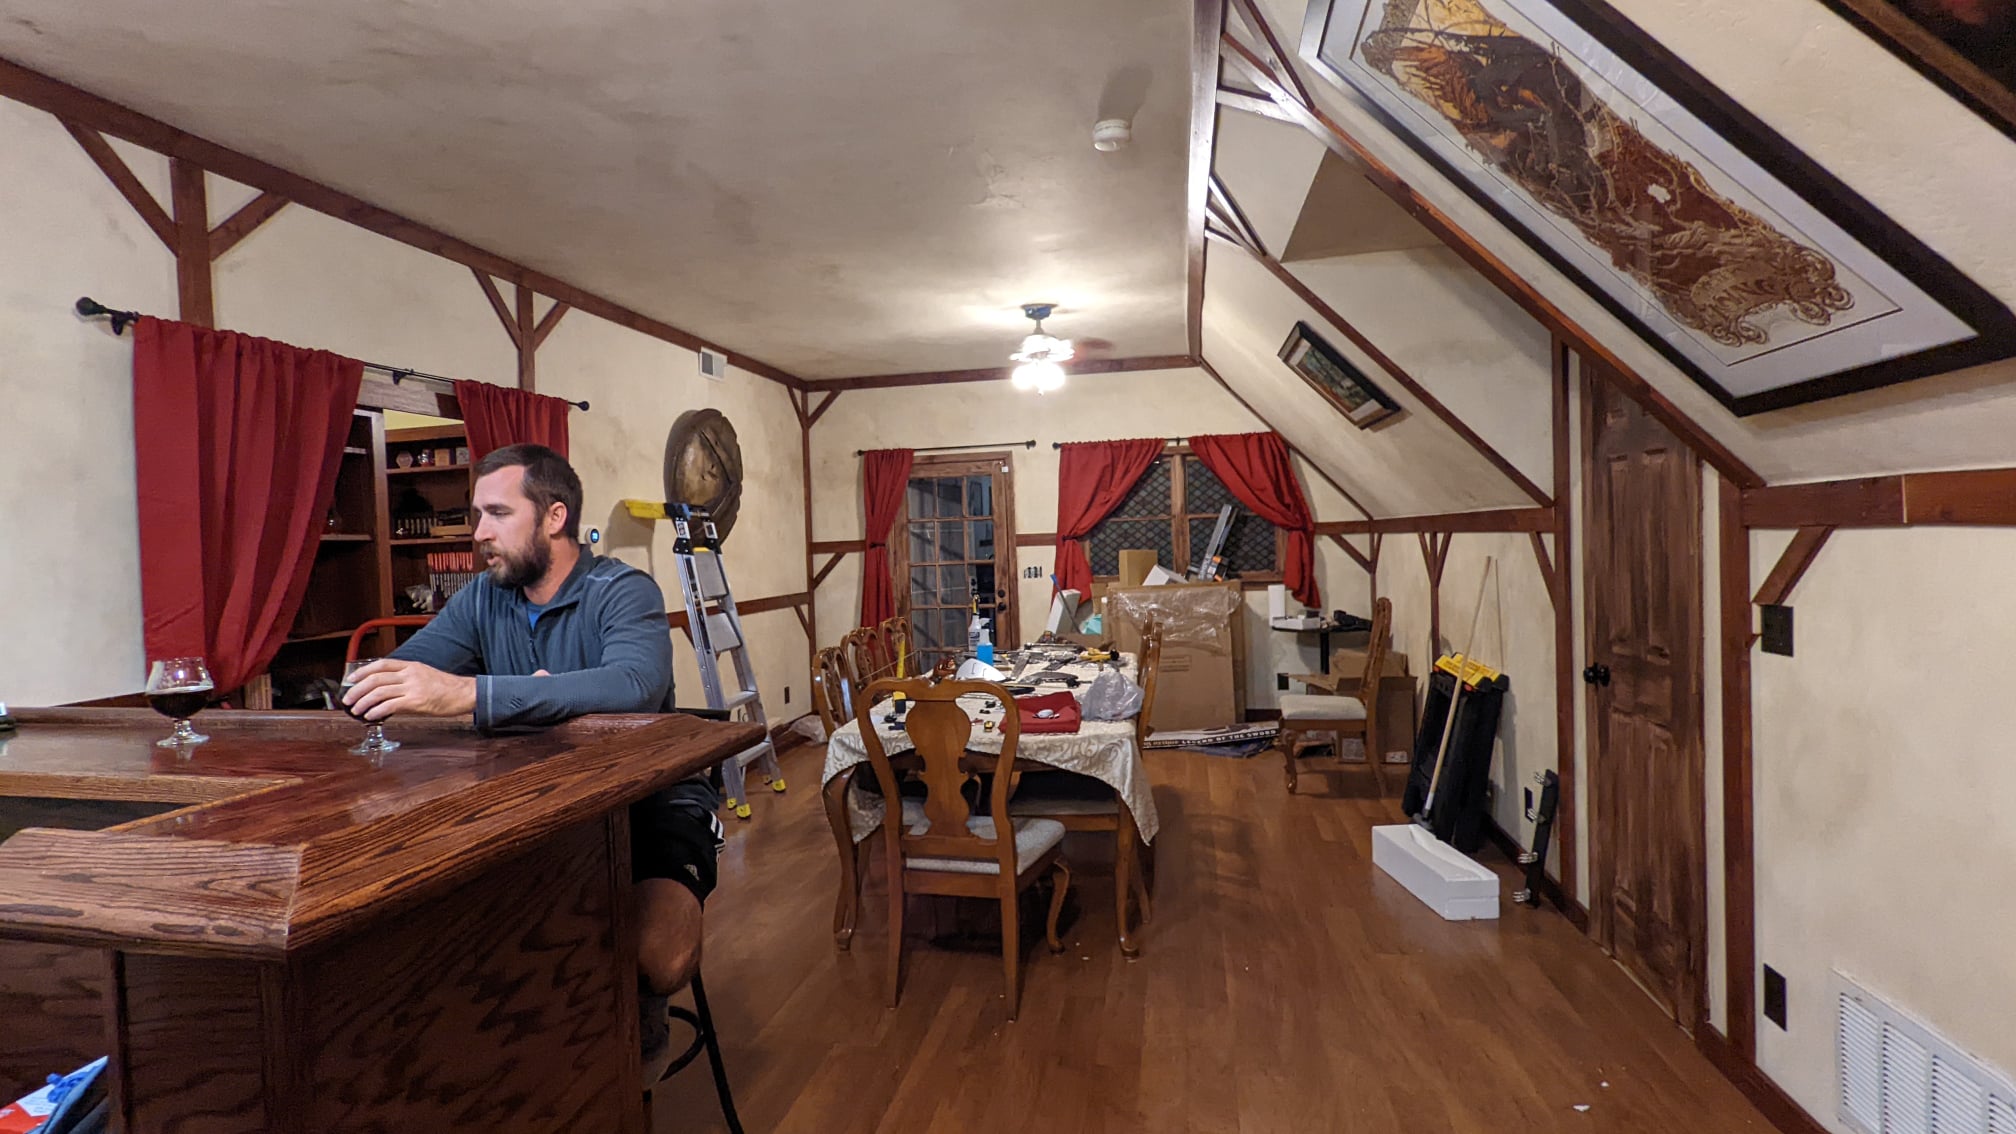
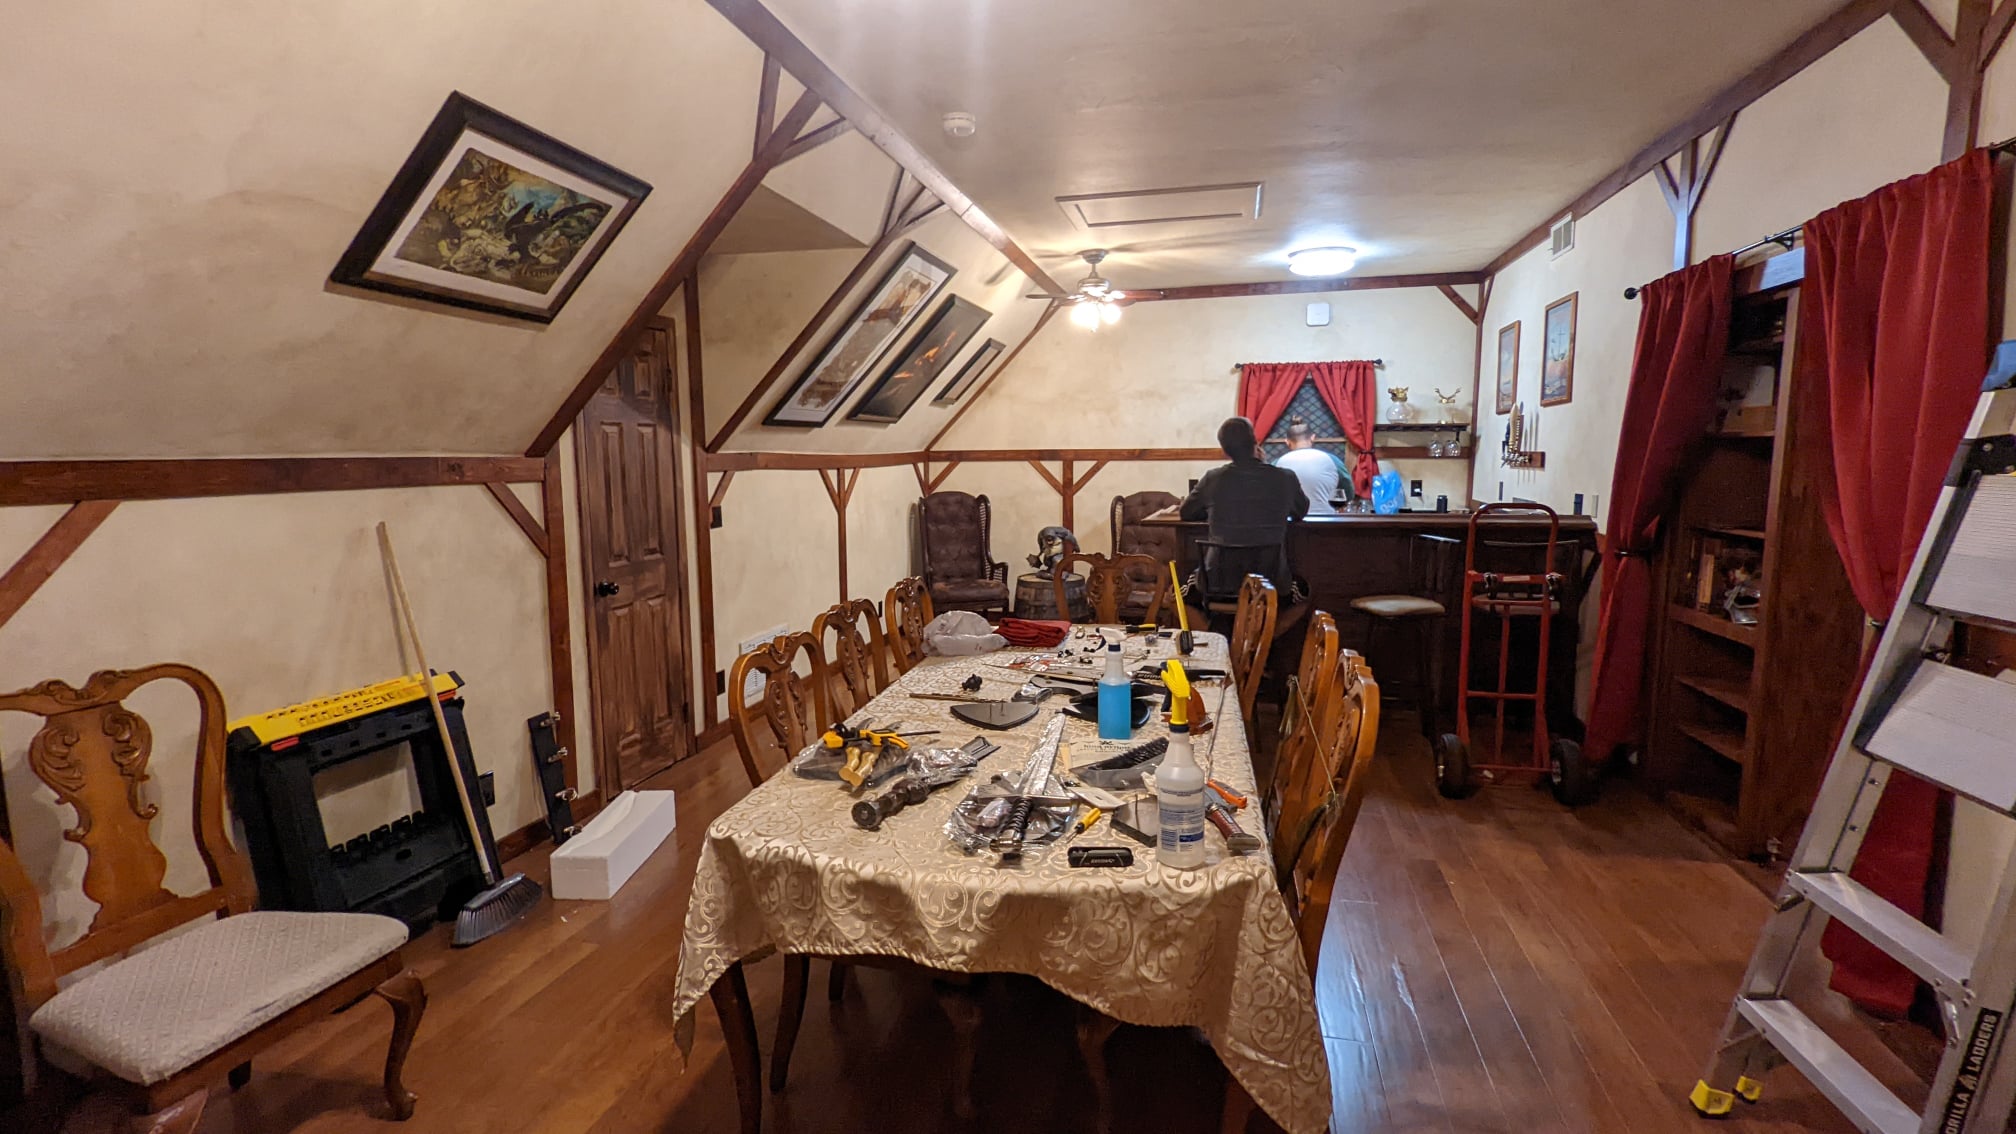
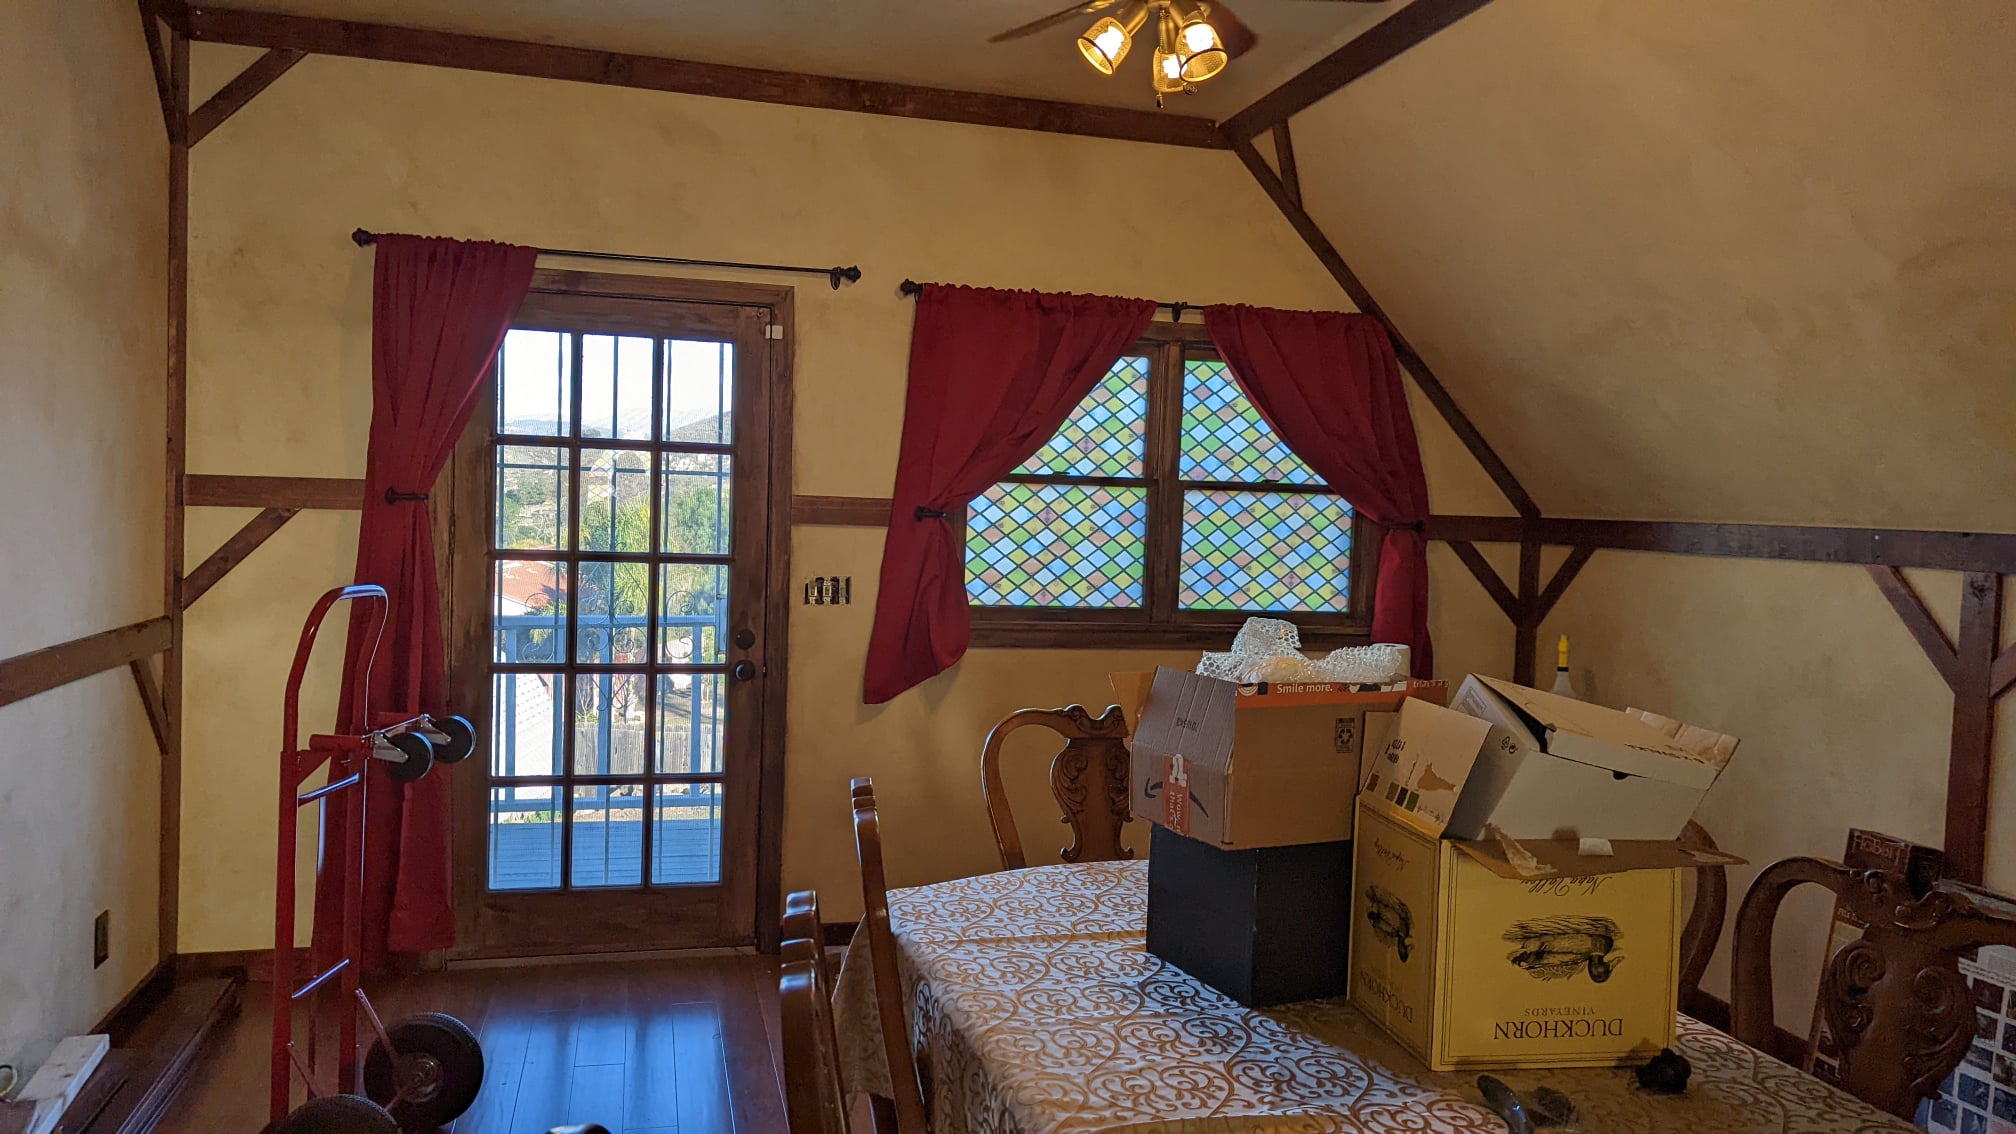
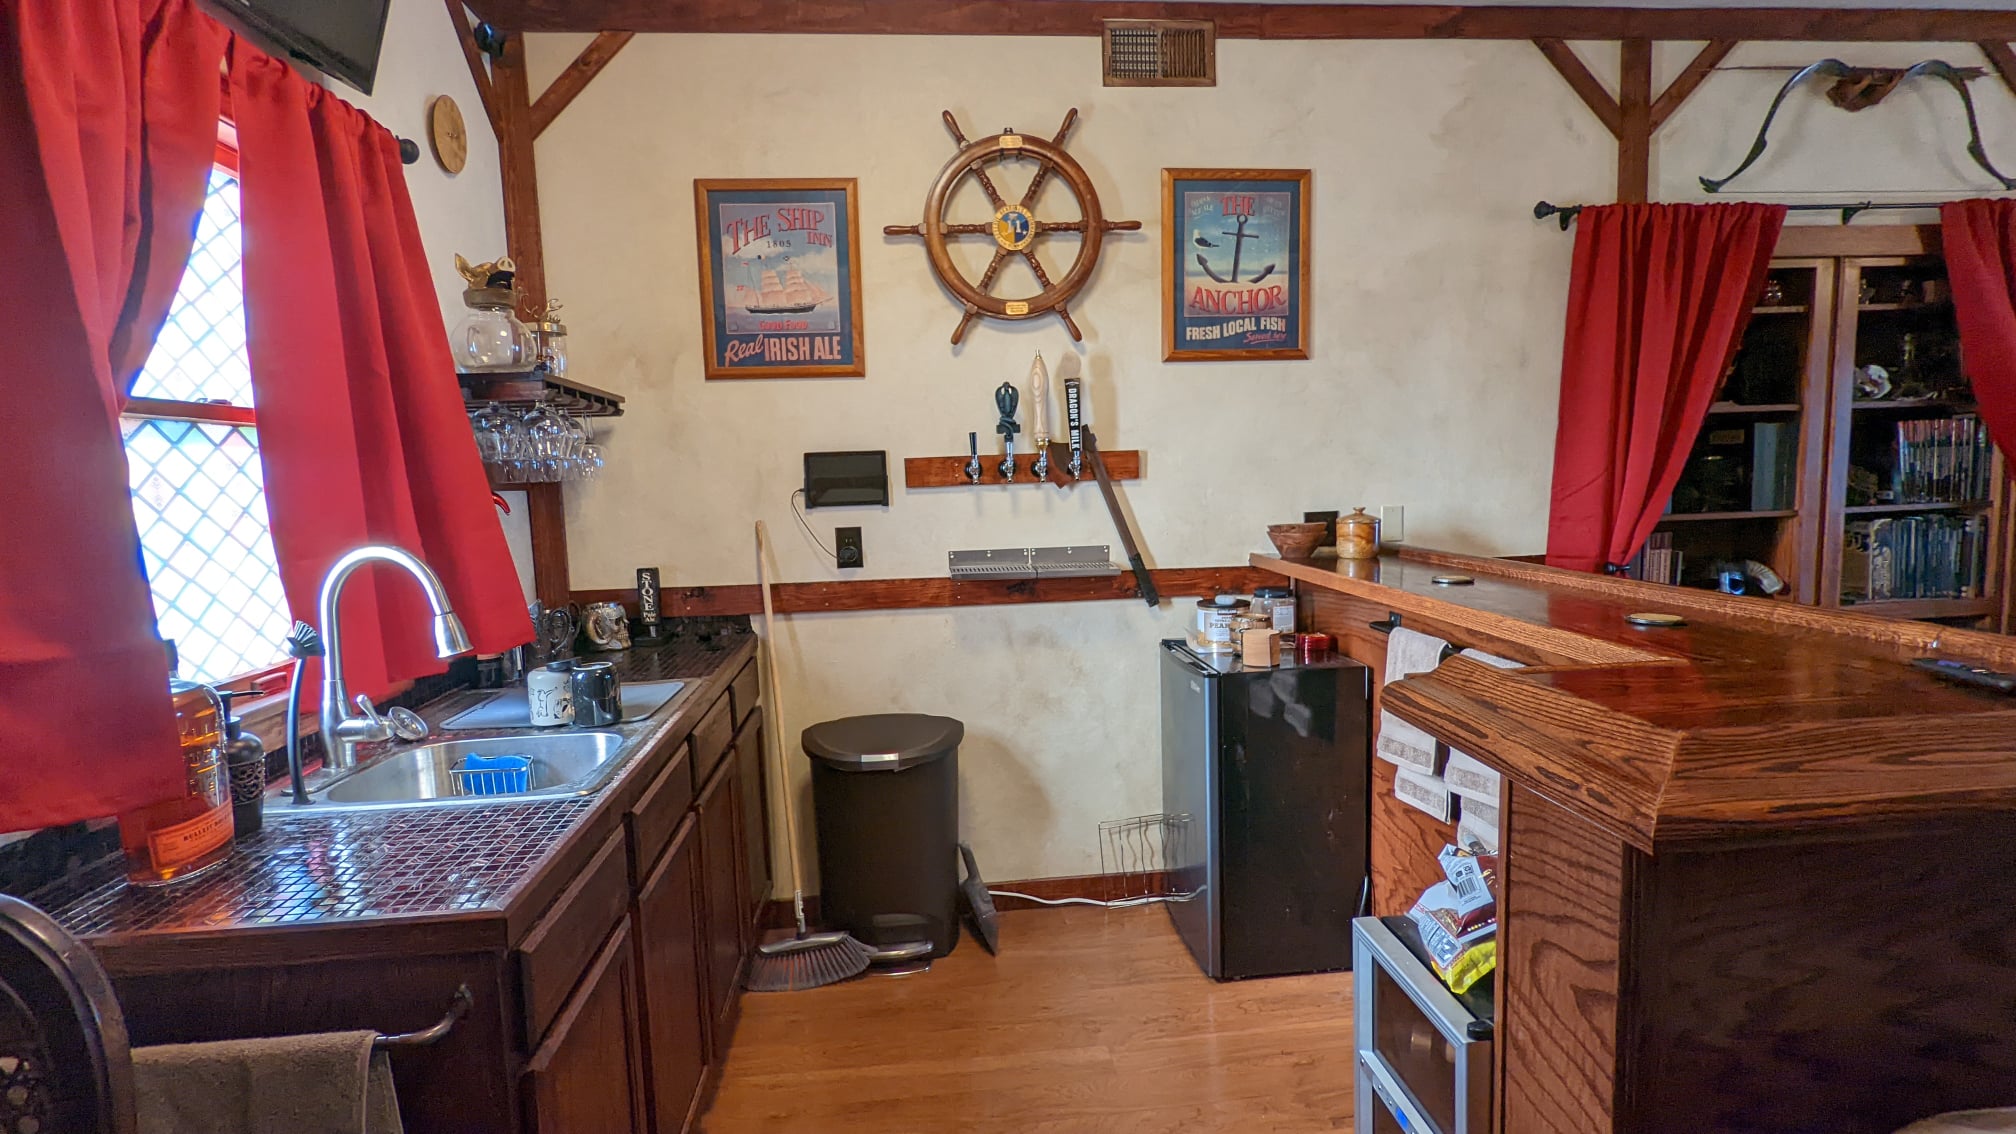
Our home tavern conversion project was made somewhat easier because the prior owners had already used it as a personal “sports bar”/man cave, having installed a physical bar bench and sink into the space.
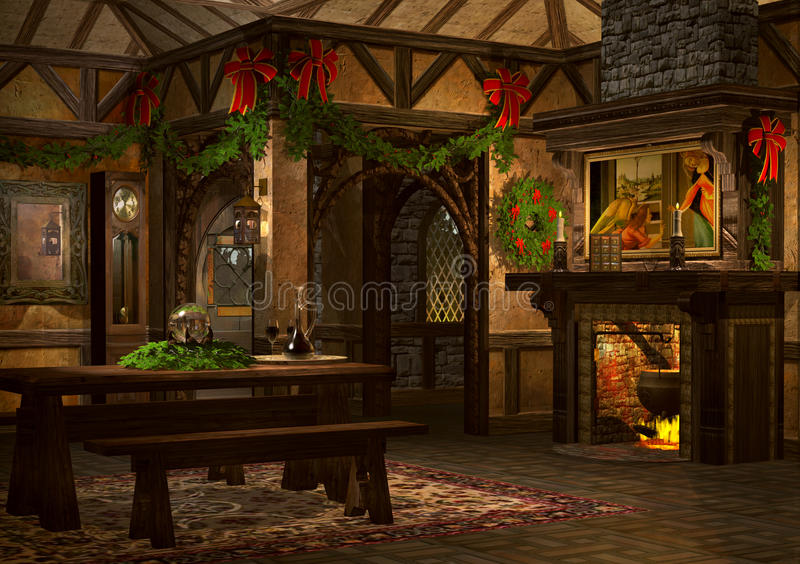
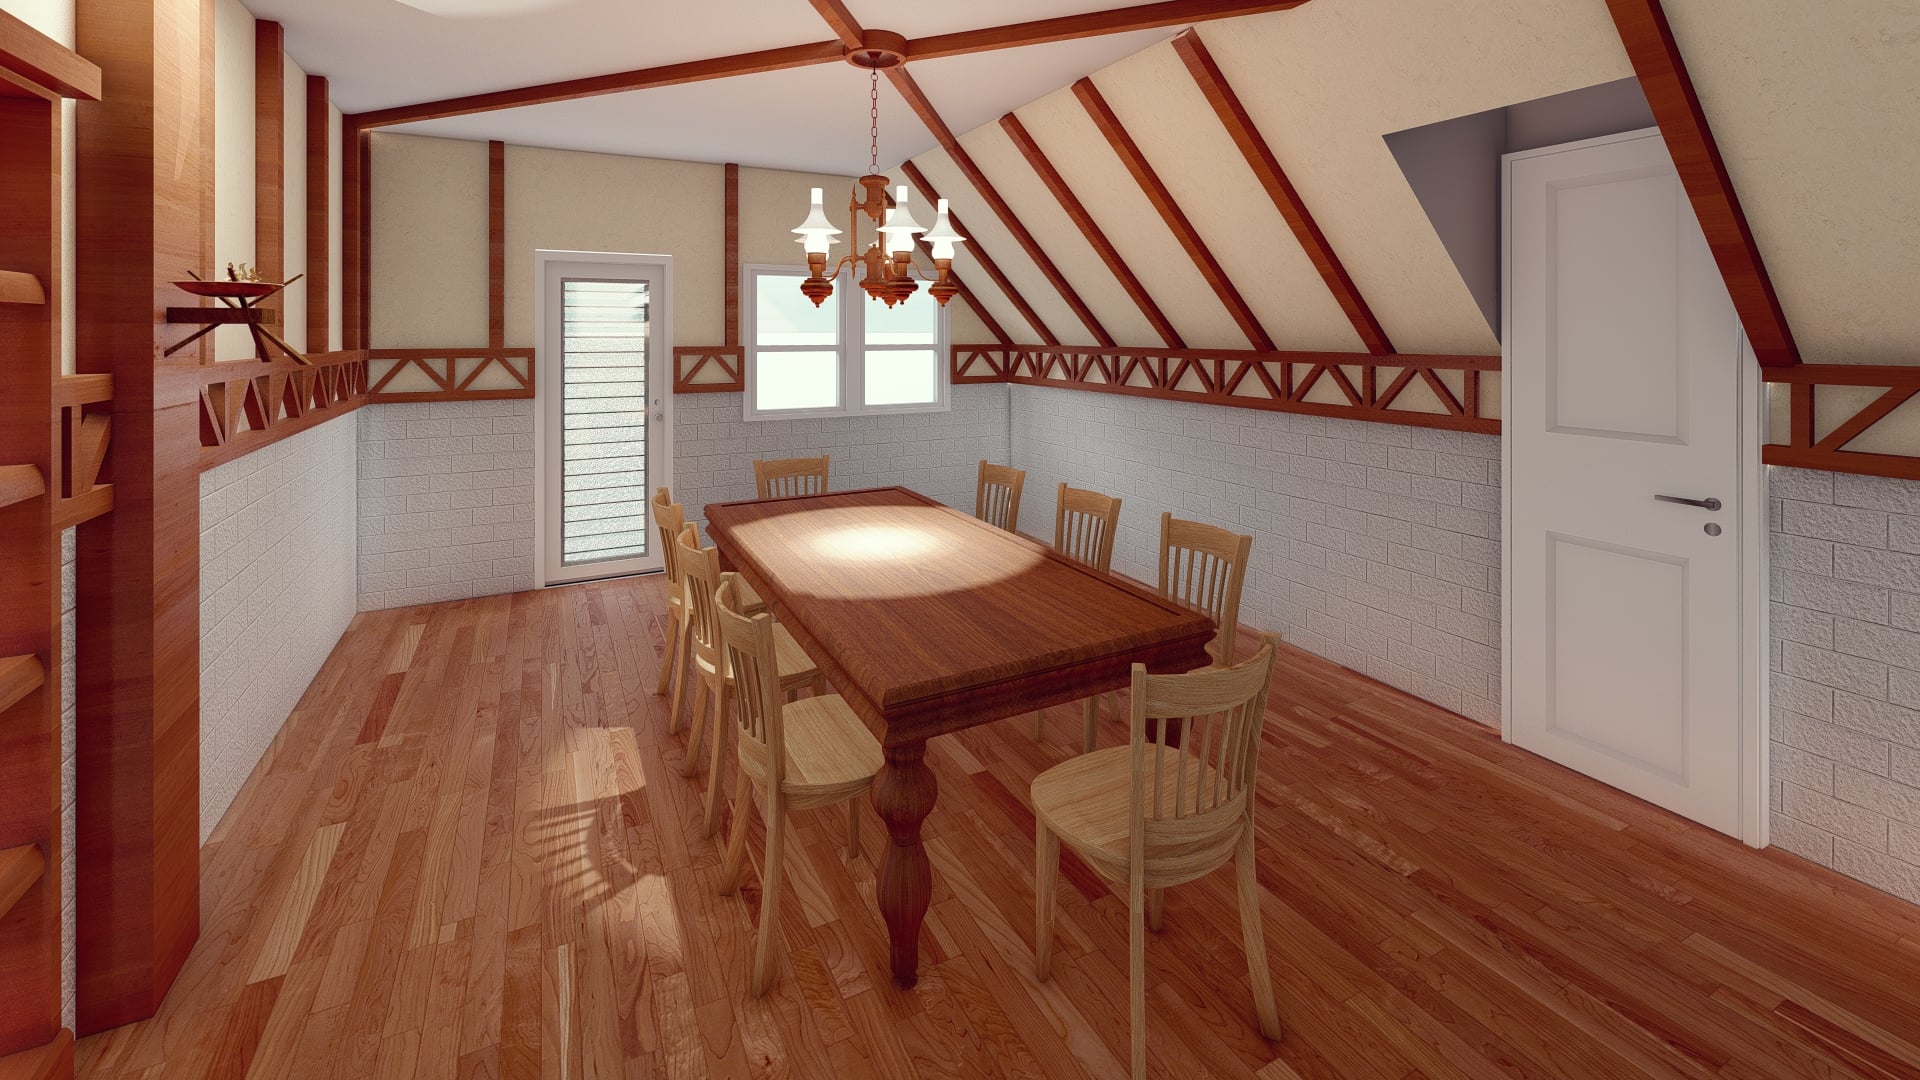
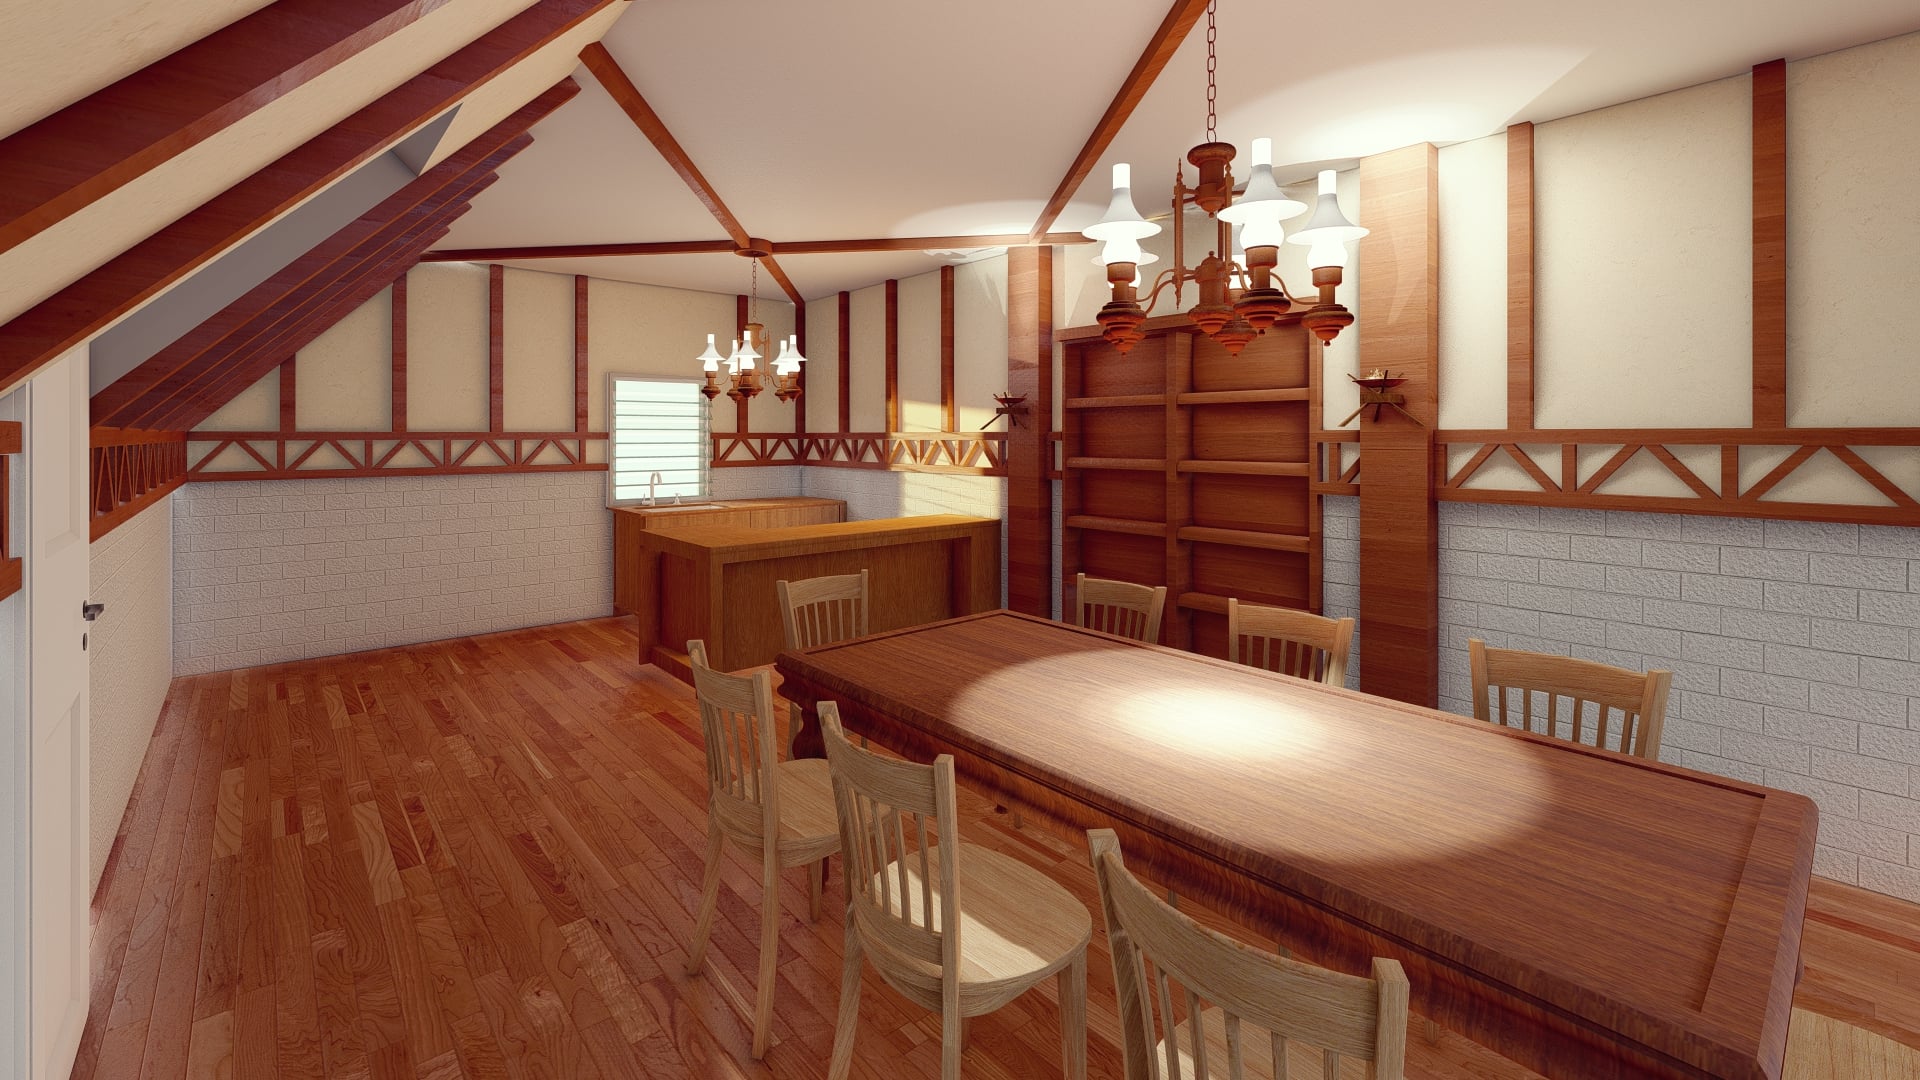
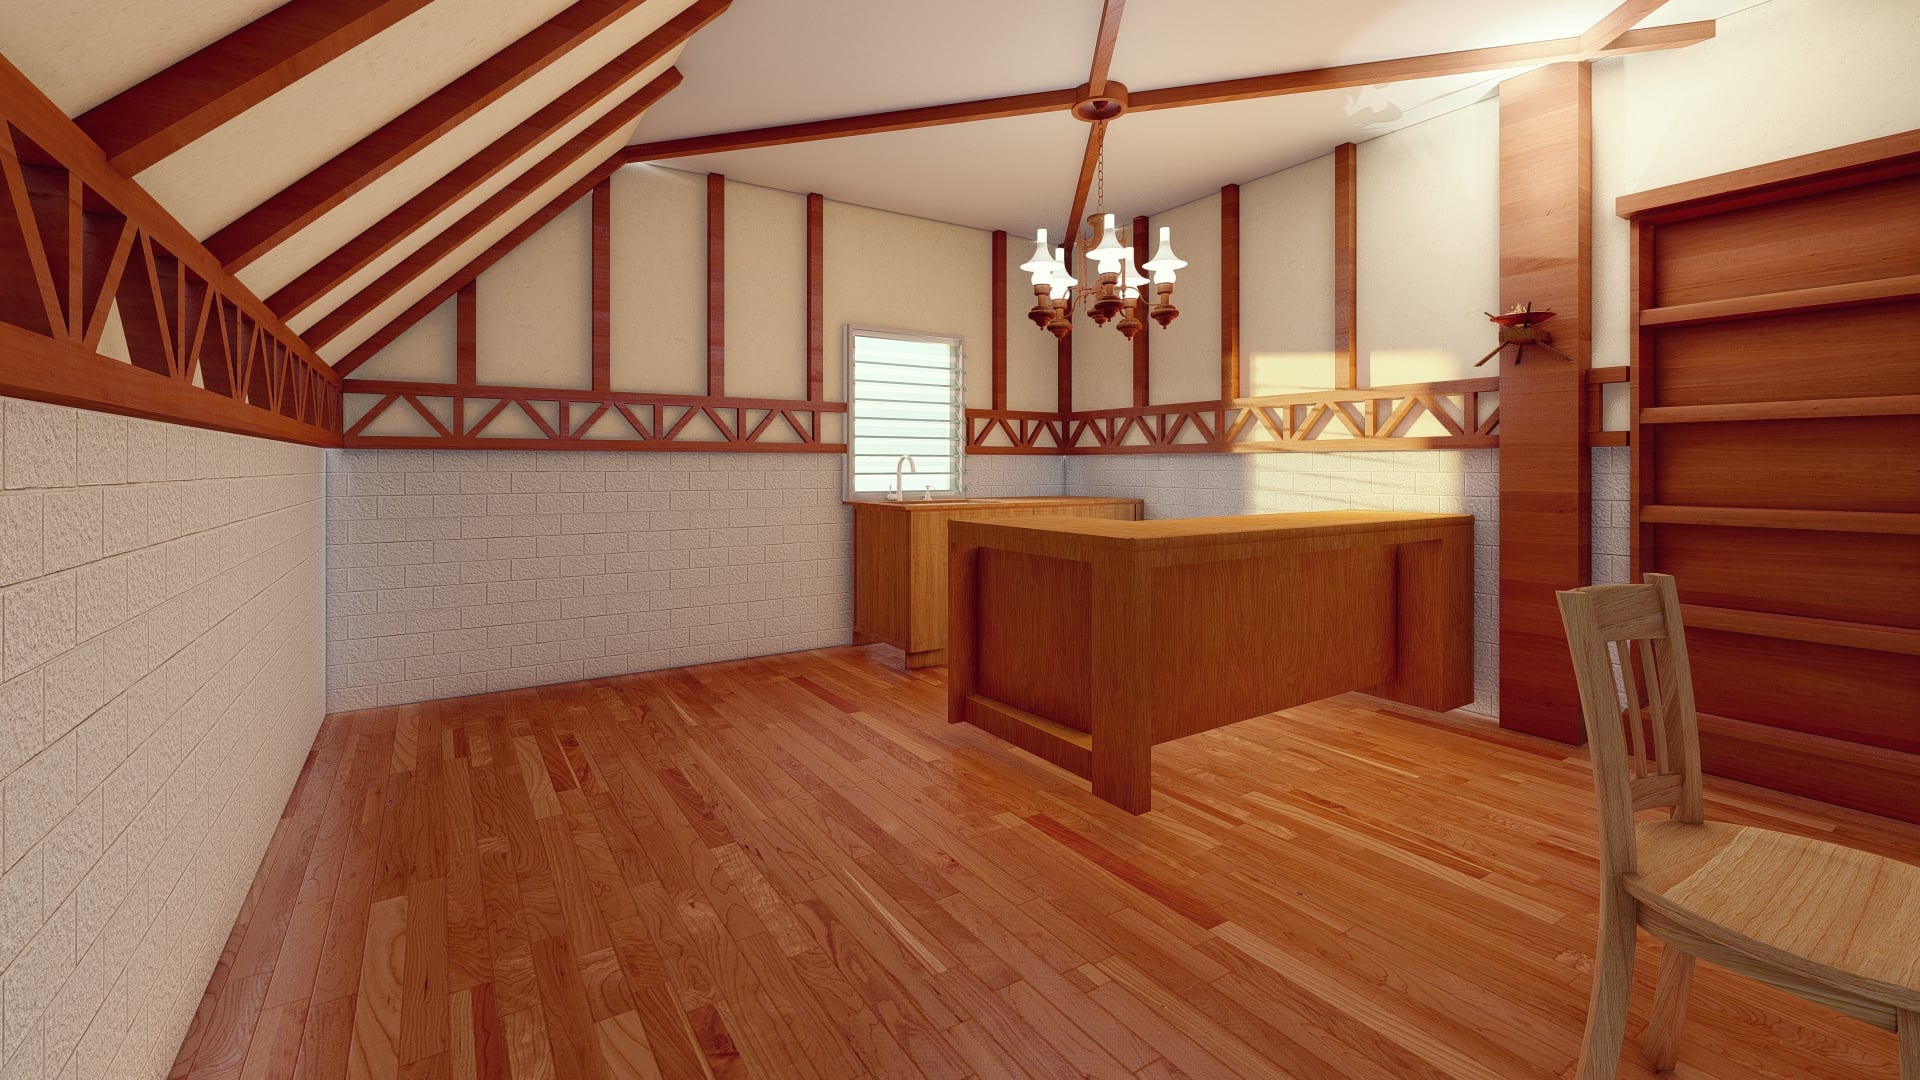
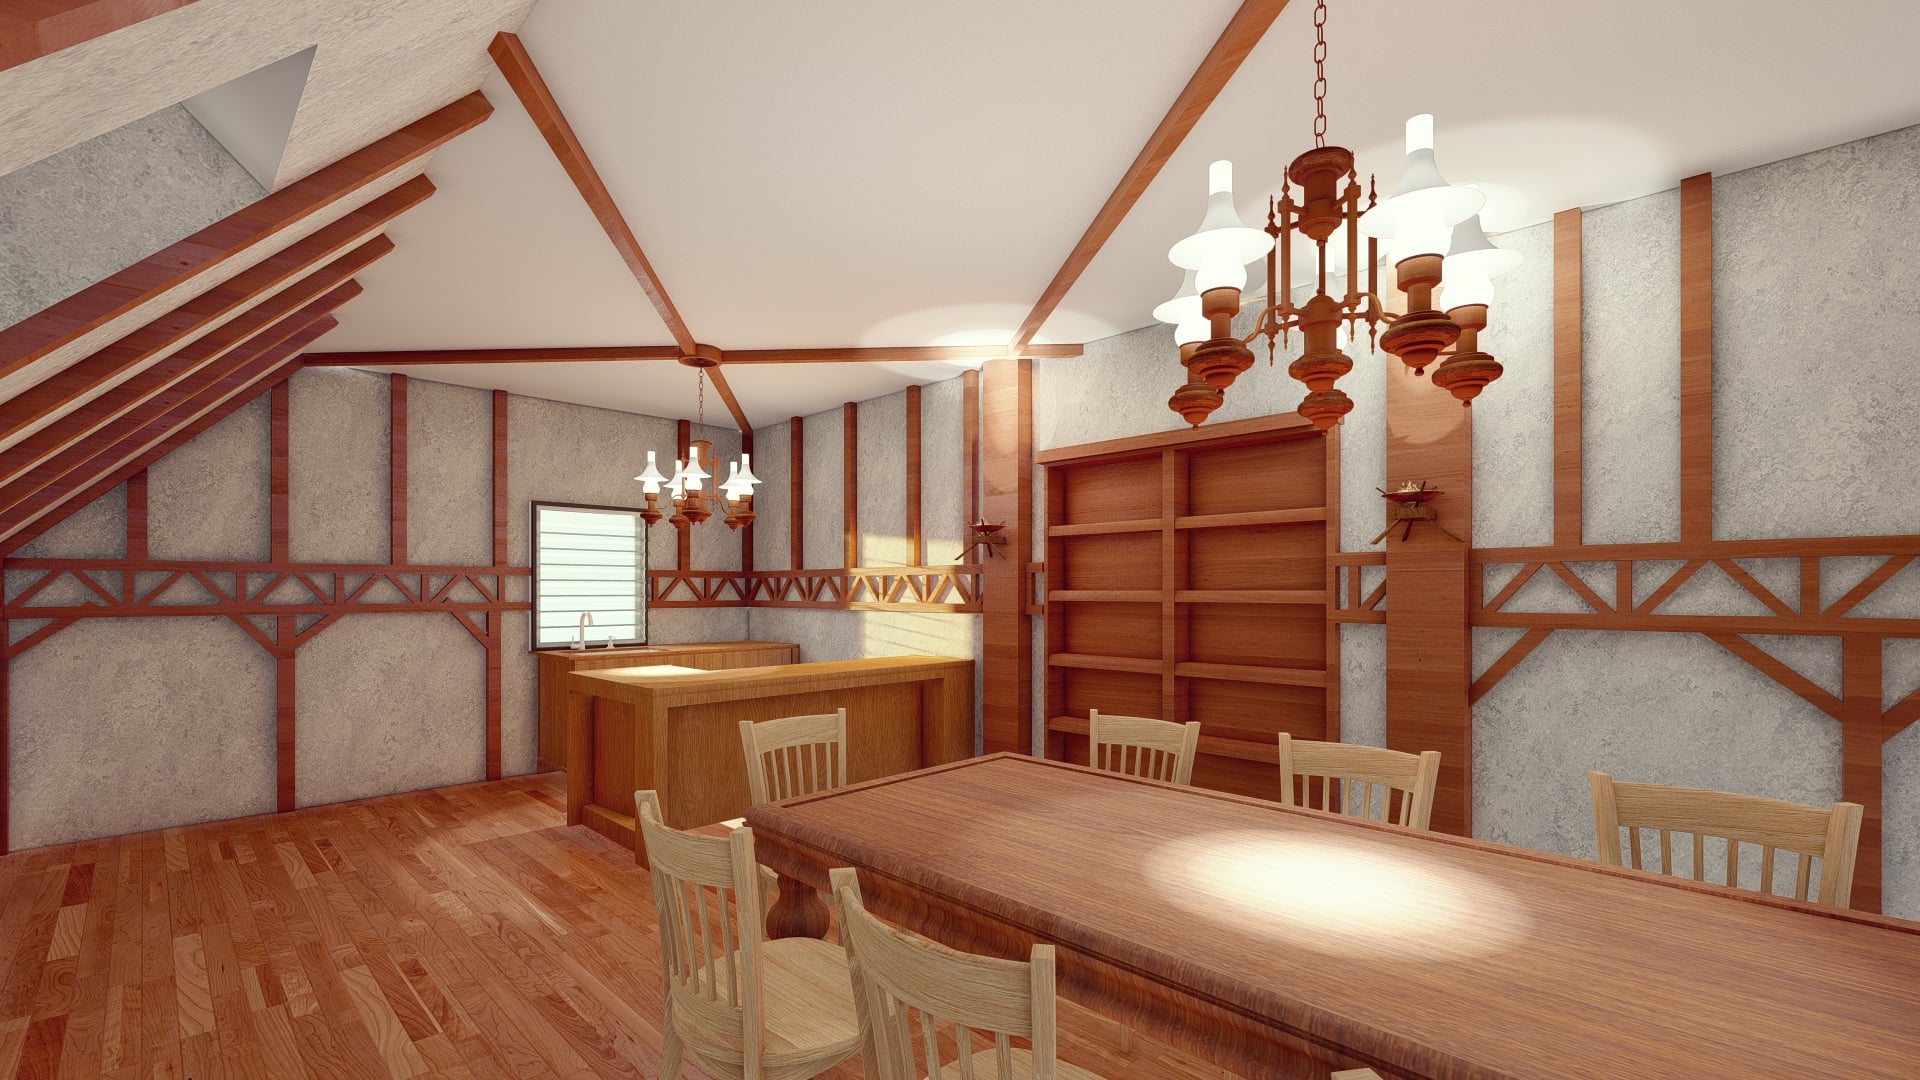
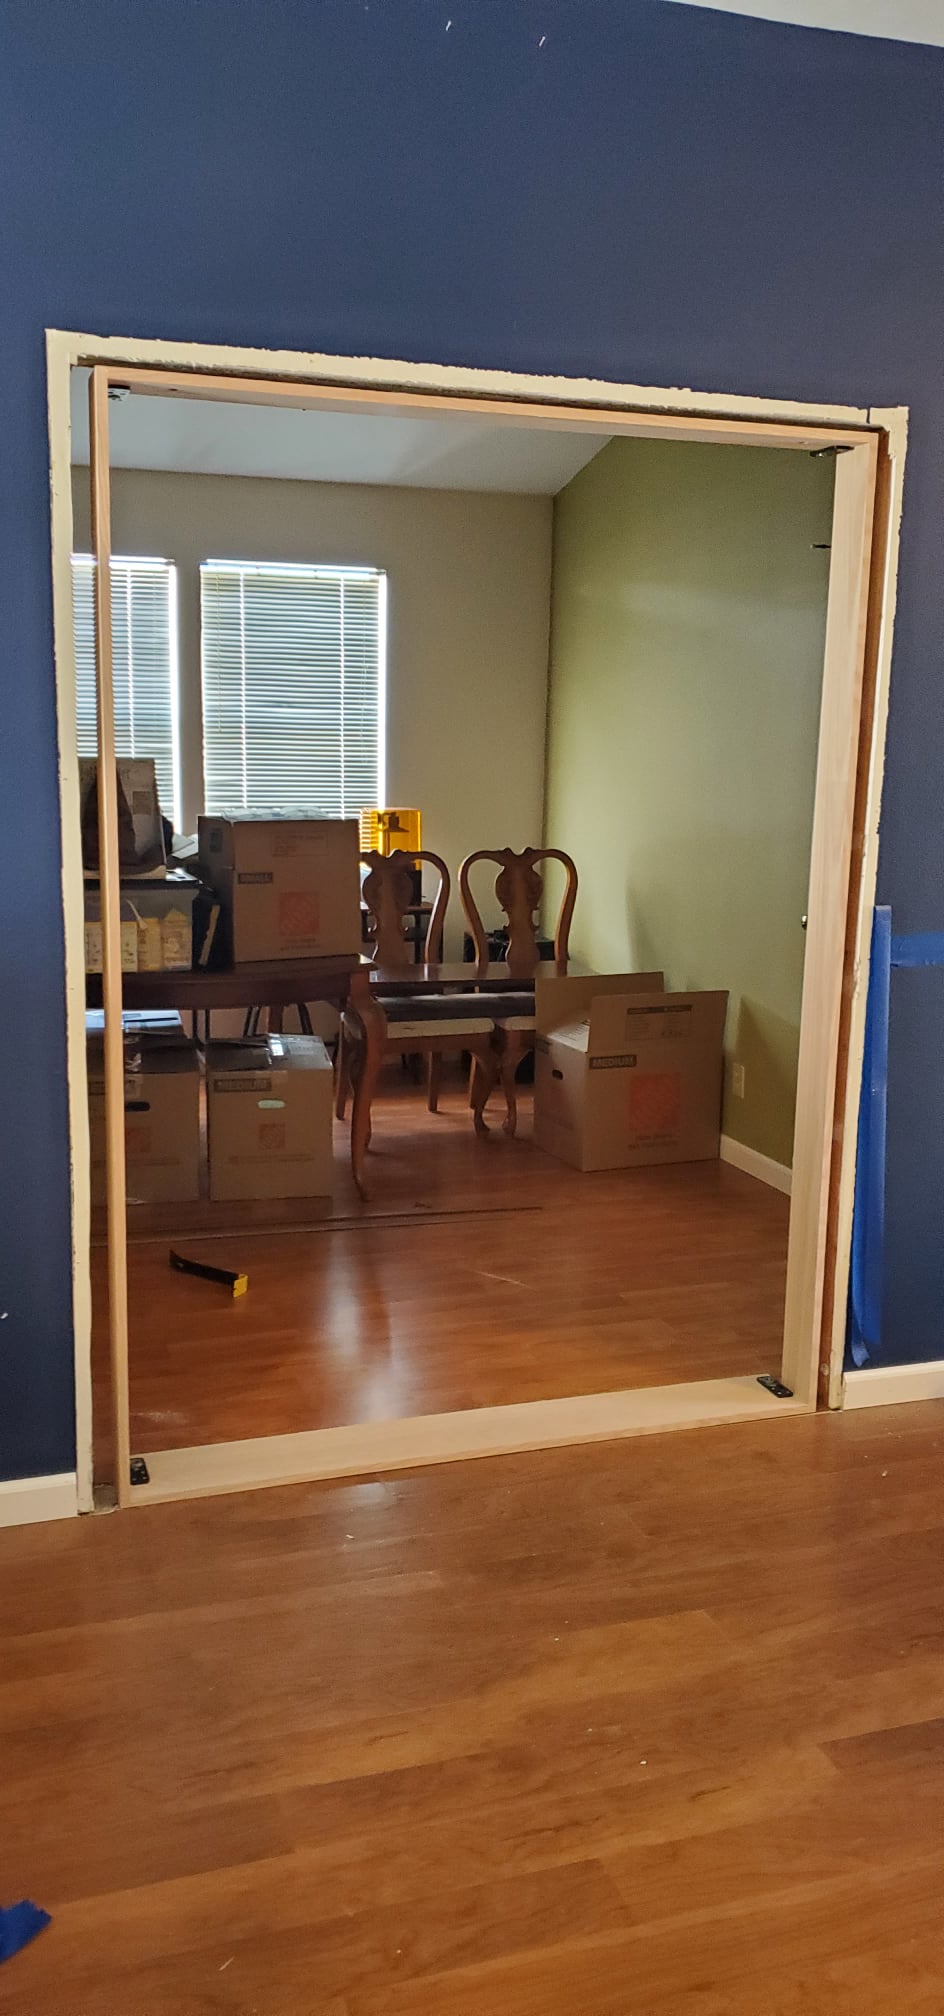
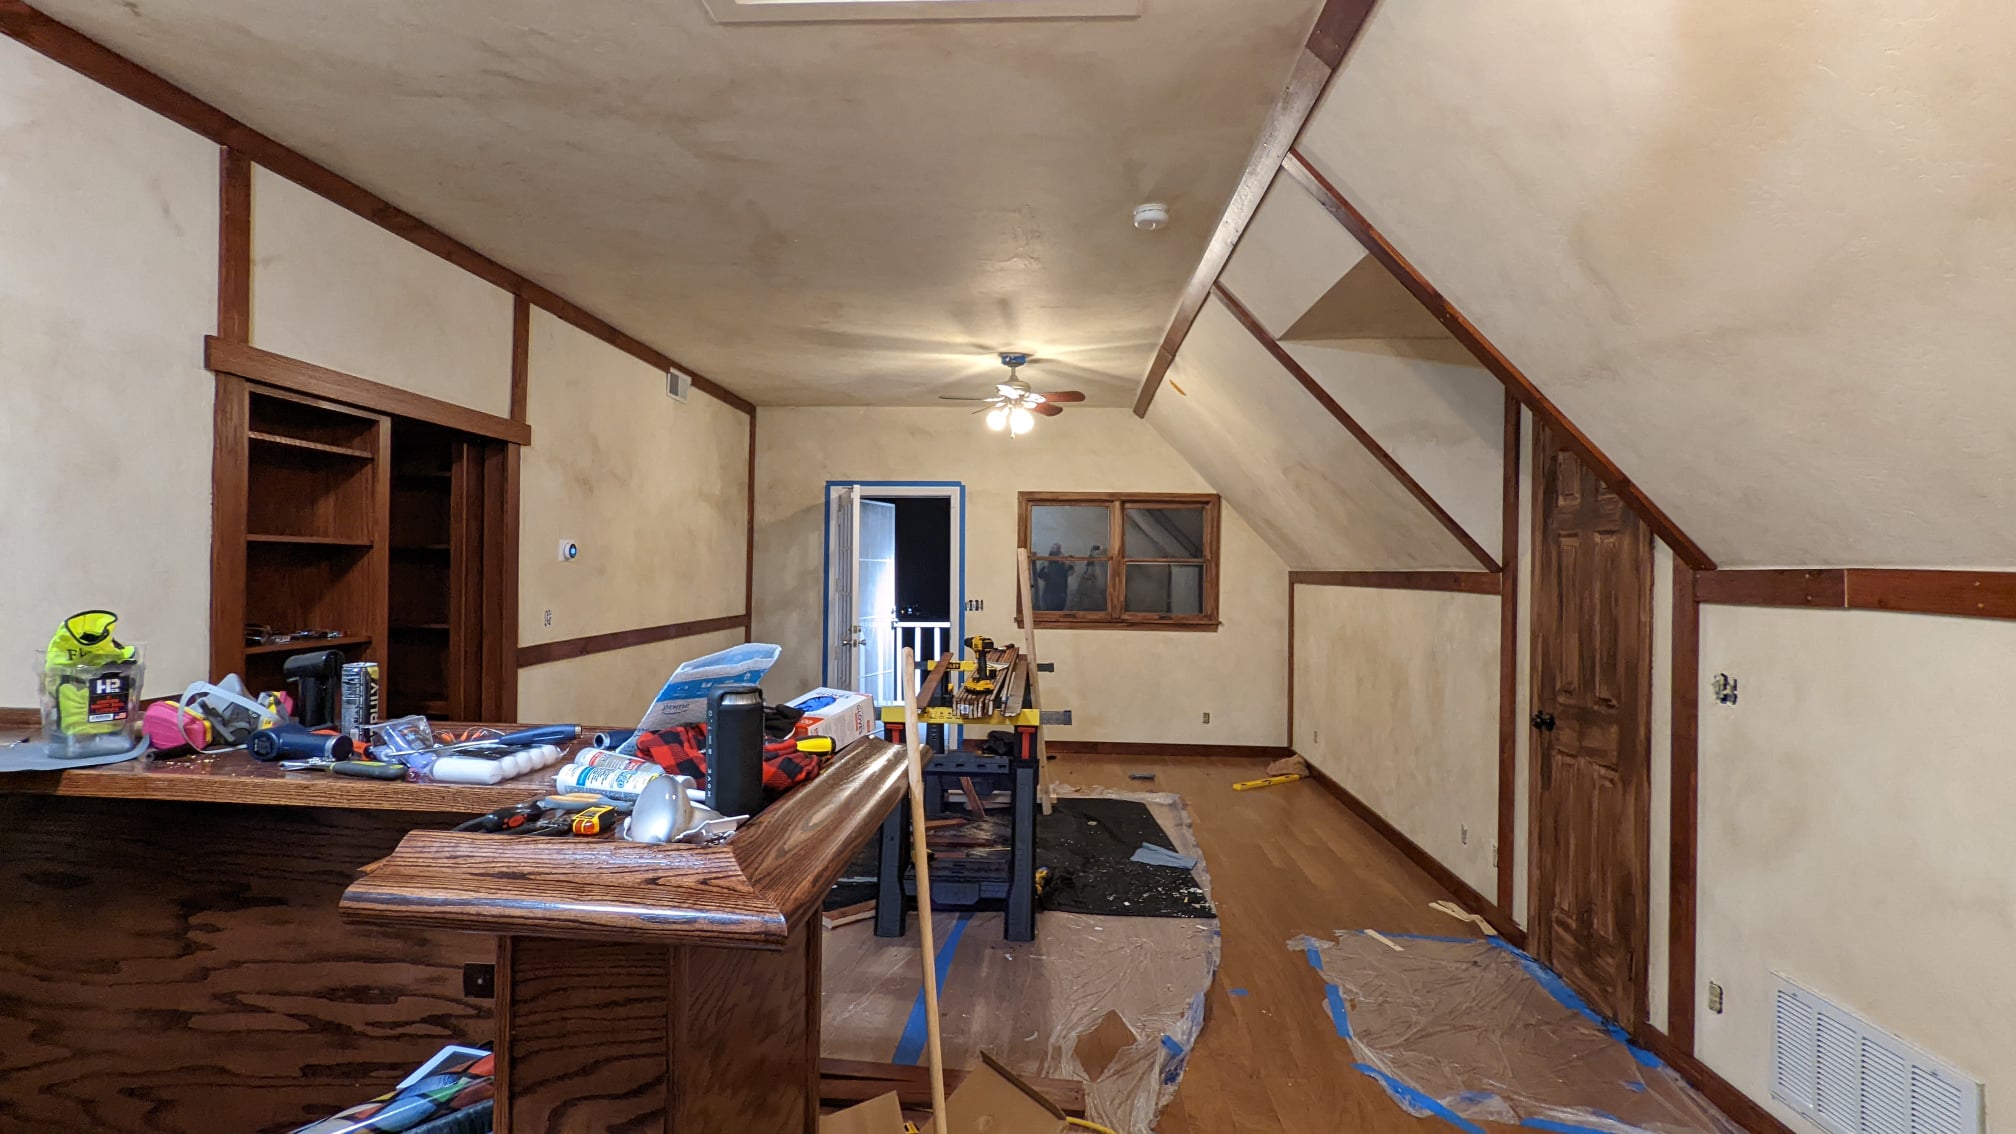
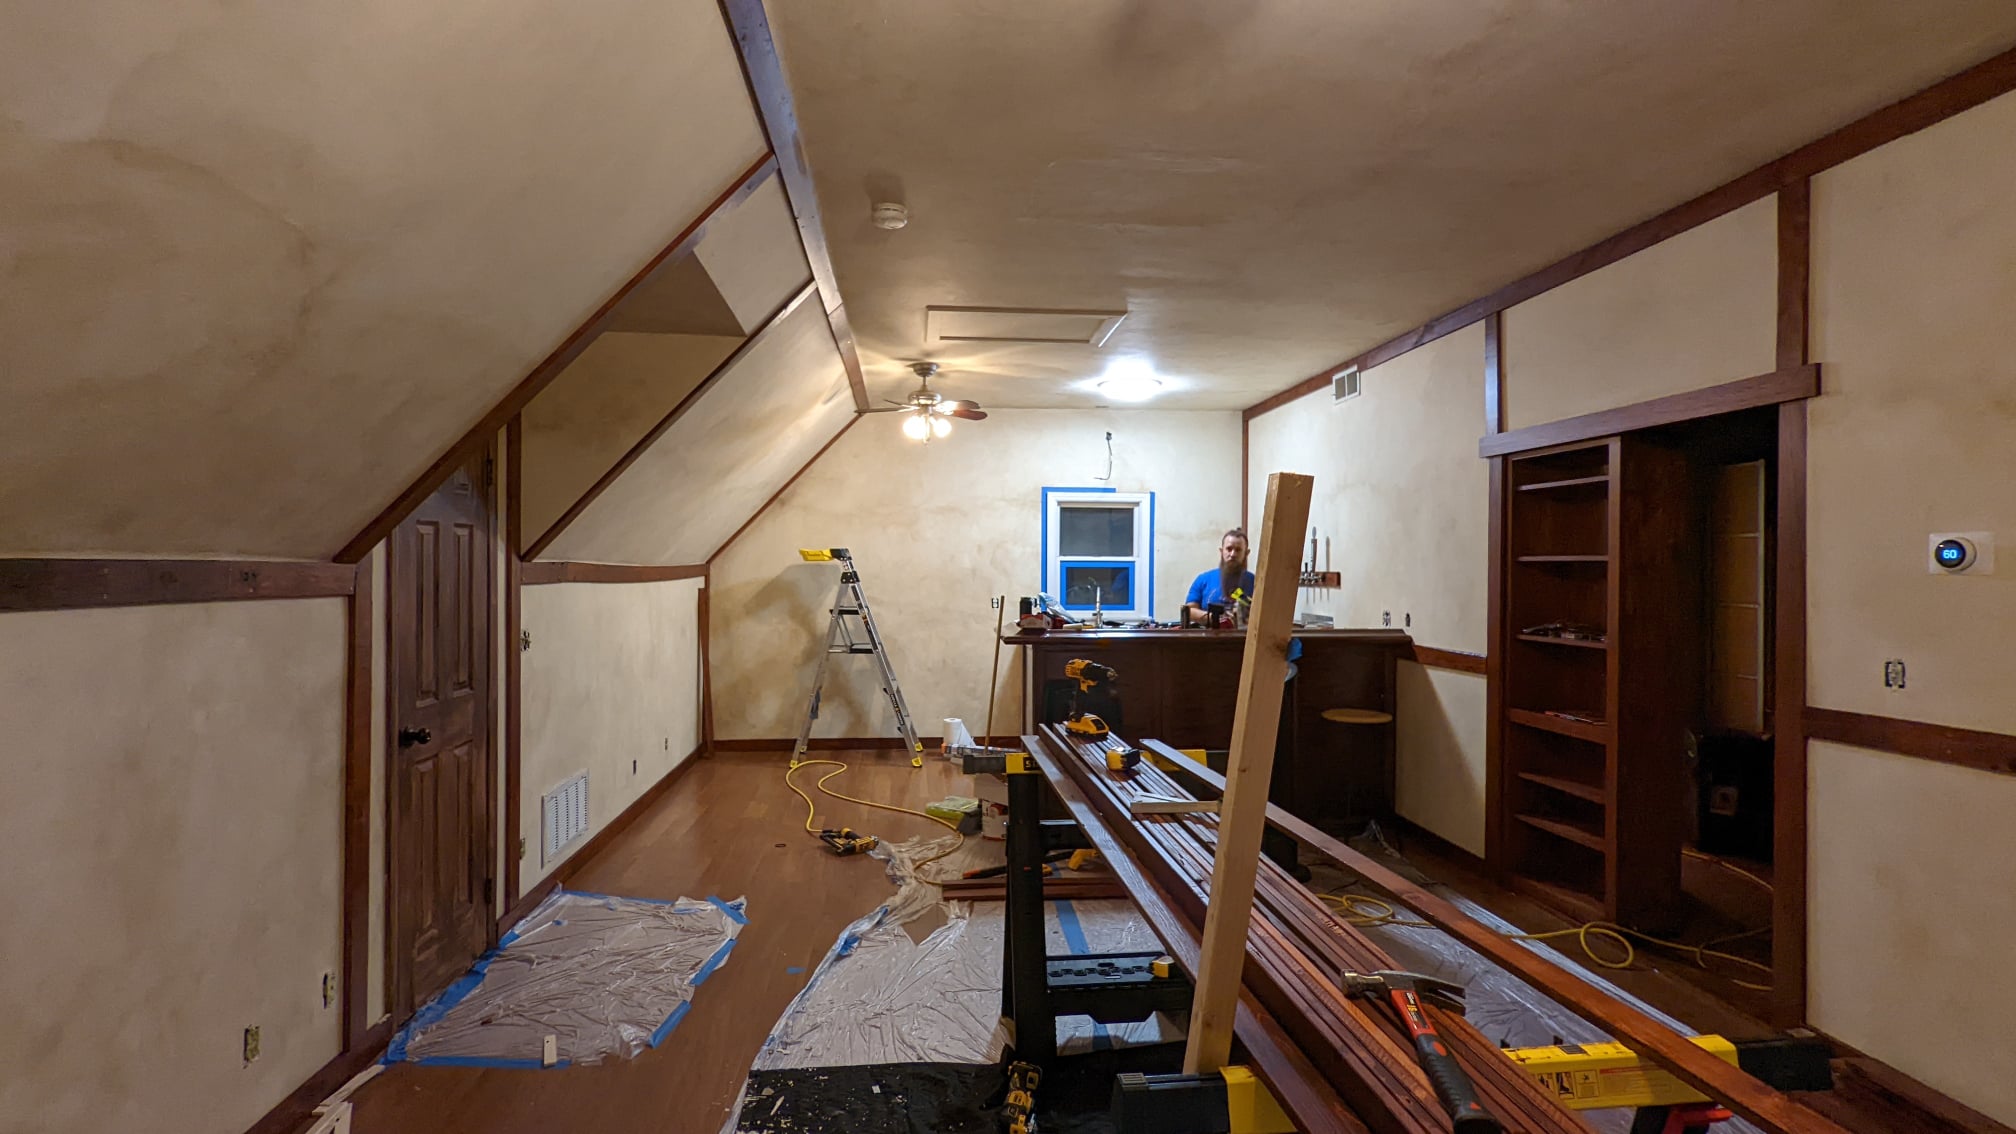
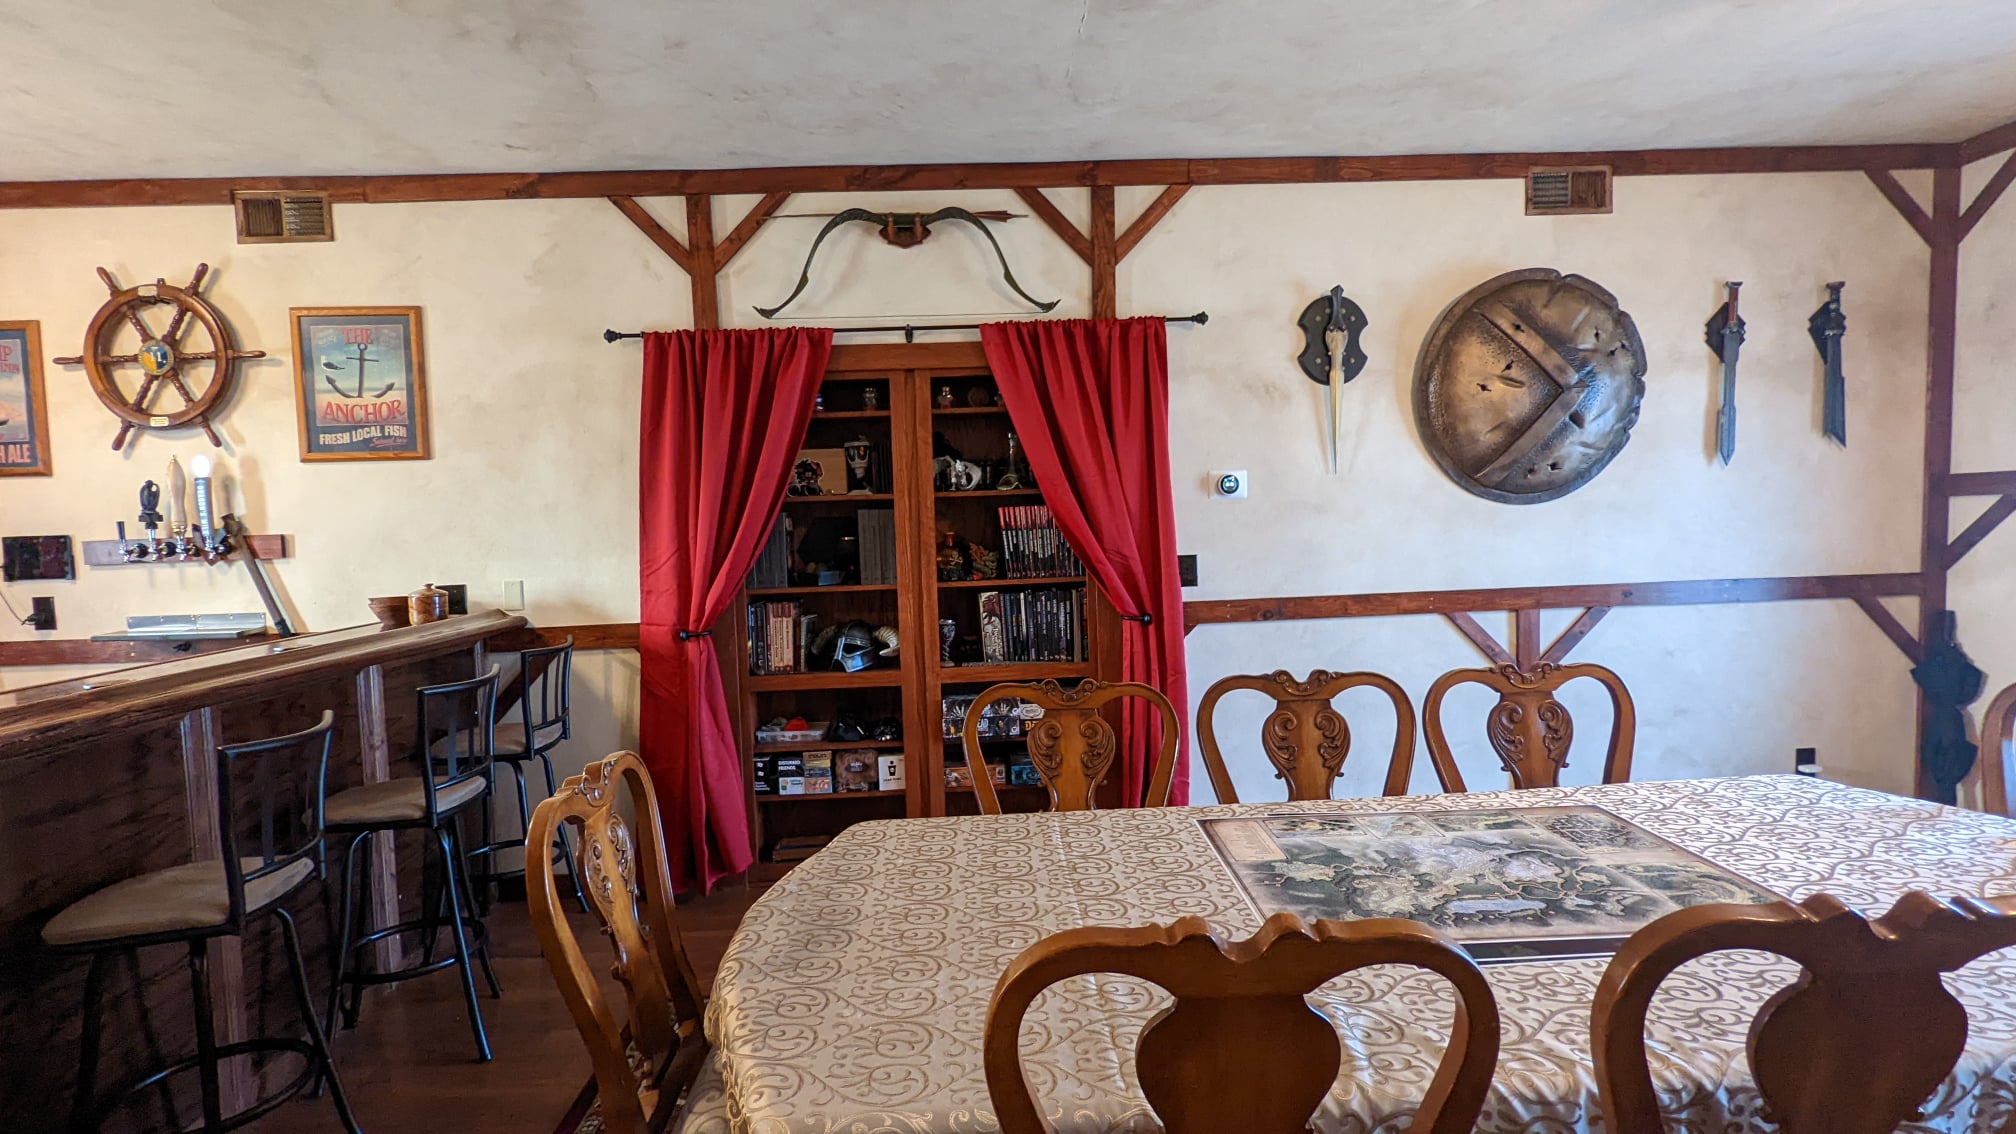
For reference, here’s what the room looked like when we bought the house (minus the artwork, as they took that with them).
We’re so happy with how it turned out that I’m writing this extra long blog post bout what we did and how we got it from start to finish!
Overall, we spent about 5 months on the build (Sept 2021-Feb 2022), with the majority of the work being done on my “stay-cations” in November and December 2021. The largest purchases were the keg stuff, bookcase doors, and tools. The rest added up, but not remotely in comparison to those.
Design Stage
First and foremost, this tavern’s design style and vibe is all Quinn. He had a vision for the tavern, and I agreed with it.
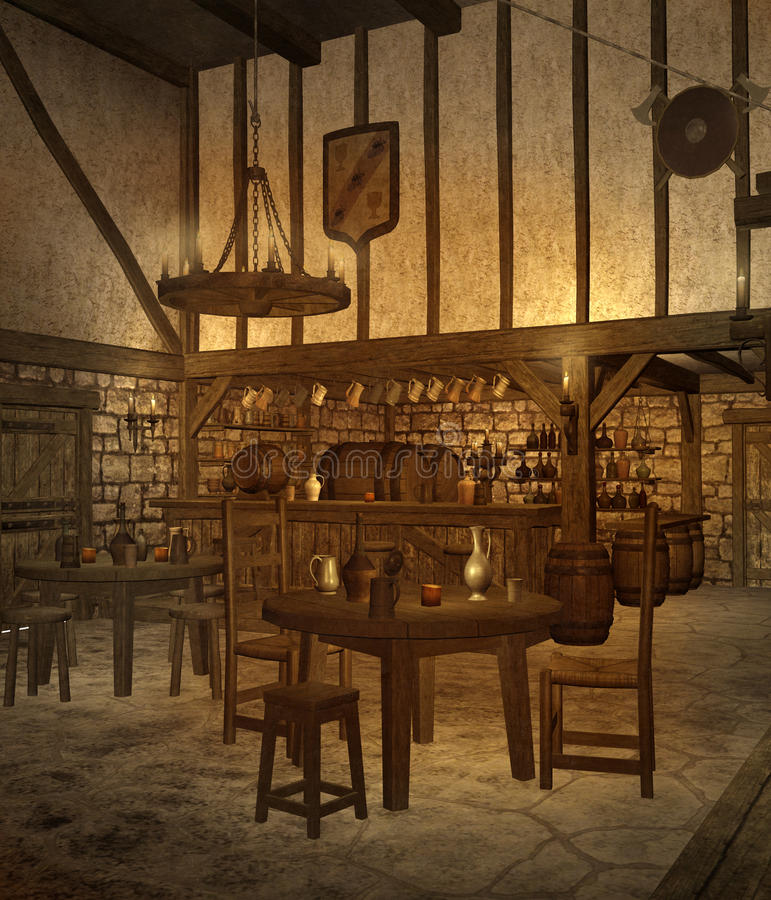
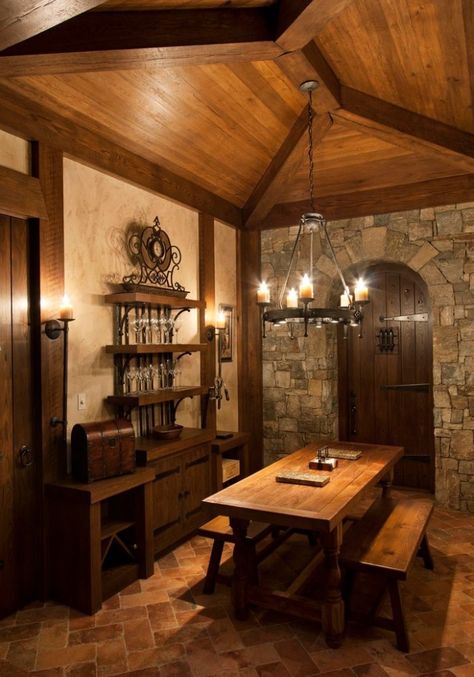
Here are sample pics we found as inspiration for the look we wanted.

We knew we wanted it to look a little dirty, and expected there would be some cobblestones and plaster, but we weren’t totally sold on how to do the cobblestone in a cost-affordable manner that also wouldn’t tear the drywall down (i.e. using real half-stones). As an alternative, we found some large white cobblestone foam stickers from Amazon, which I then painted following a YouTube tutorial for painting D&D miniature cobblestones (by Black Magic Craft).


Initially, it looked like an obvious choice, even though the height meant we’d either have to accept our cobblestone “wall” being shorter than we’d like, or have to buy a bunch of extra stickers and try to match top/bottom, as well as carving out every other “stone” on each side of the stickers to interlock them.

Unfortunately, after just a few days, it was clear that even with a primer coat, my paint job flaked off very easily. I didn’t apply a sealant, so maybe that would’ve helped *shrug*.

The surface of the stickers just weren’t meant to keep paint, as they’re stain resistant, so ultimately we had to trash this option because the paint just wouldn’t stay, and I didn’t want to have to worry about touch-ups later. That said, we were still expecting we would somehow incorporate stone into the build, since that would be “authentic”. (We later went for “fun and practical,” which is way better than “authentic” any day).
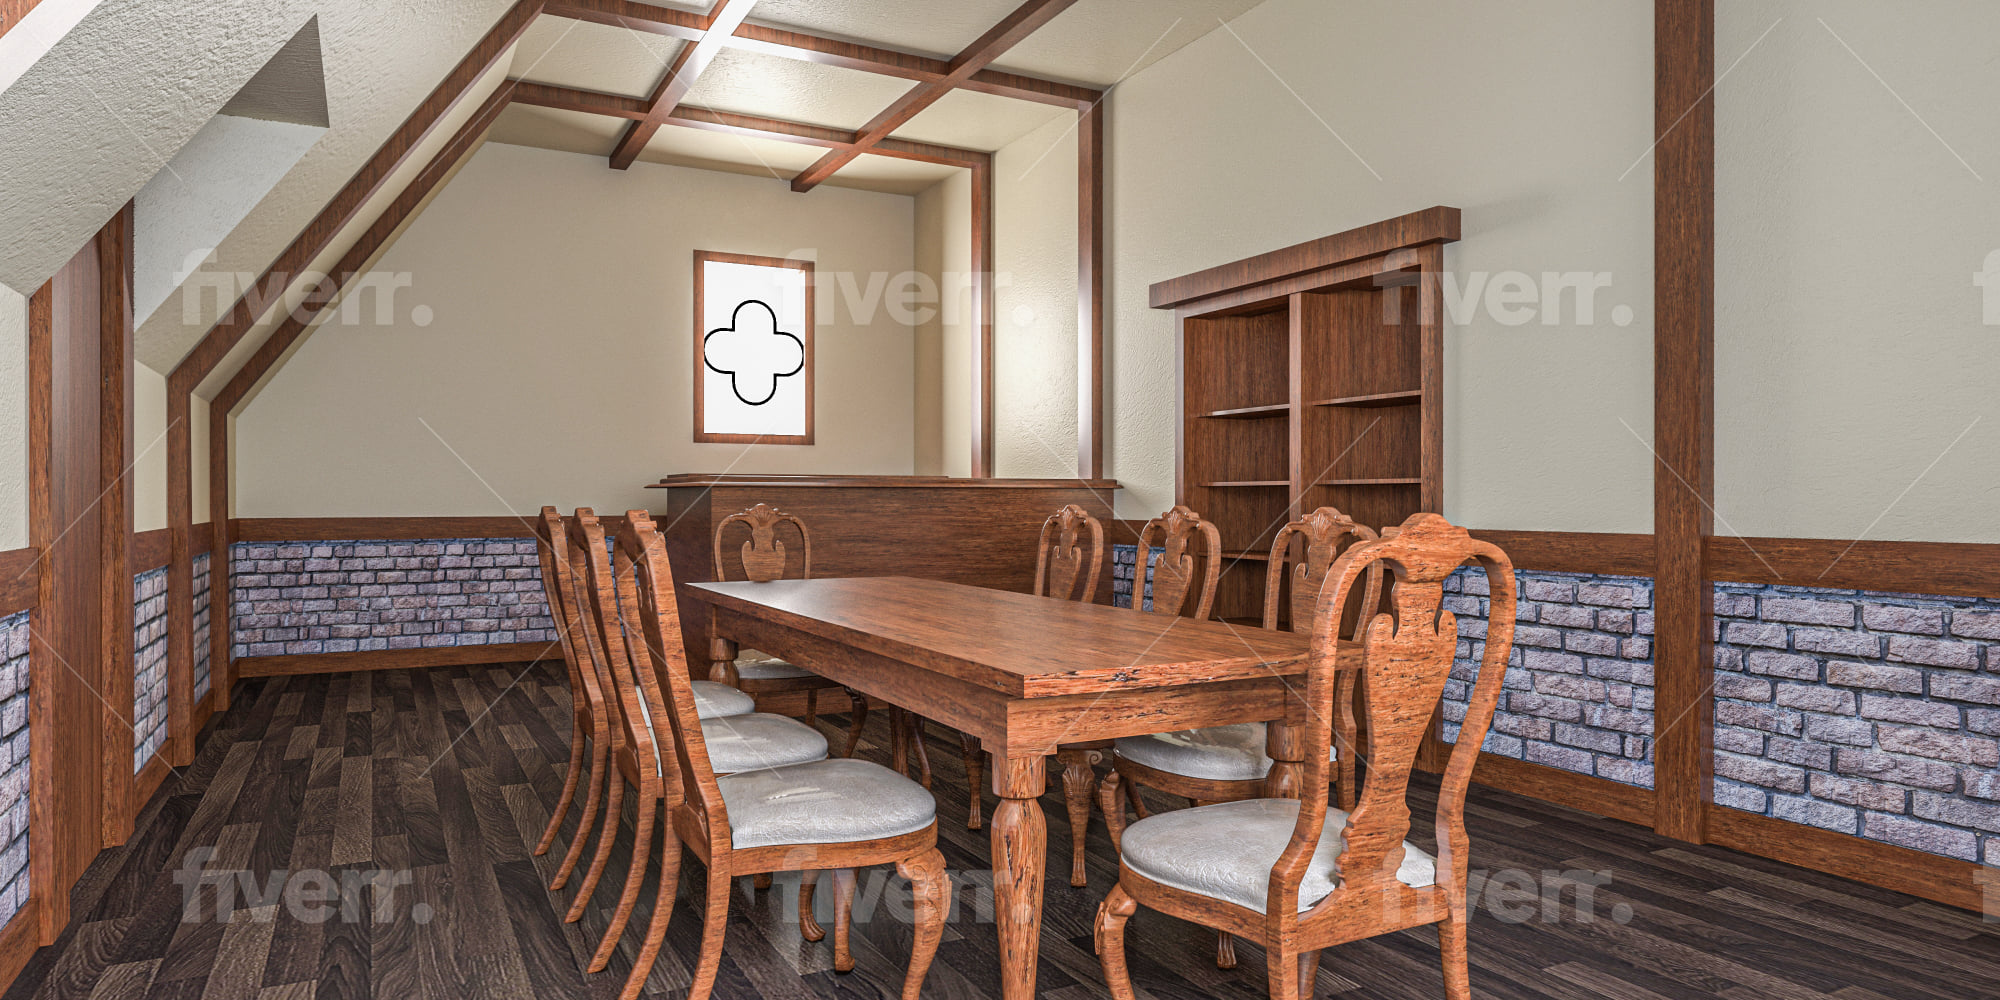
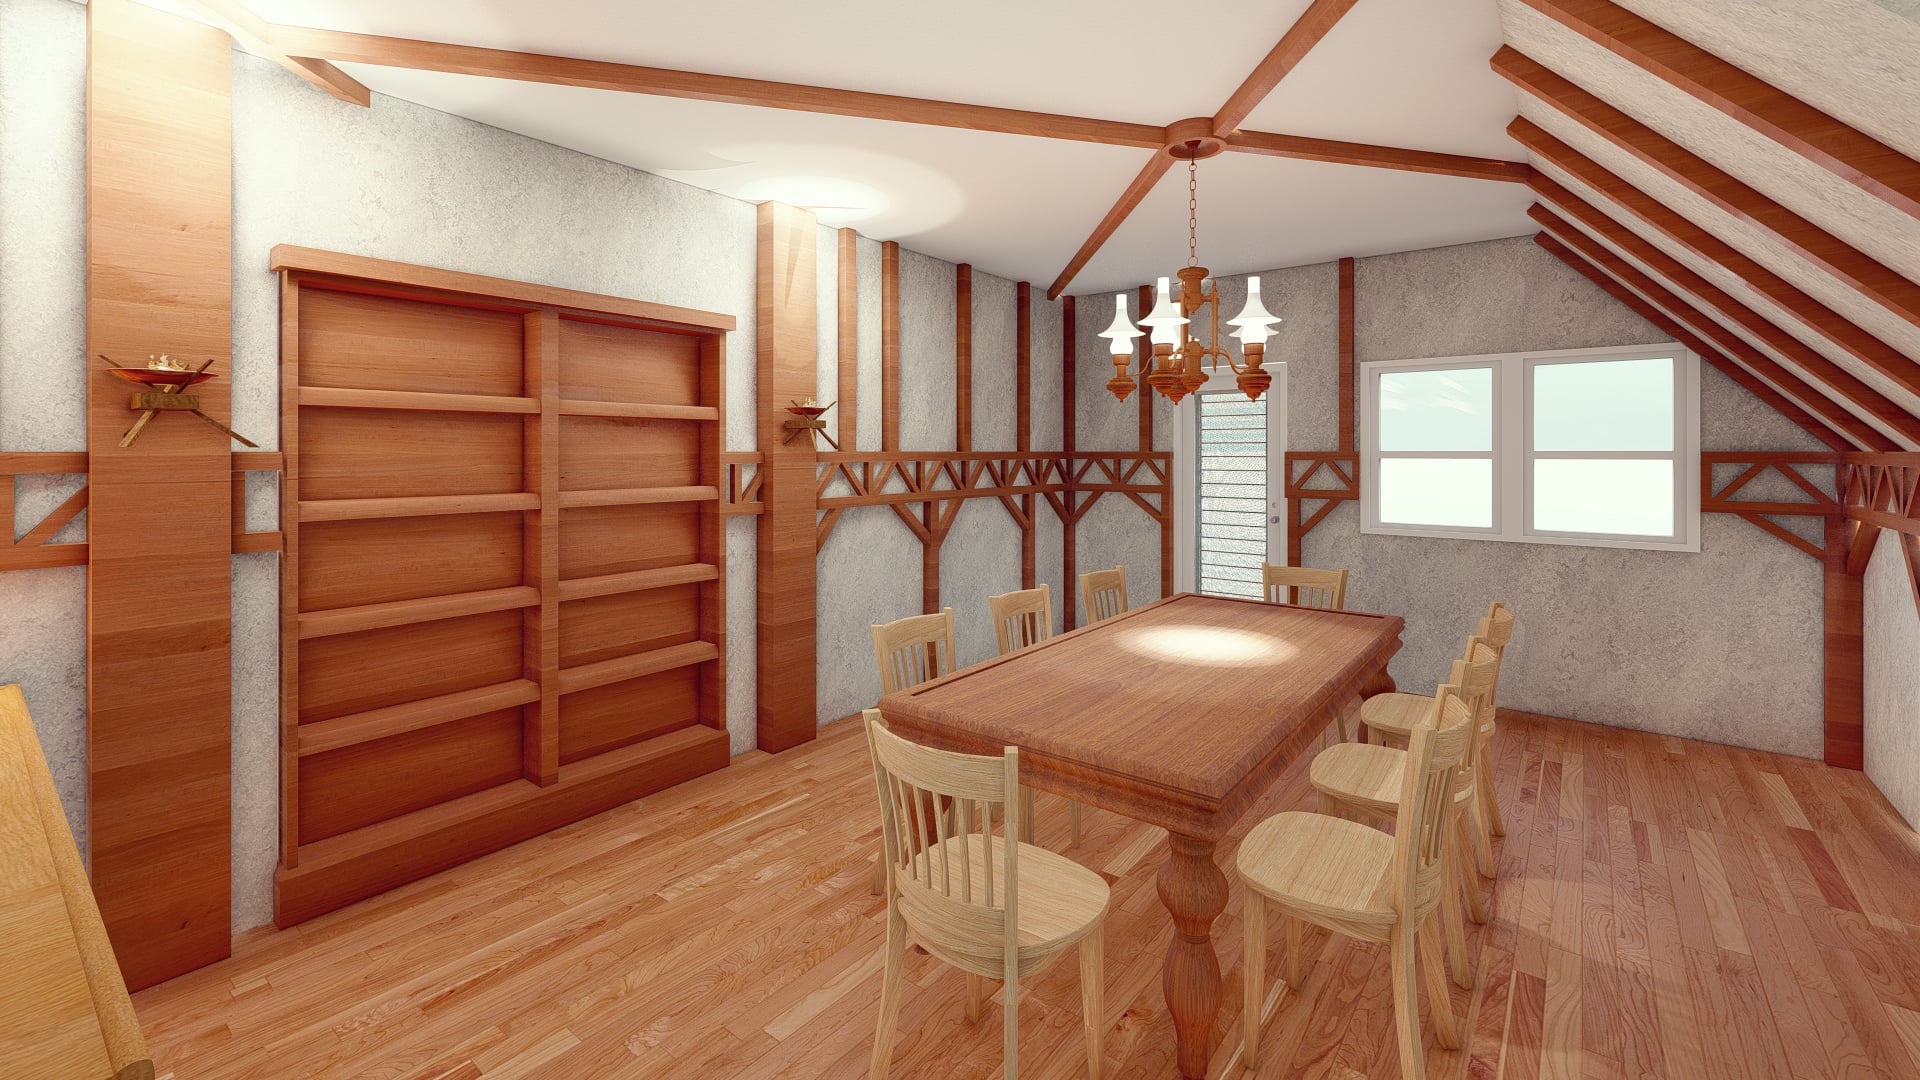
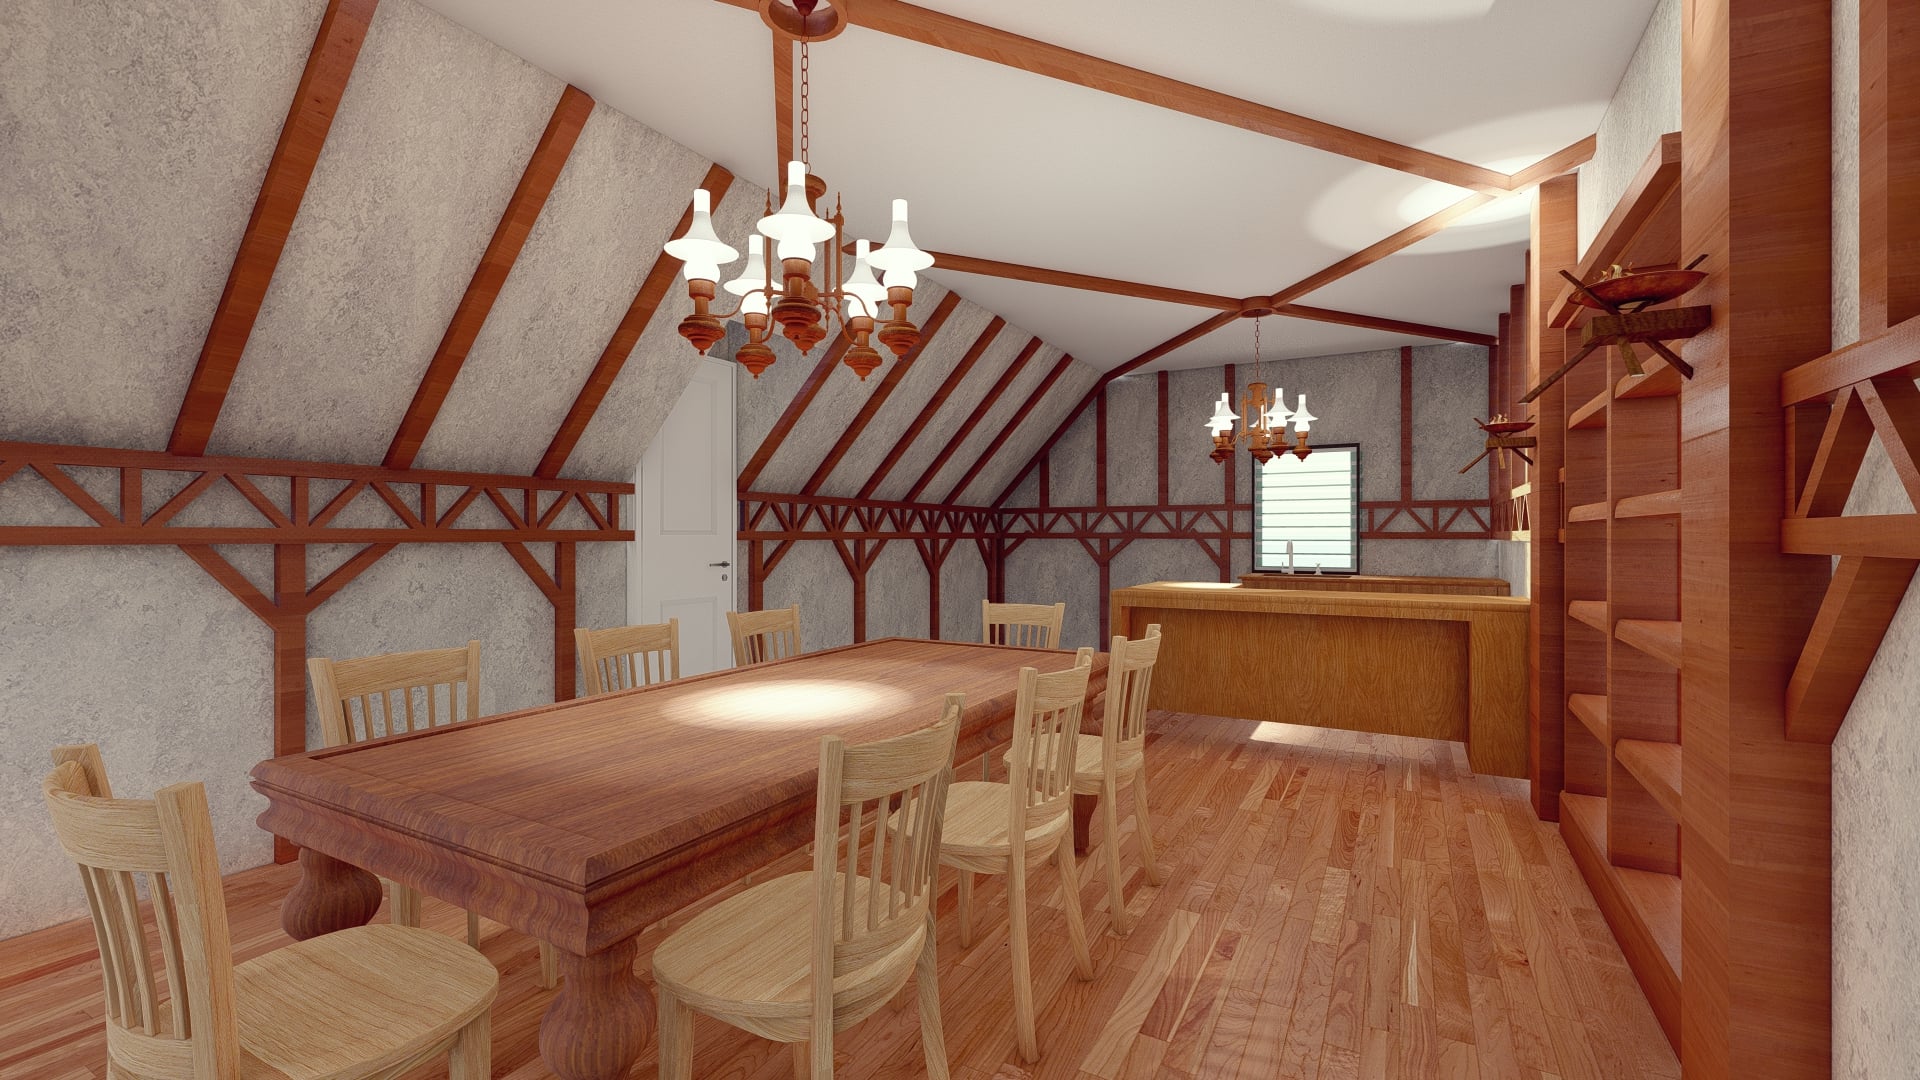
I tried my hand at Photoshopping what the room might look like, but I immediately realized my limitations, and we hired 3 designers on Fiverr to give us some ideas.

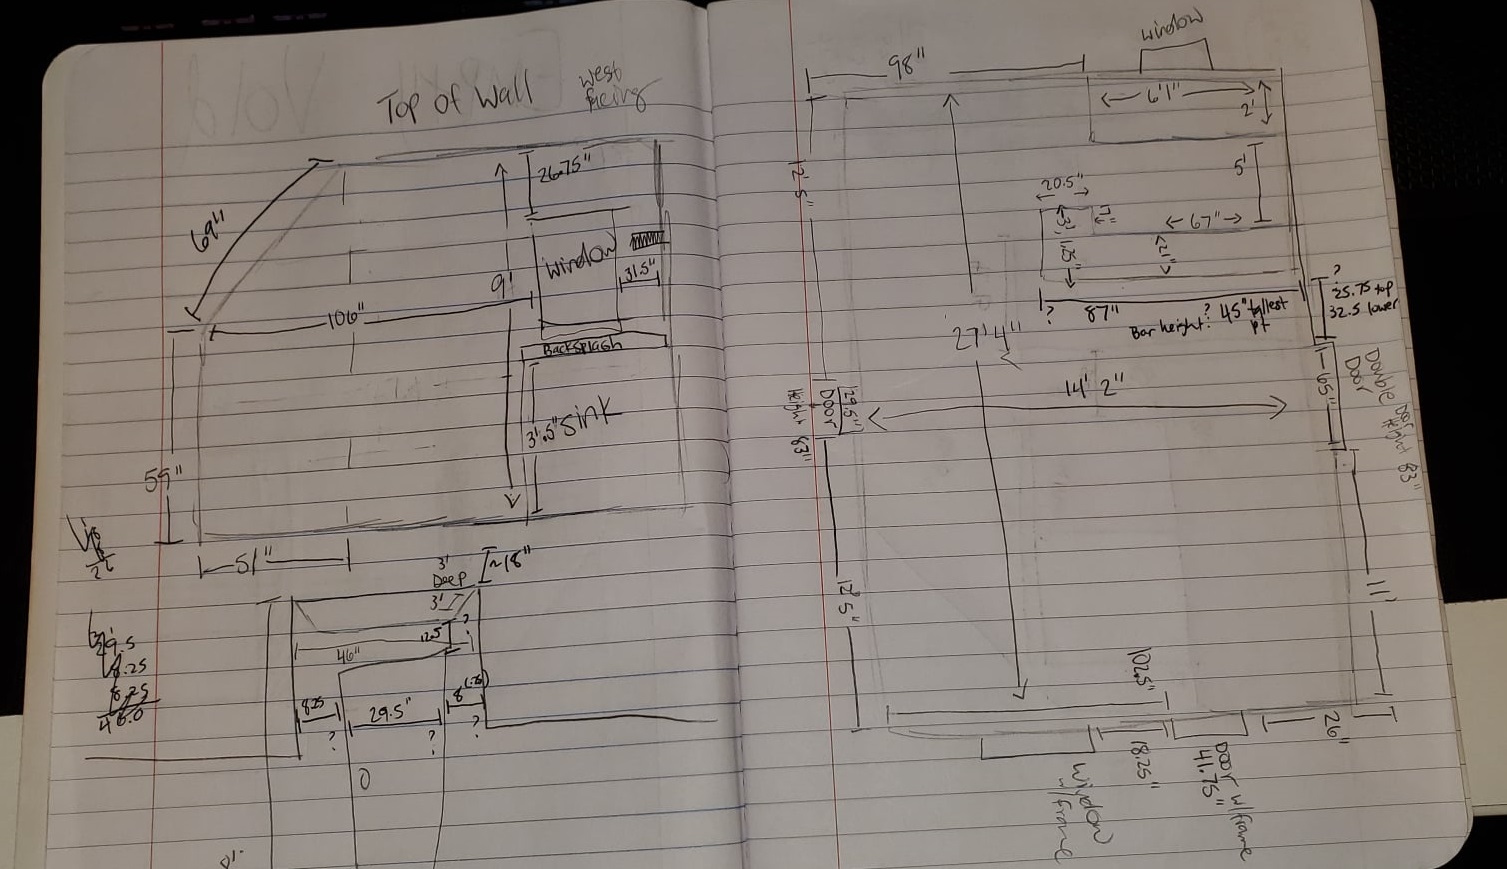
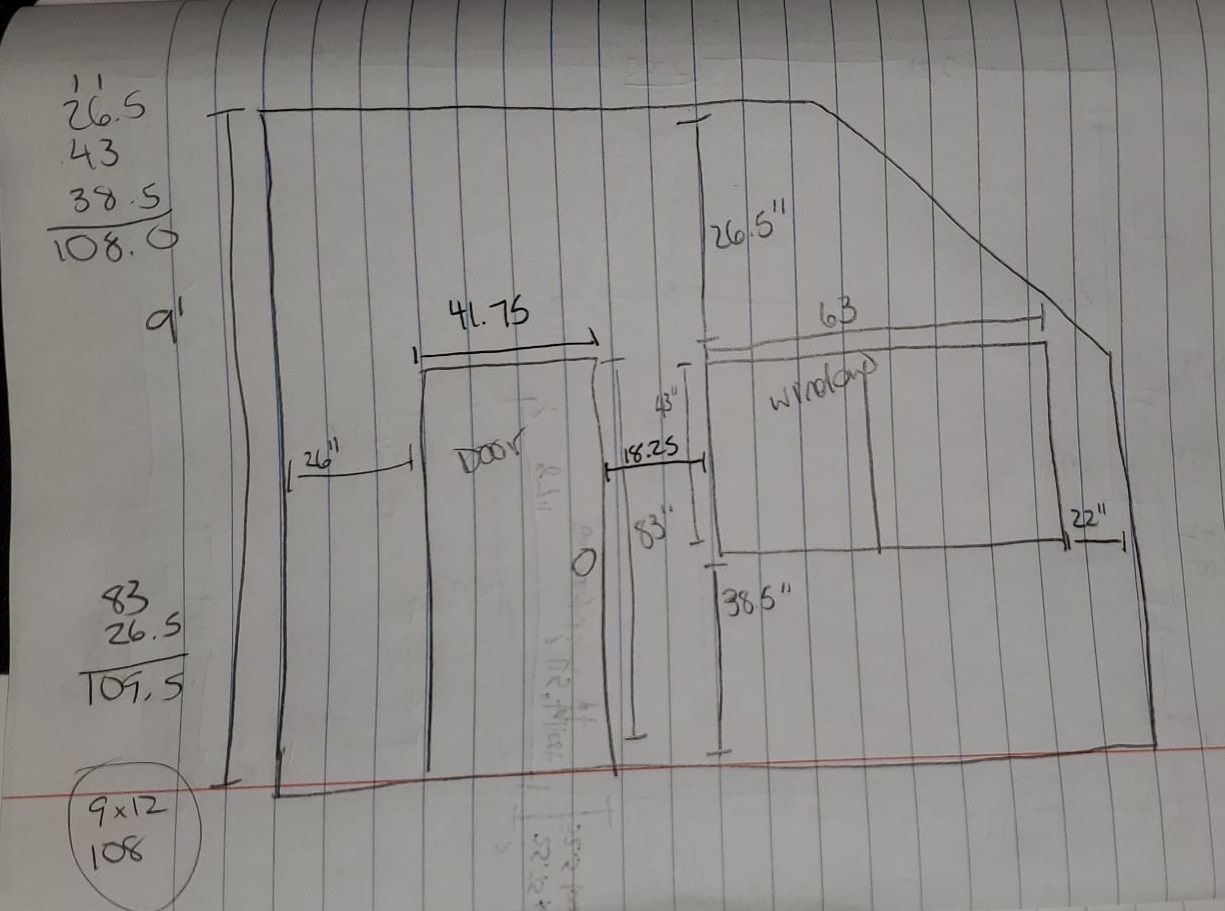
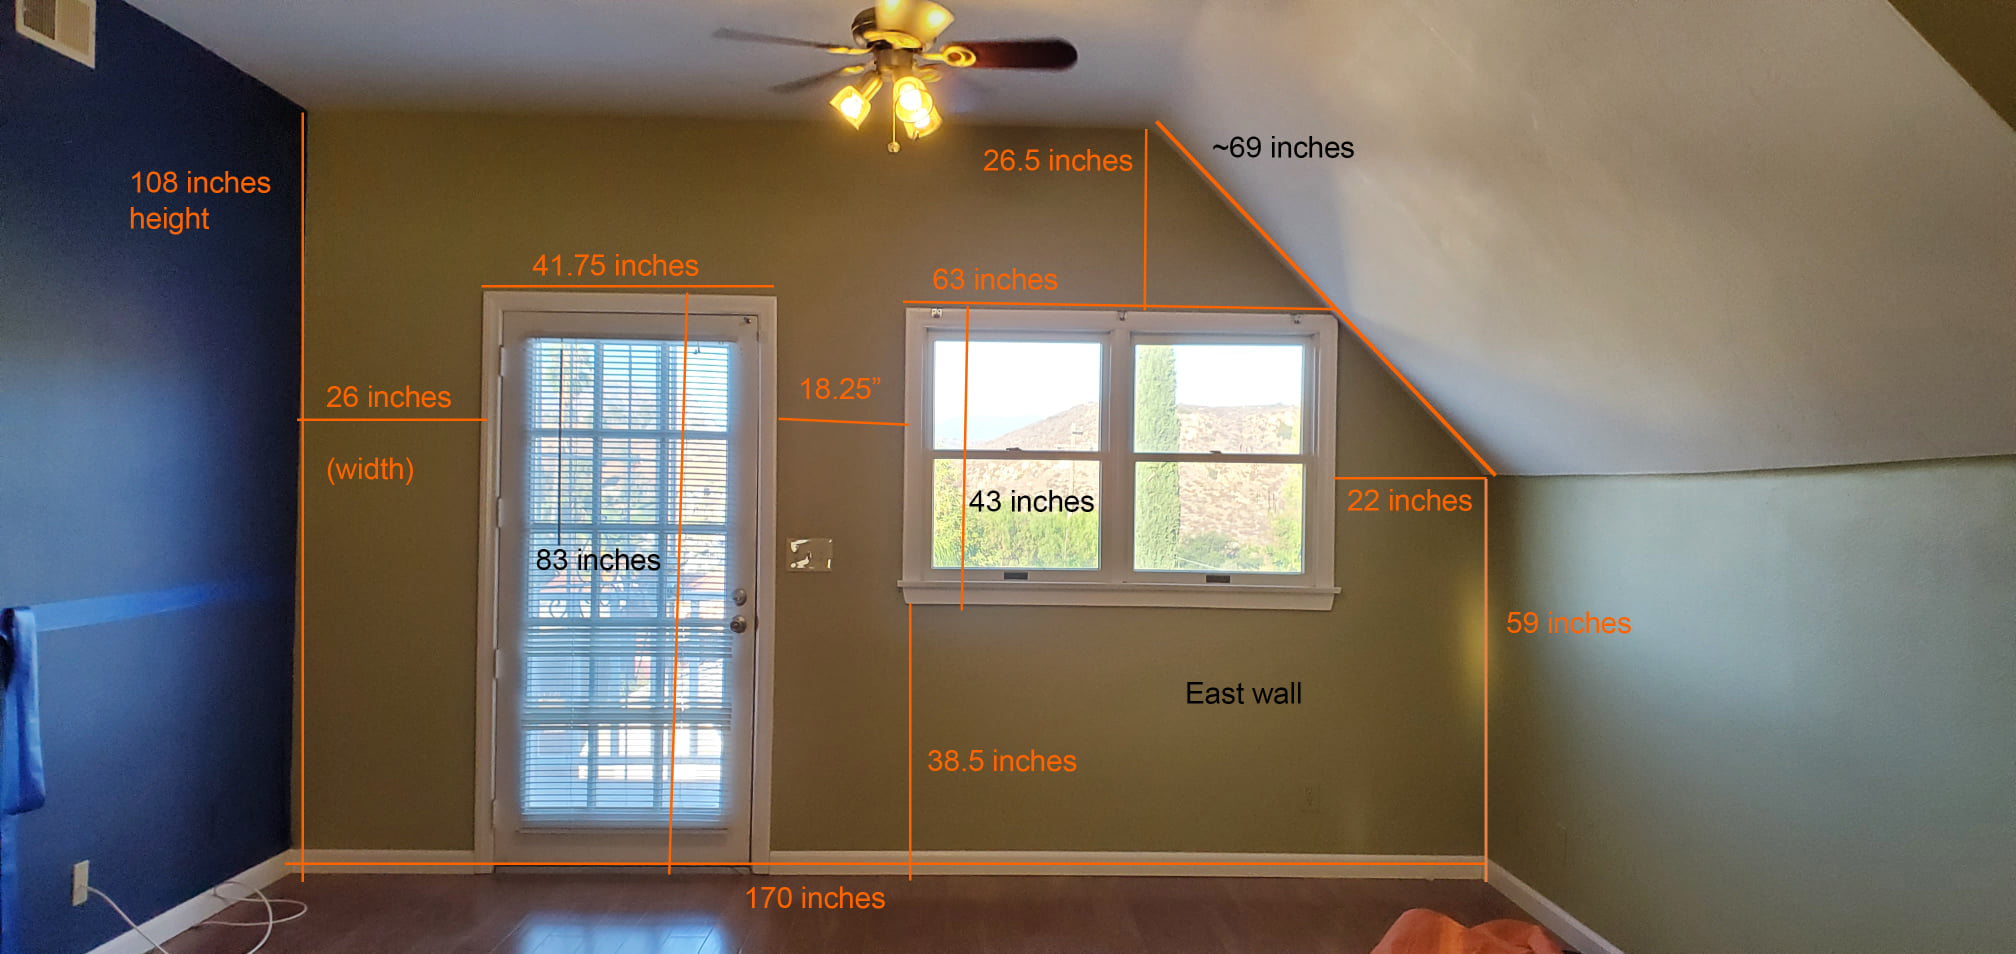
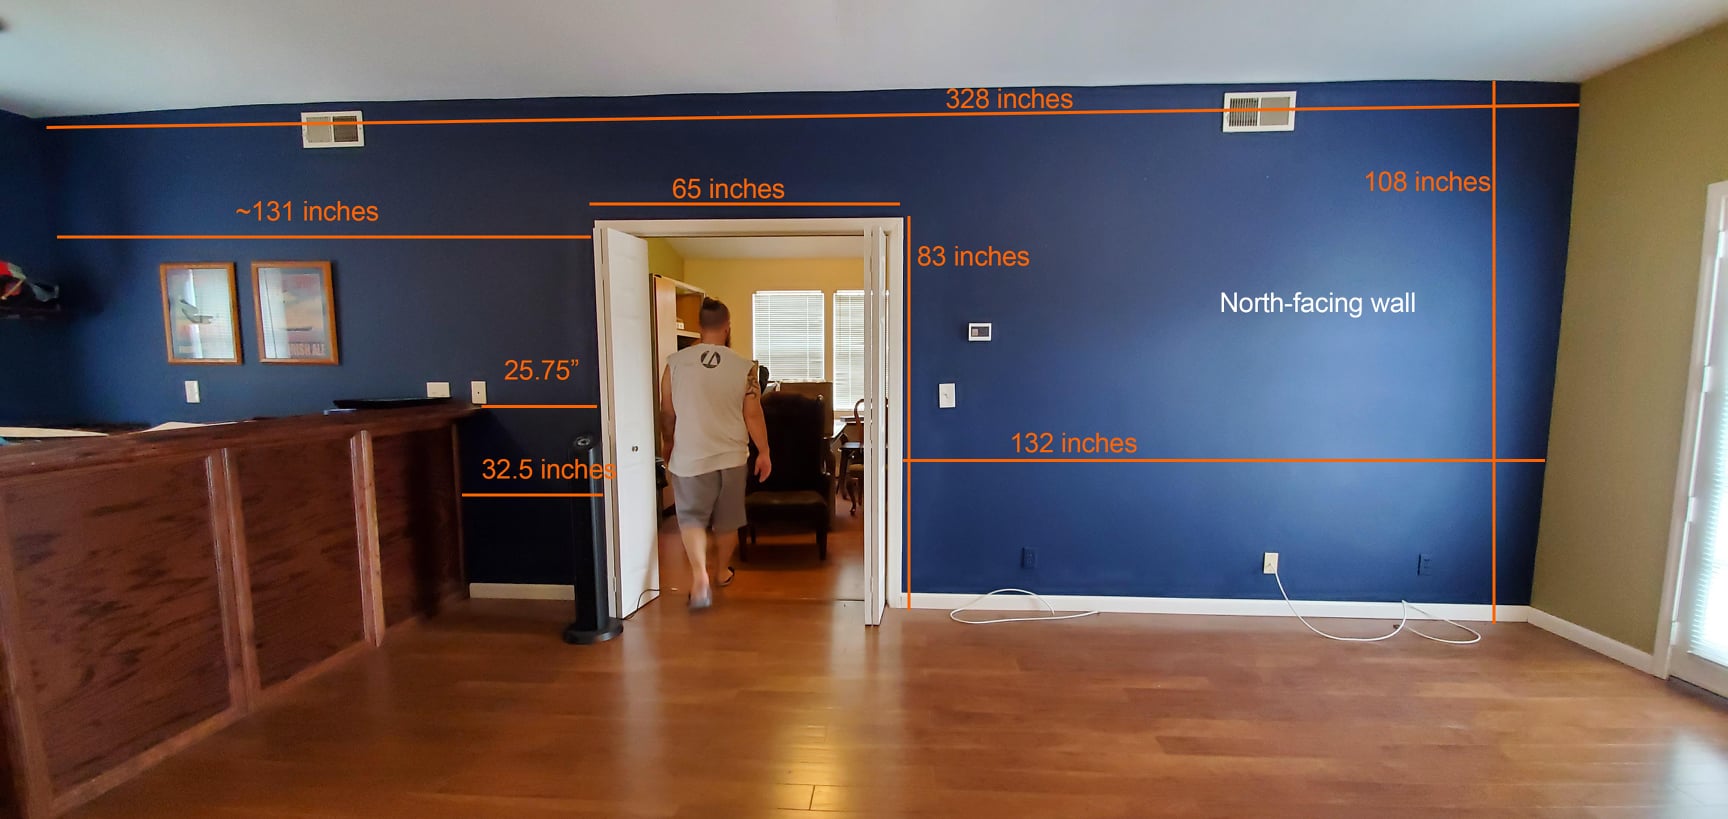
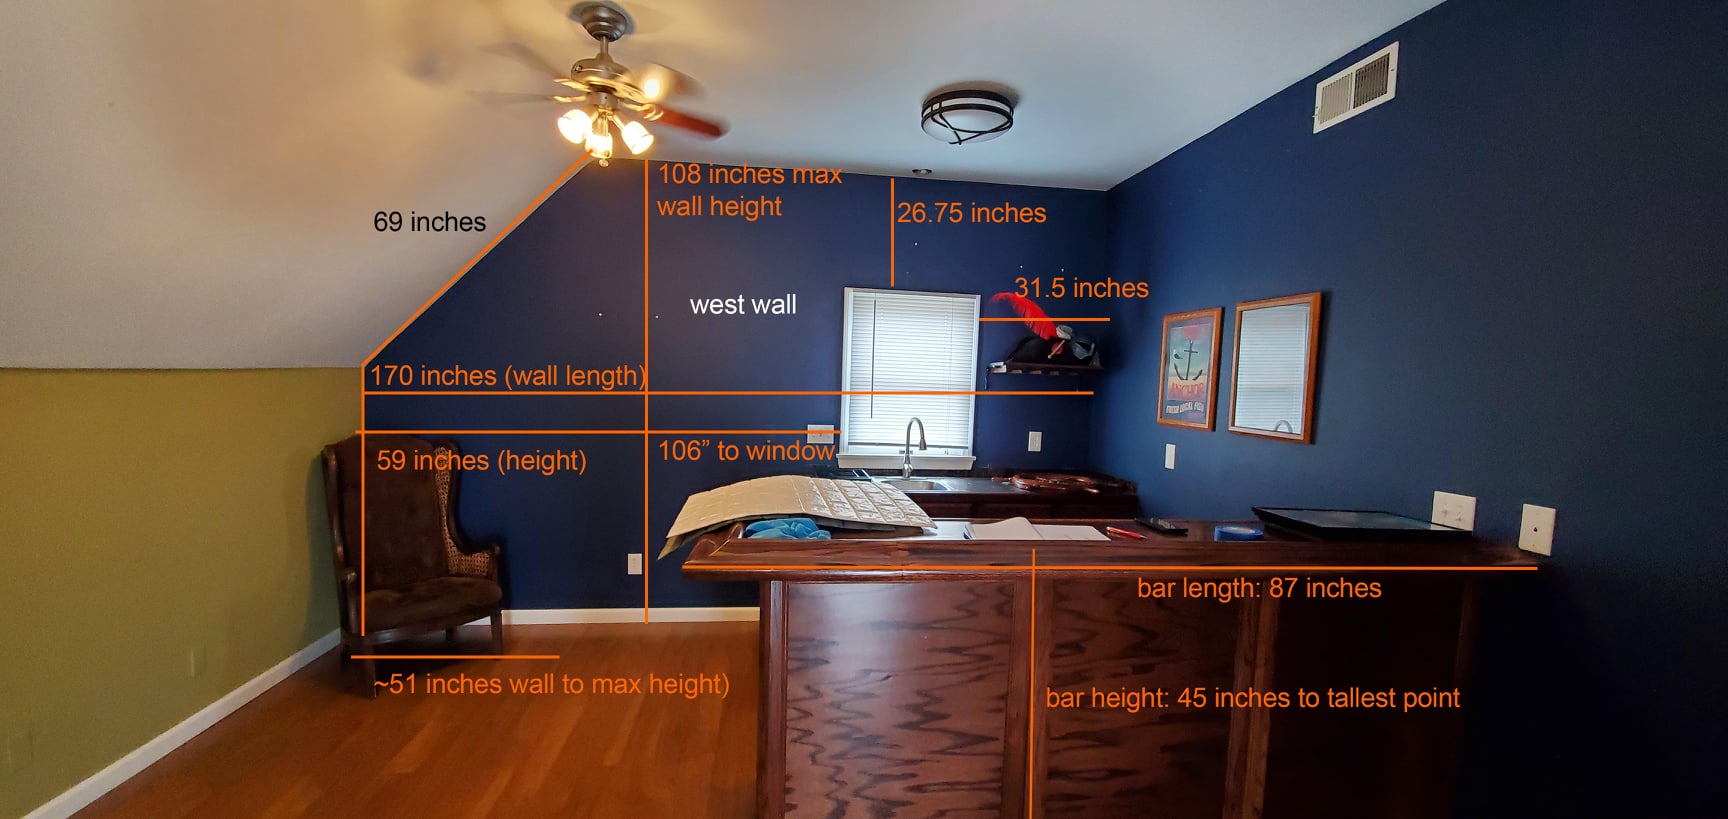
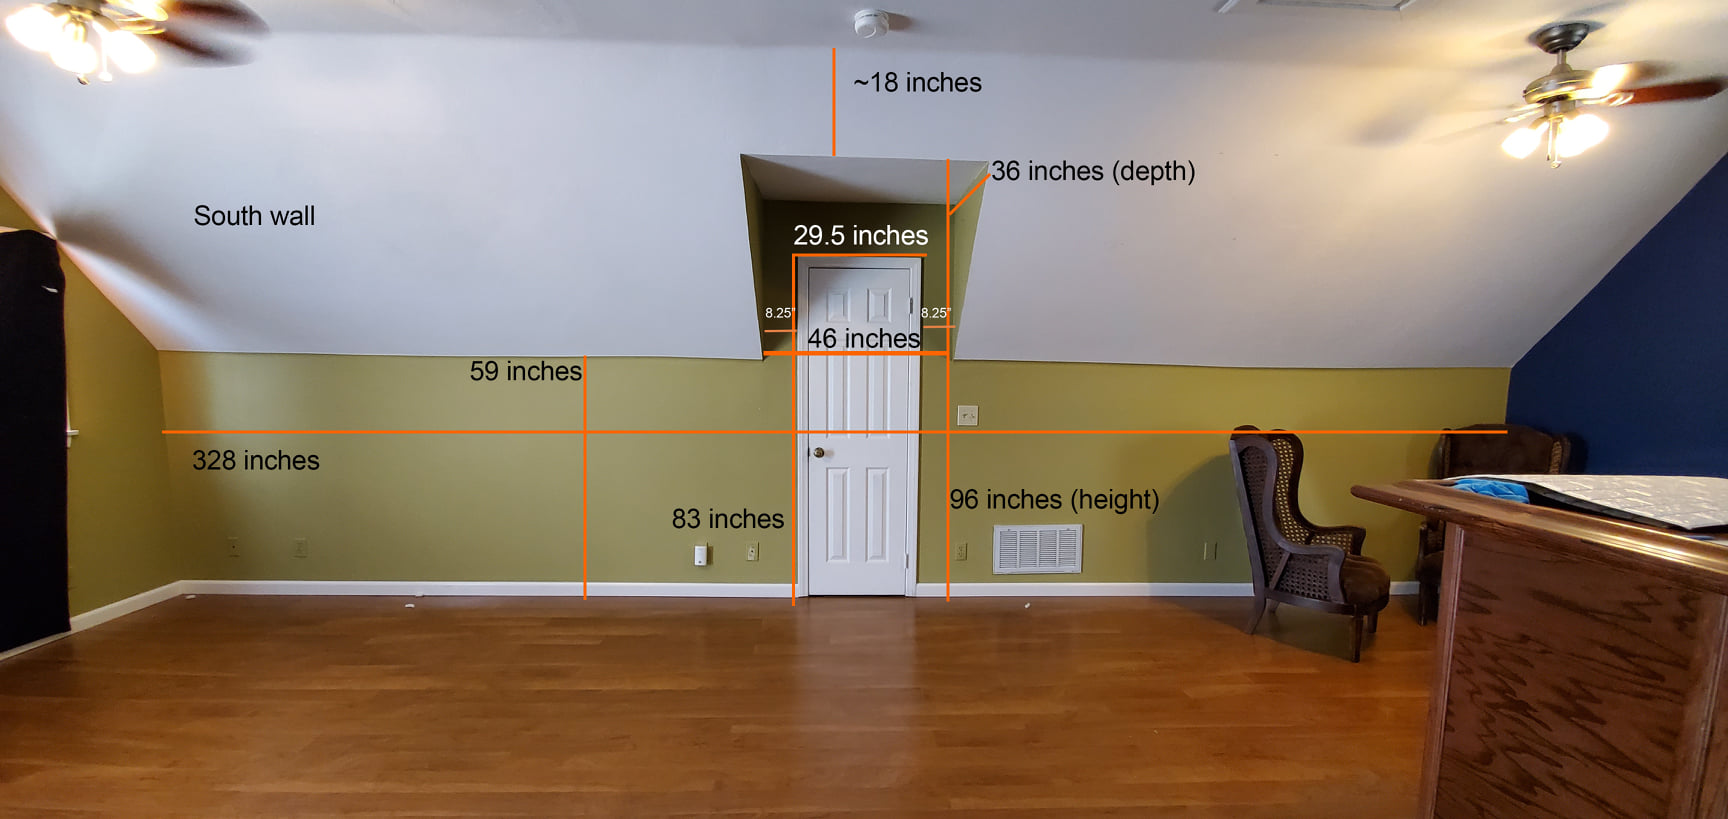
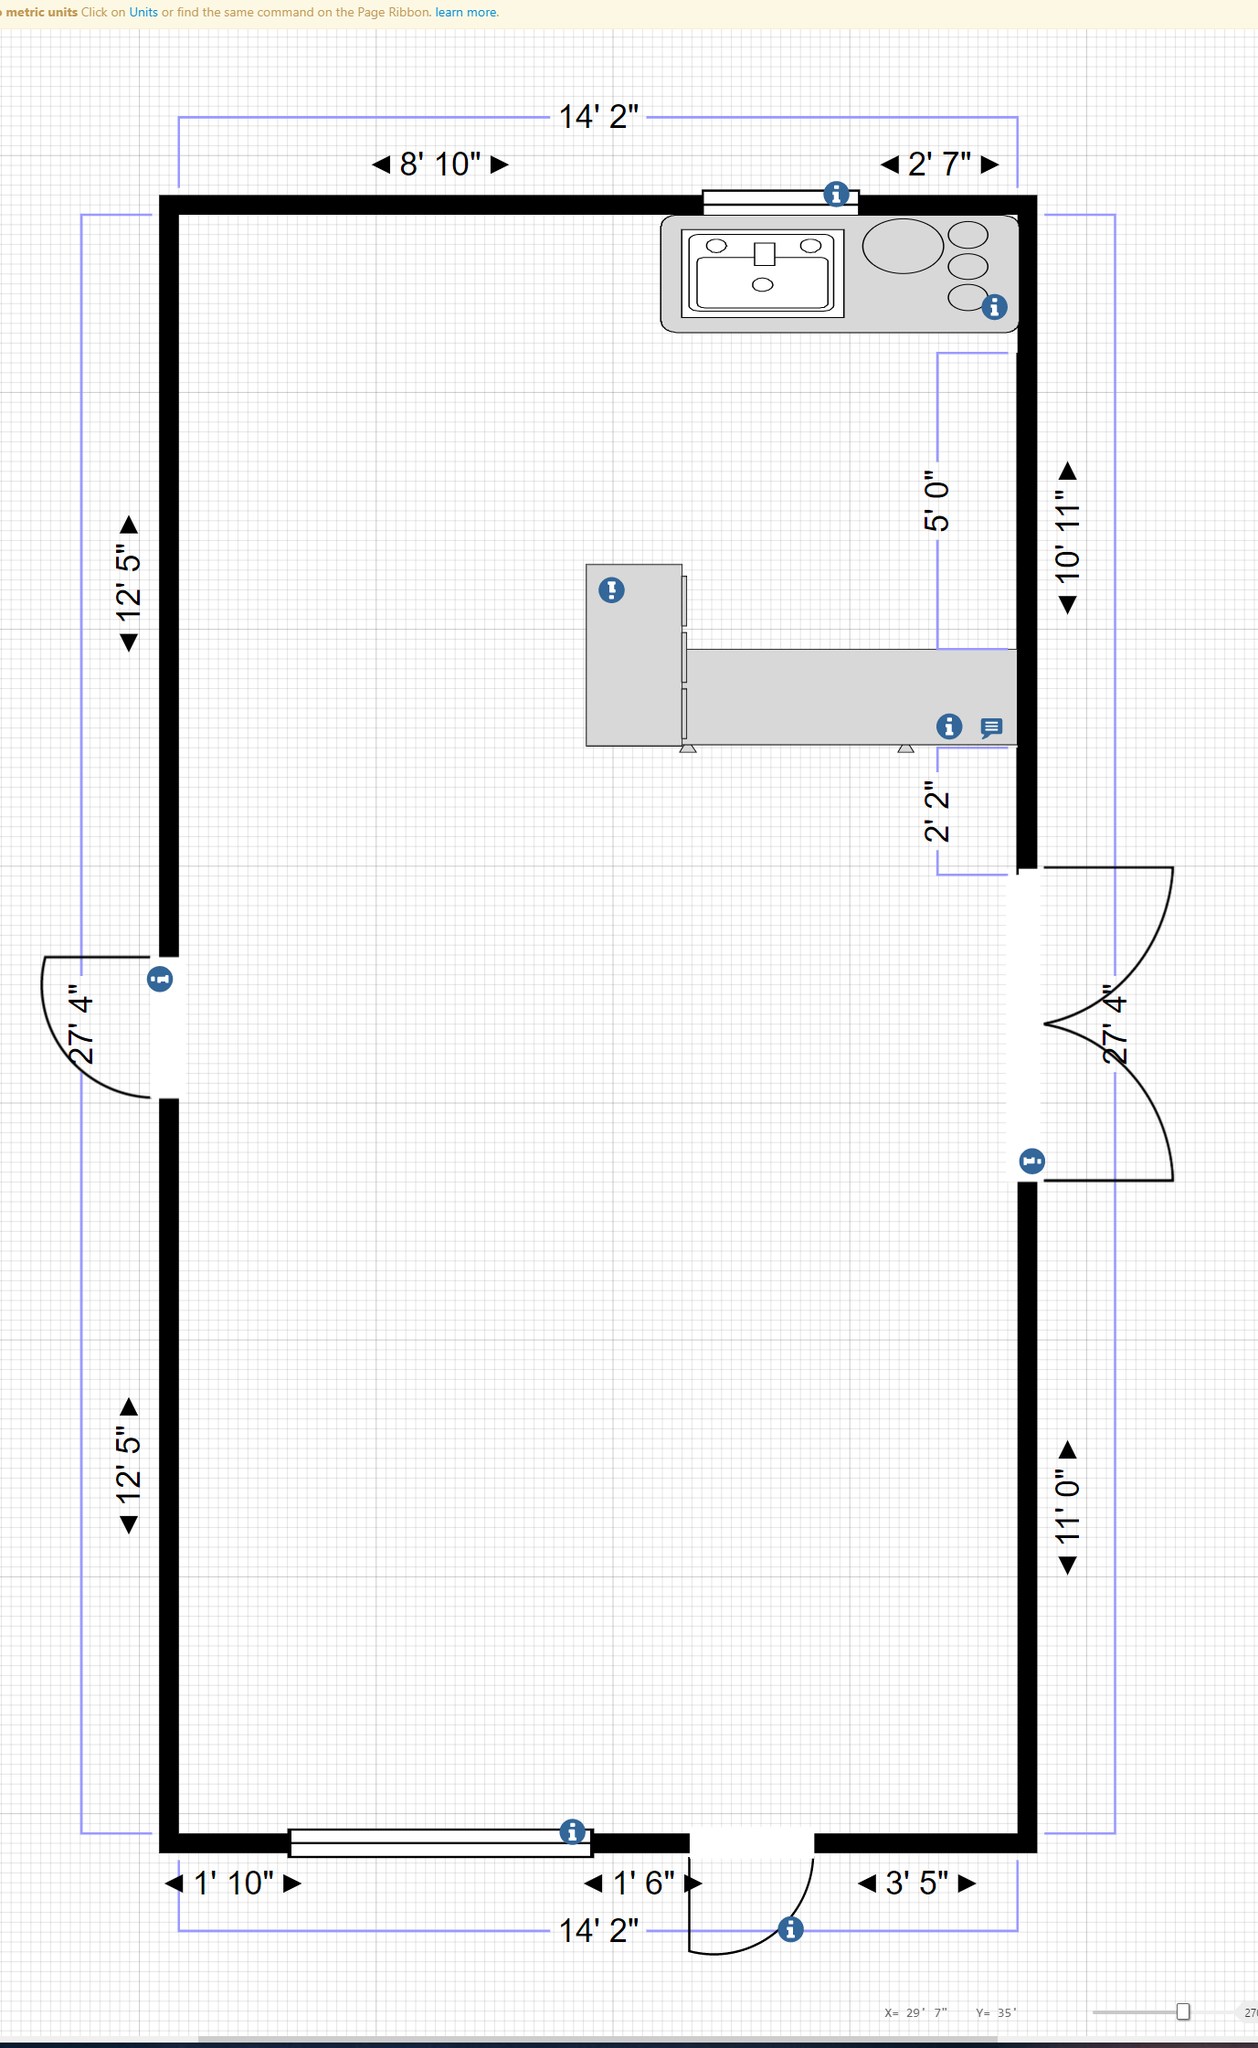
First, though, I had to measure everything, since we wanted a 3d rendering, as that’s *apparently* not possible without measurements. I did my best. It’s not perfect, but close enough to get a design made. You’ll see that this is our mantra for the whole project — “It’s not perfect, and that’s okay,” –Quinn. He had to work hard for me to accept that point of view, but I’m glad he did. Also said a lot, “good enough for government work.” That’s when we know to just stop and let something be.

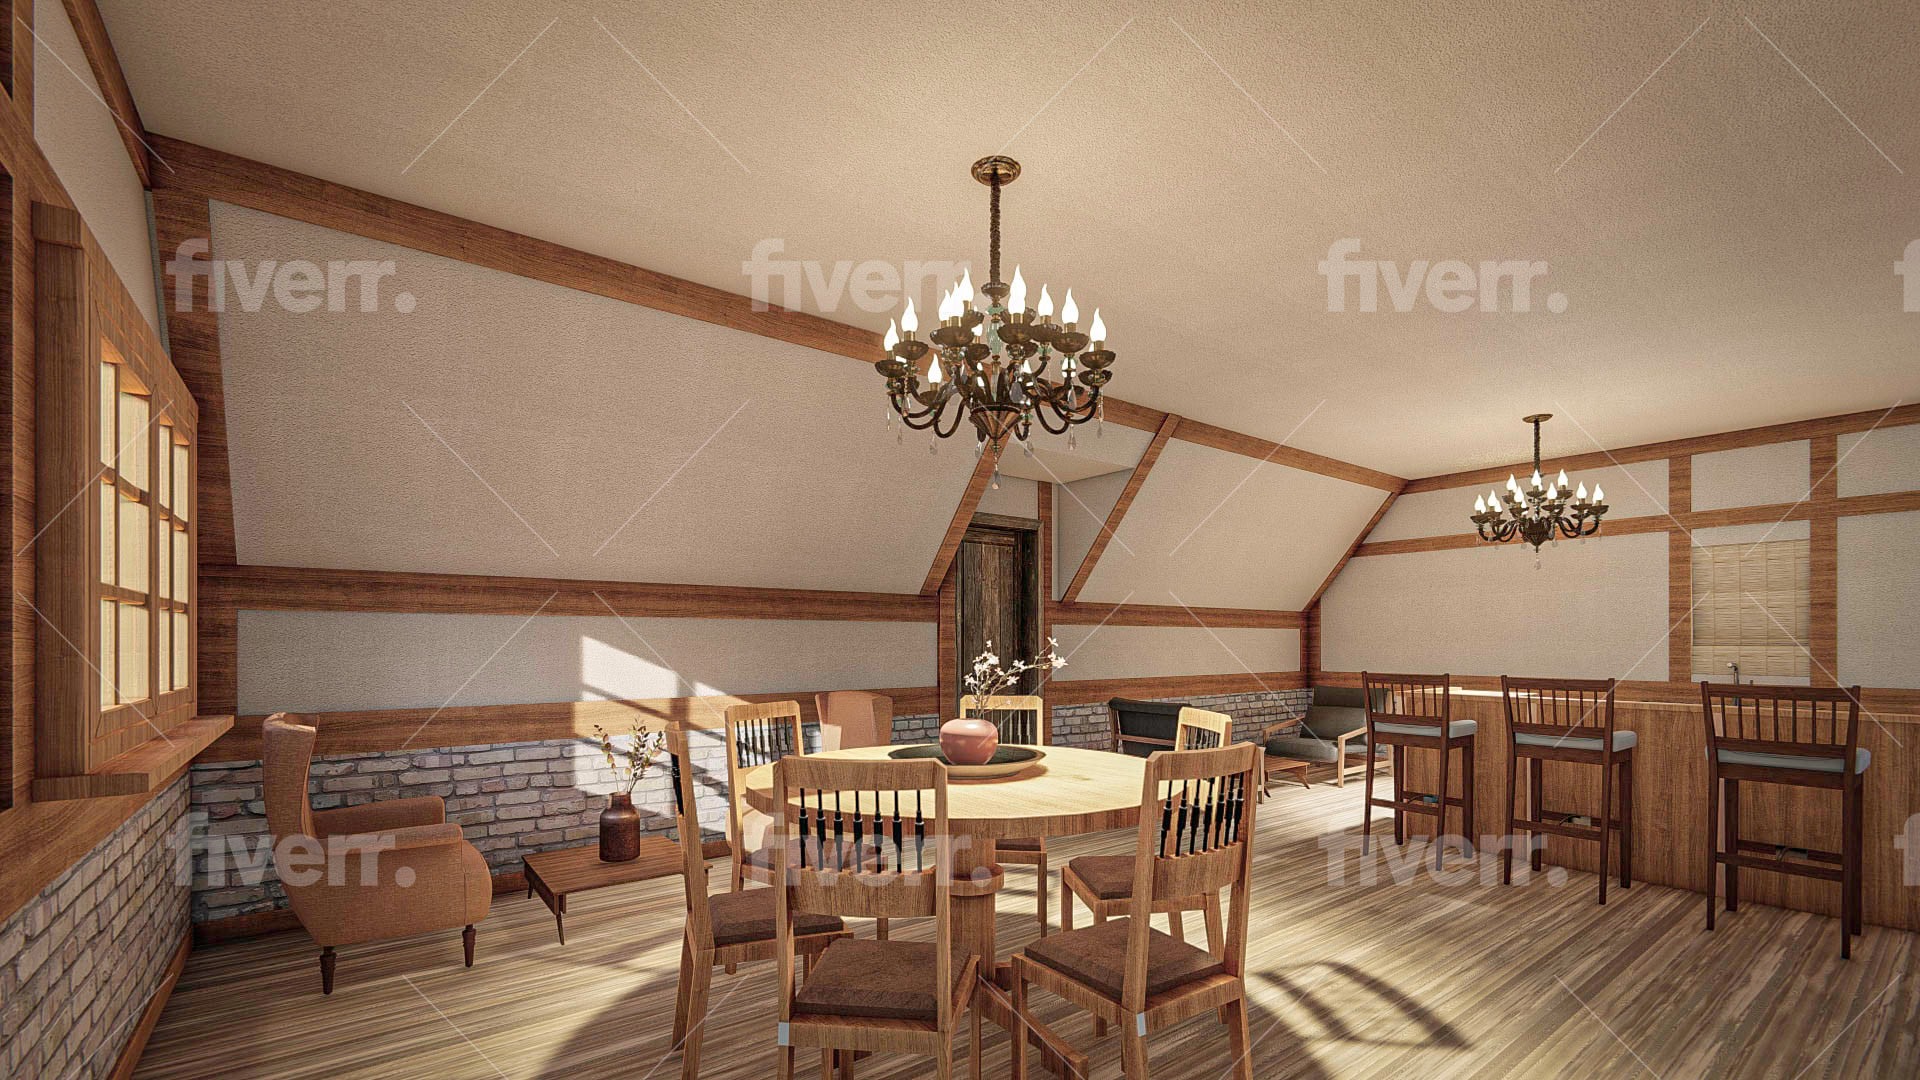
In hindsight, I was a little *too* specific re: the cobblestone look when describing the design job to the 3 designers, but at least one of them gave us an option with out it. Here’s what they gave us, based on my description and measurements — the 3rd designer even gave us several views!

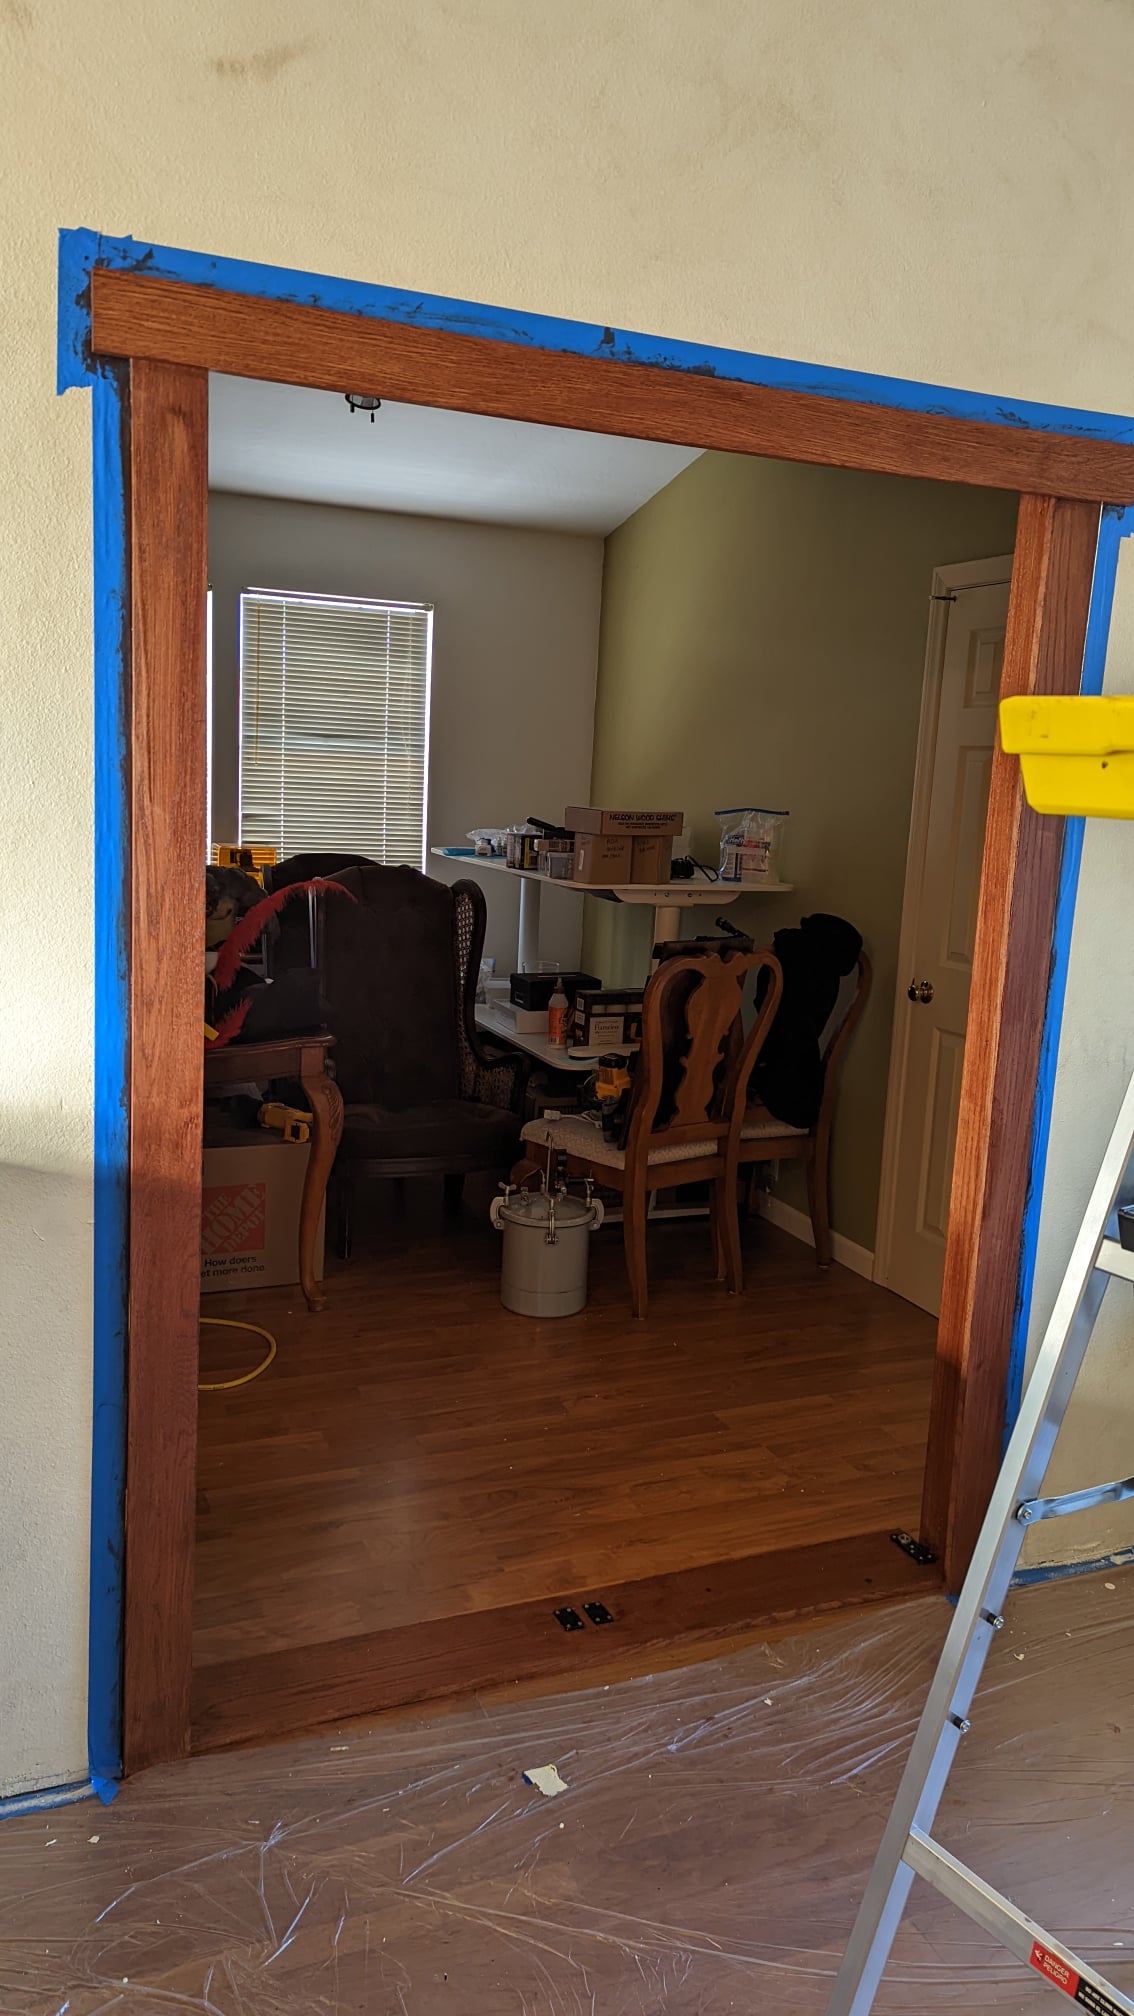
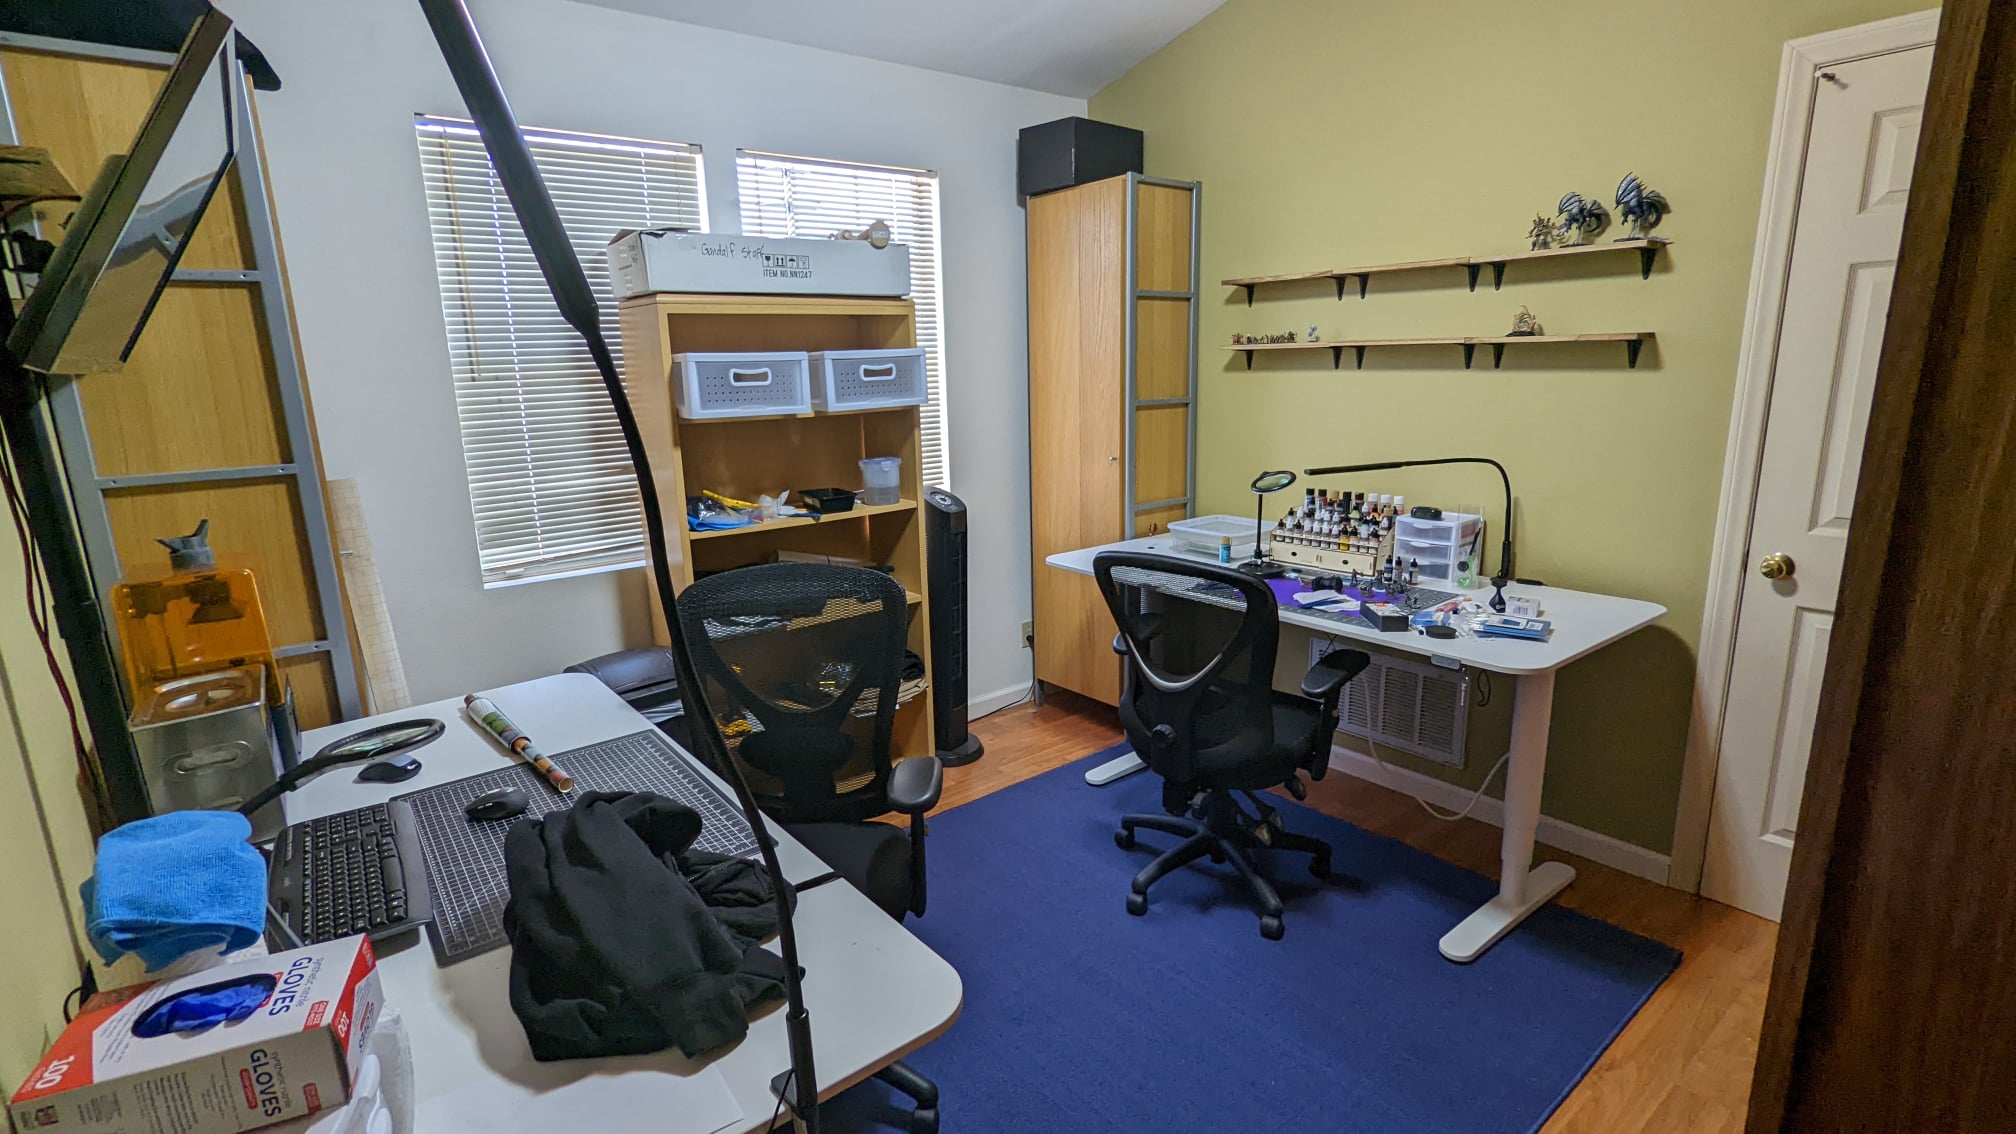
We got the designs in September 2021, but decided that before we did anything major, we wanted to convert the awful folding closet doors blocking off the room/bathroom/closet into a bookcase door.
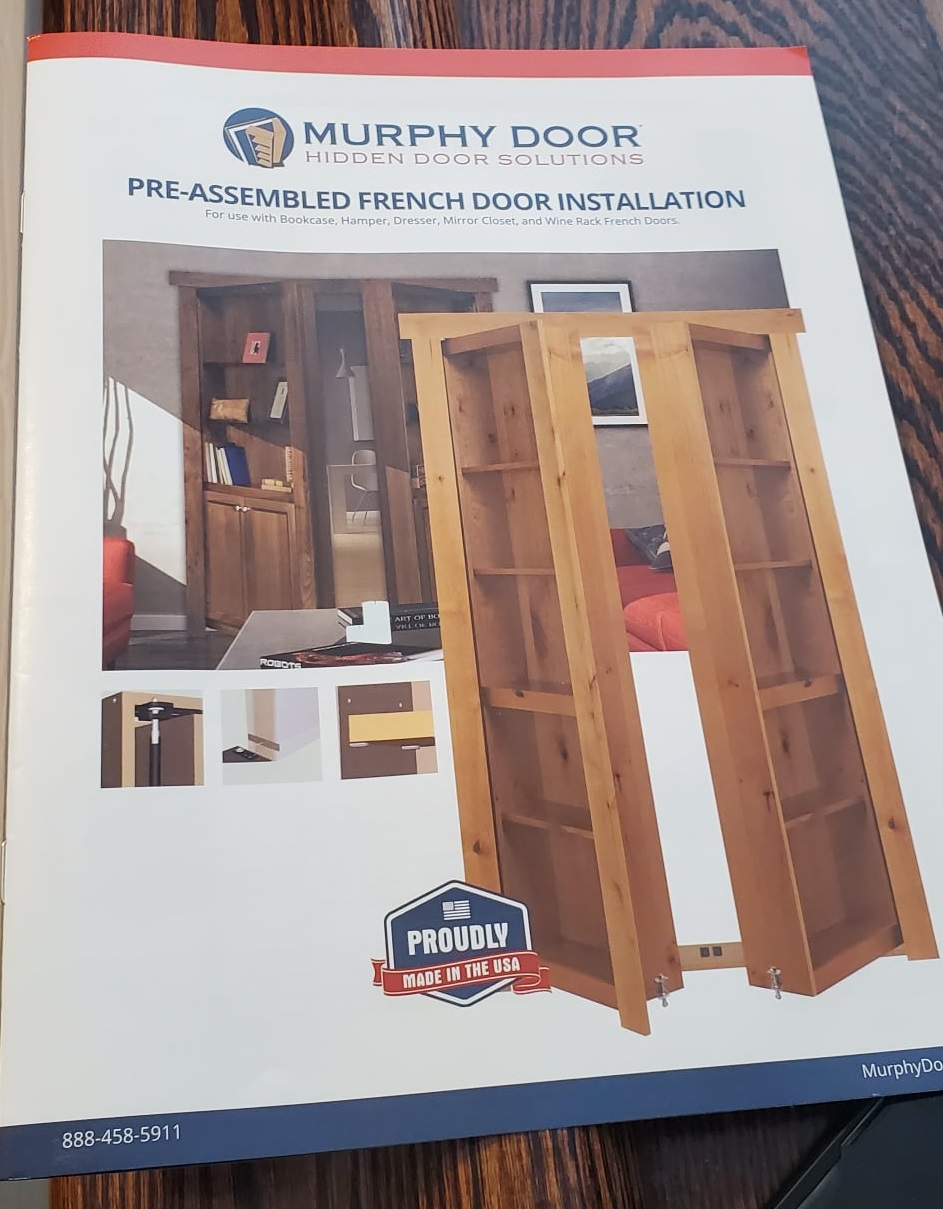
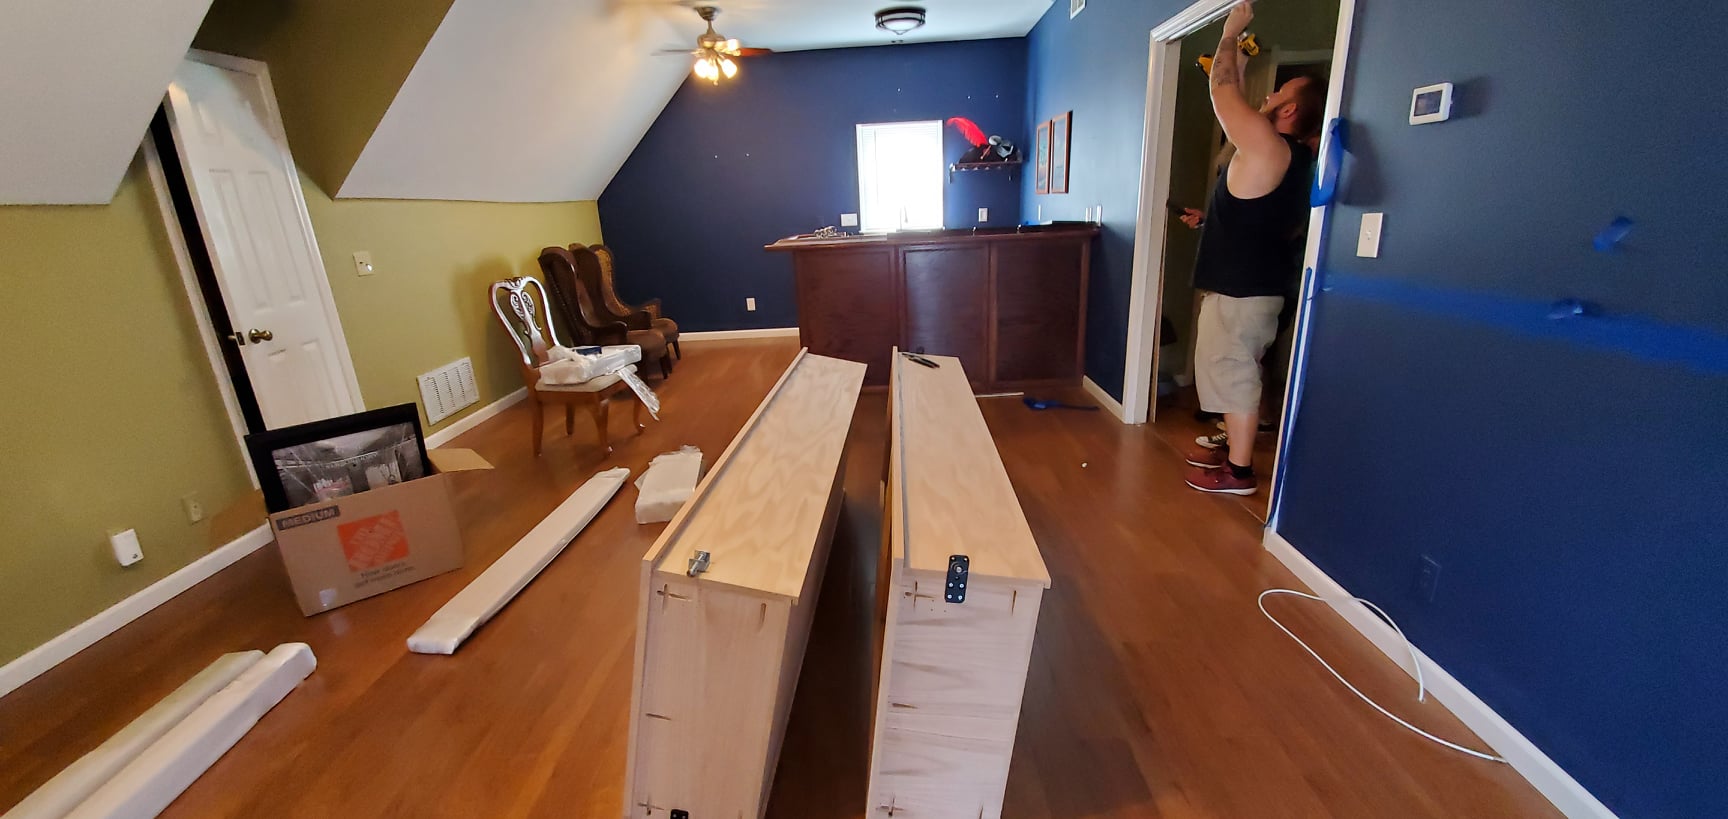
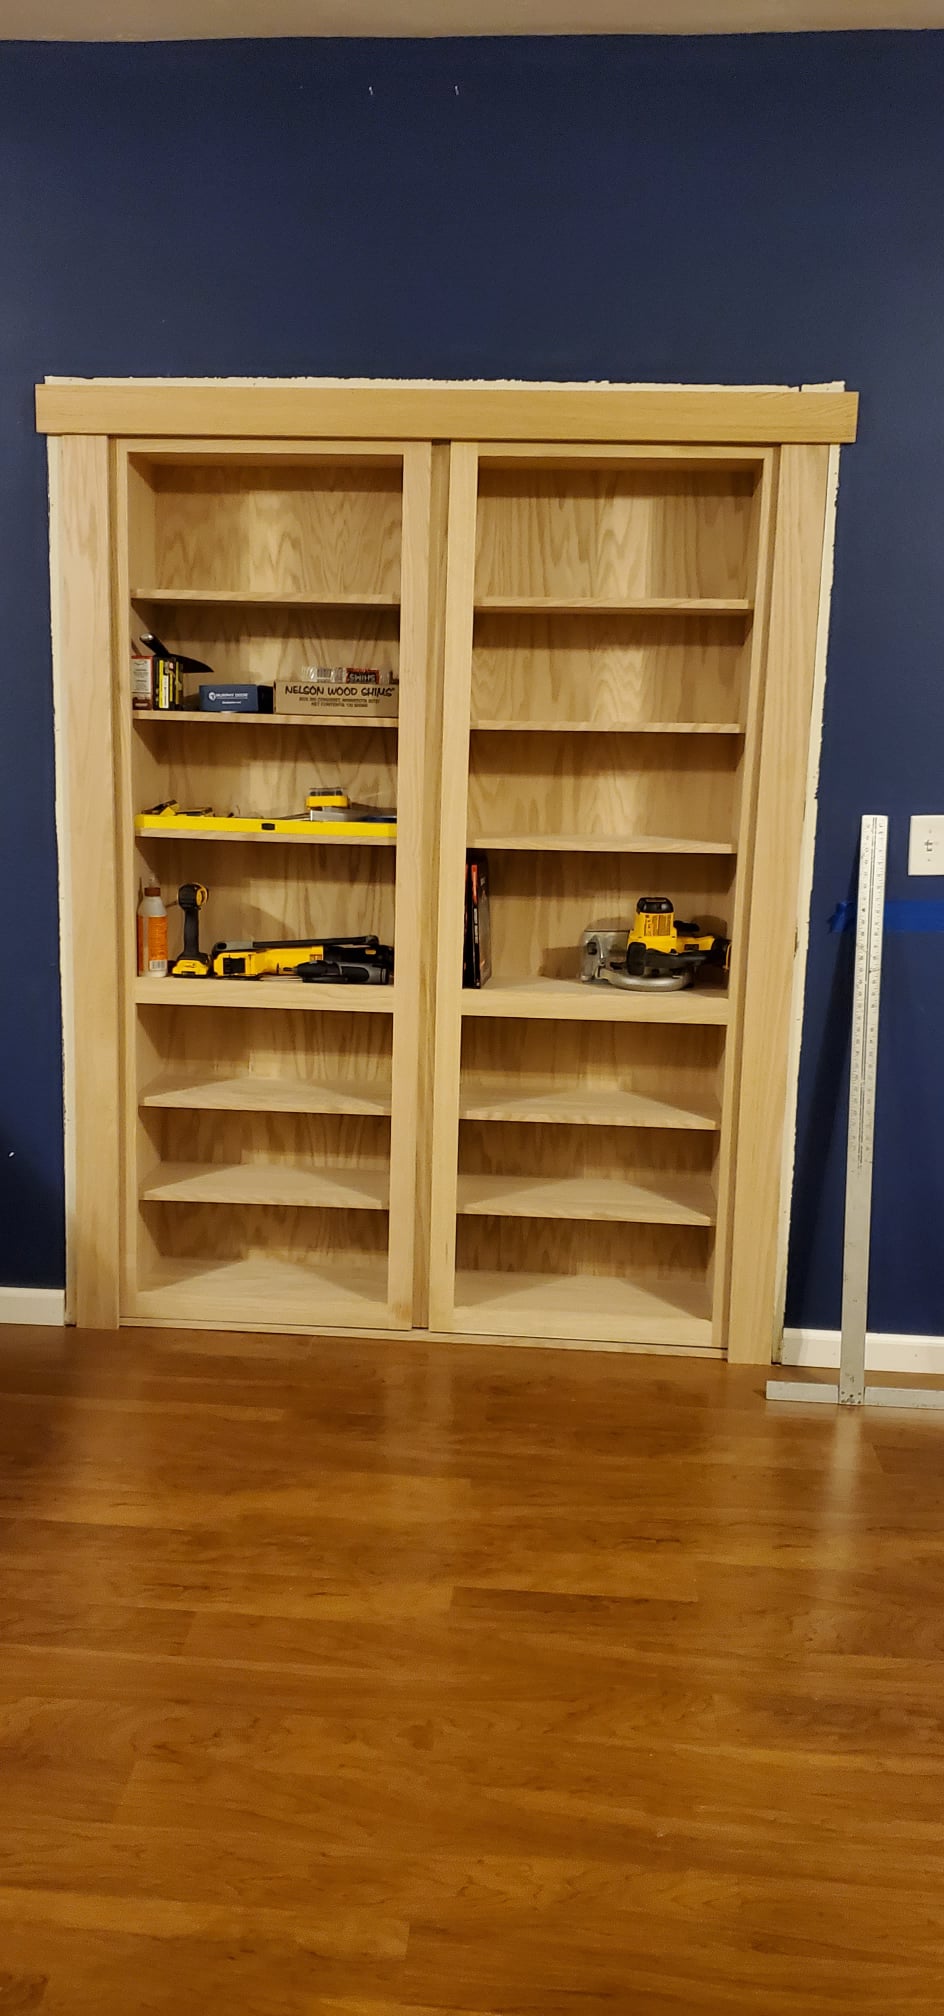
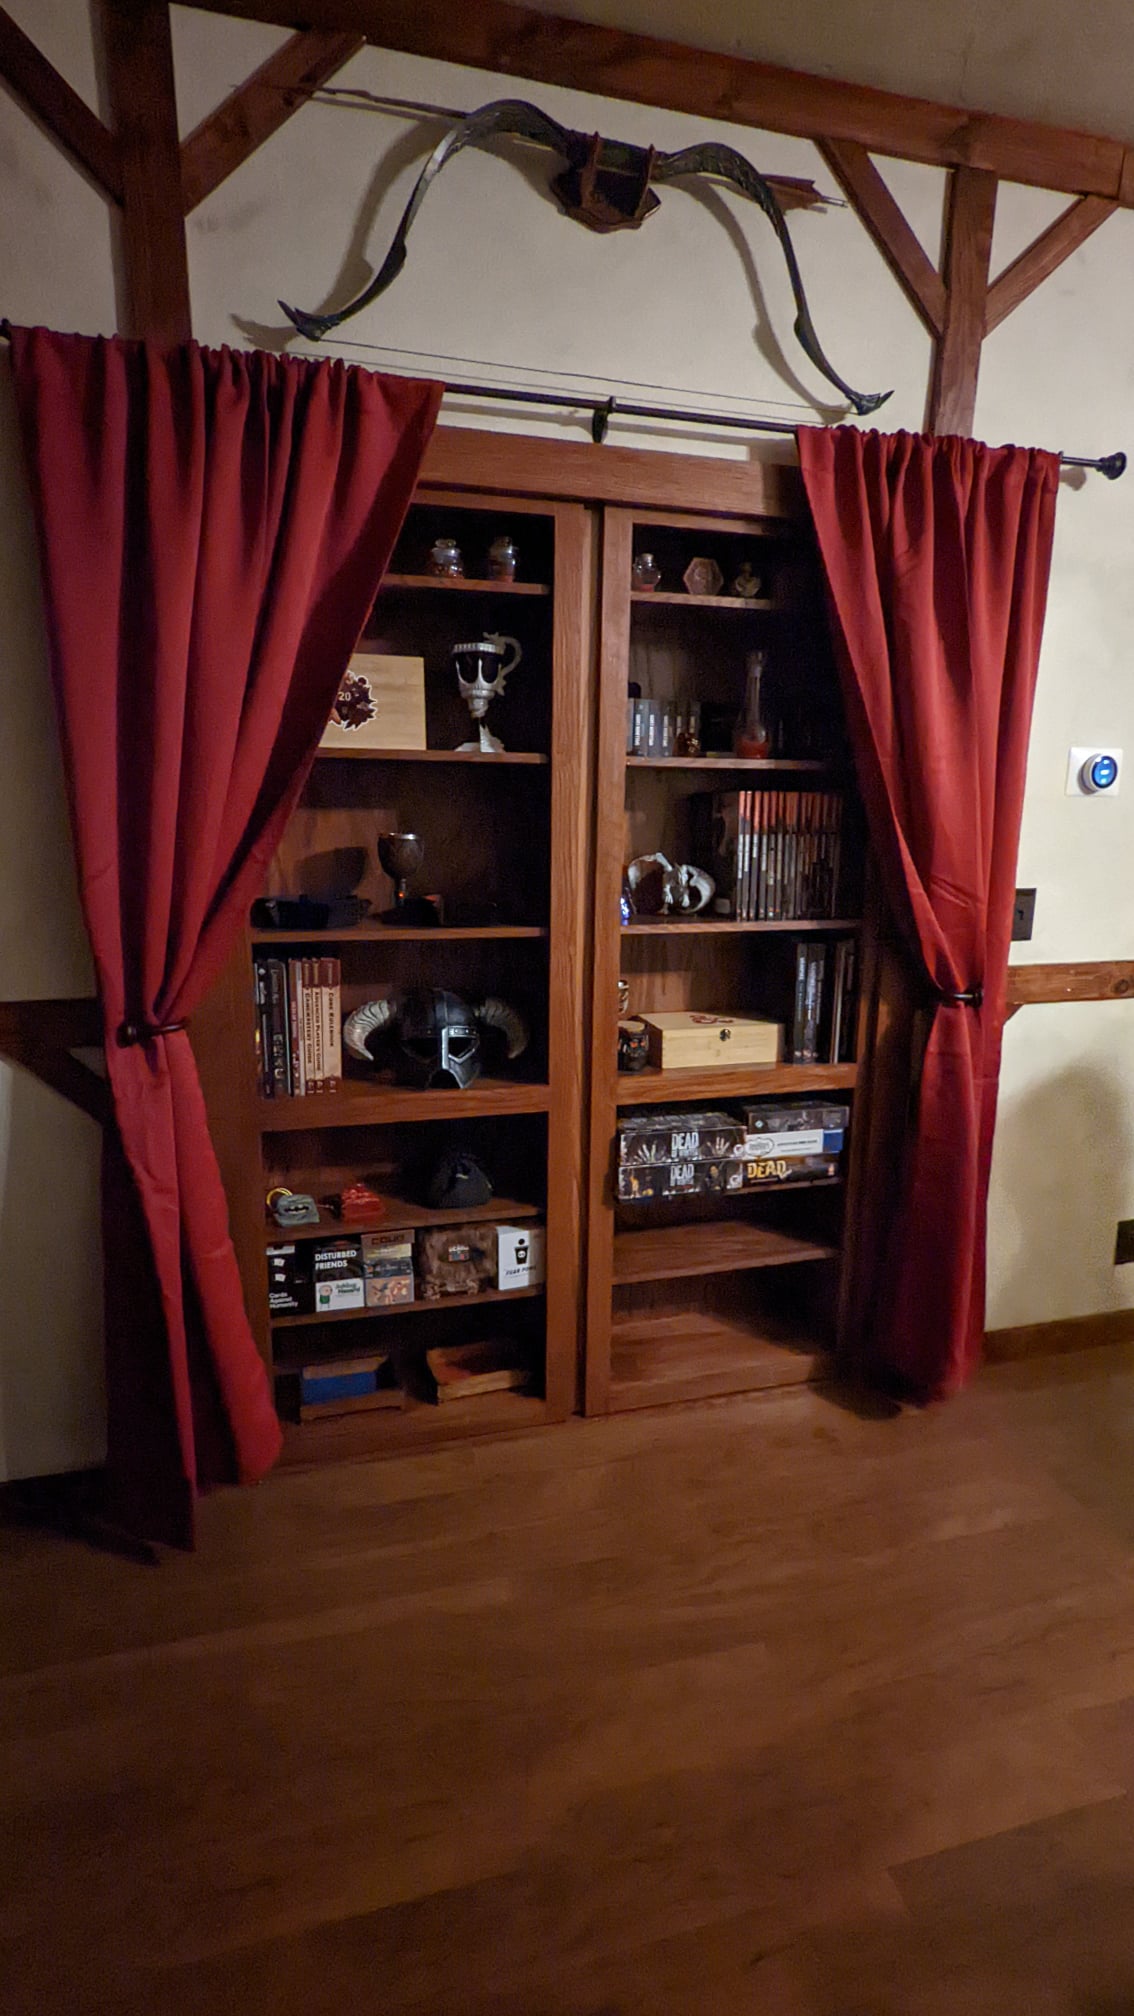
The Bookcase Doors
Quinn and I have ALWAYS wanted a secret room hidden by a bookcase. So, we got some inward opening Murphy Doors. Quinn and his brother installed them over the course of a day and a half. We learned a LOT about our walls, and the fact that basically none of them are plumb.
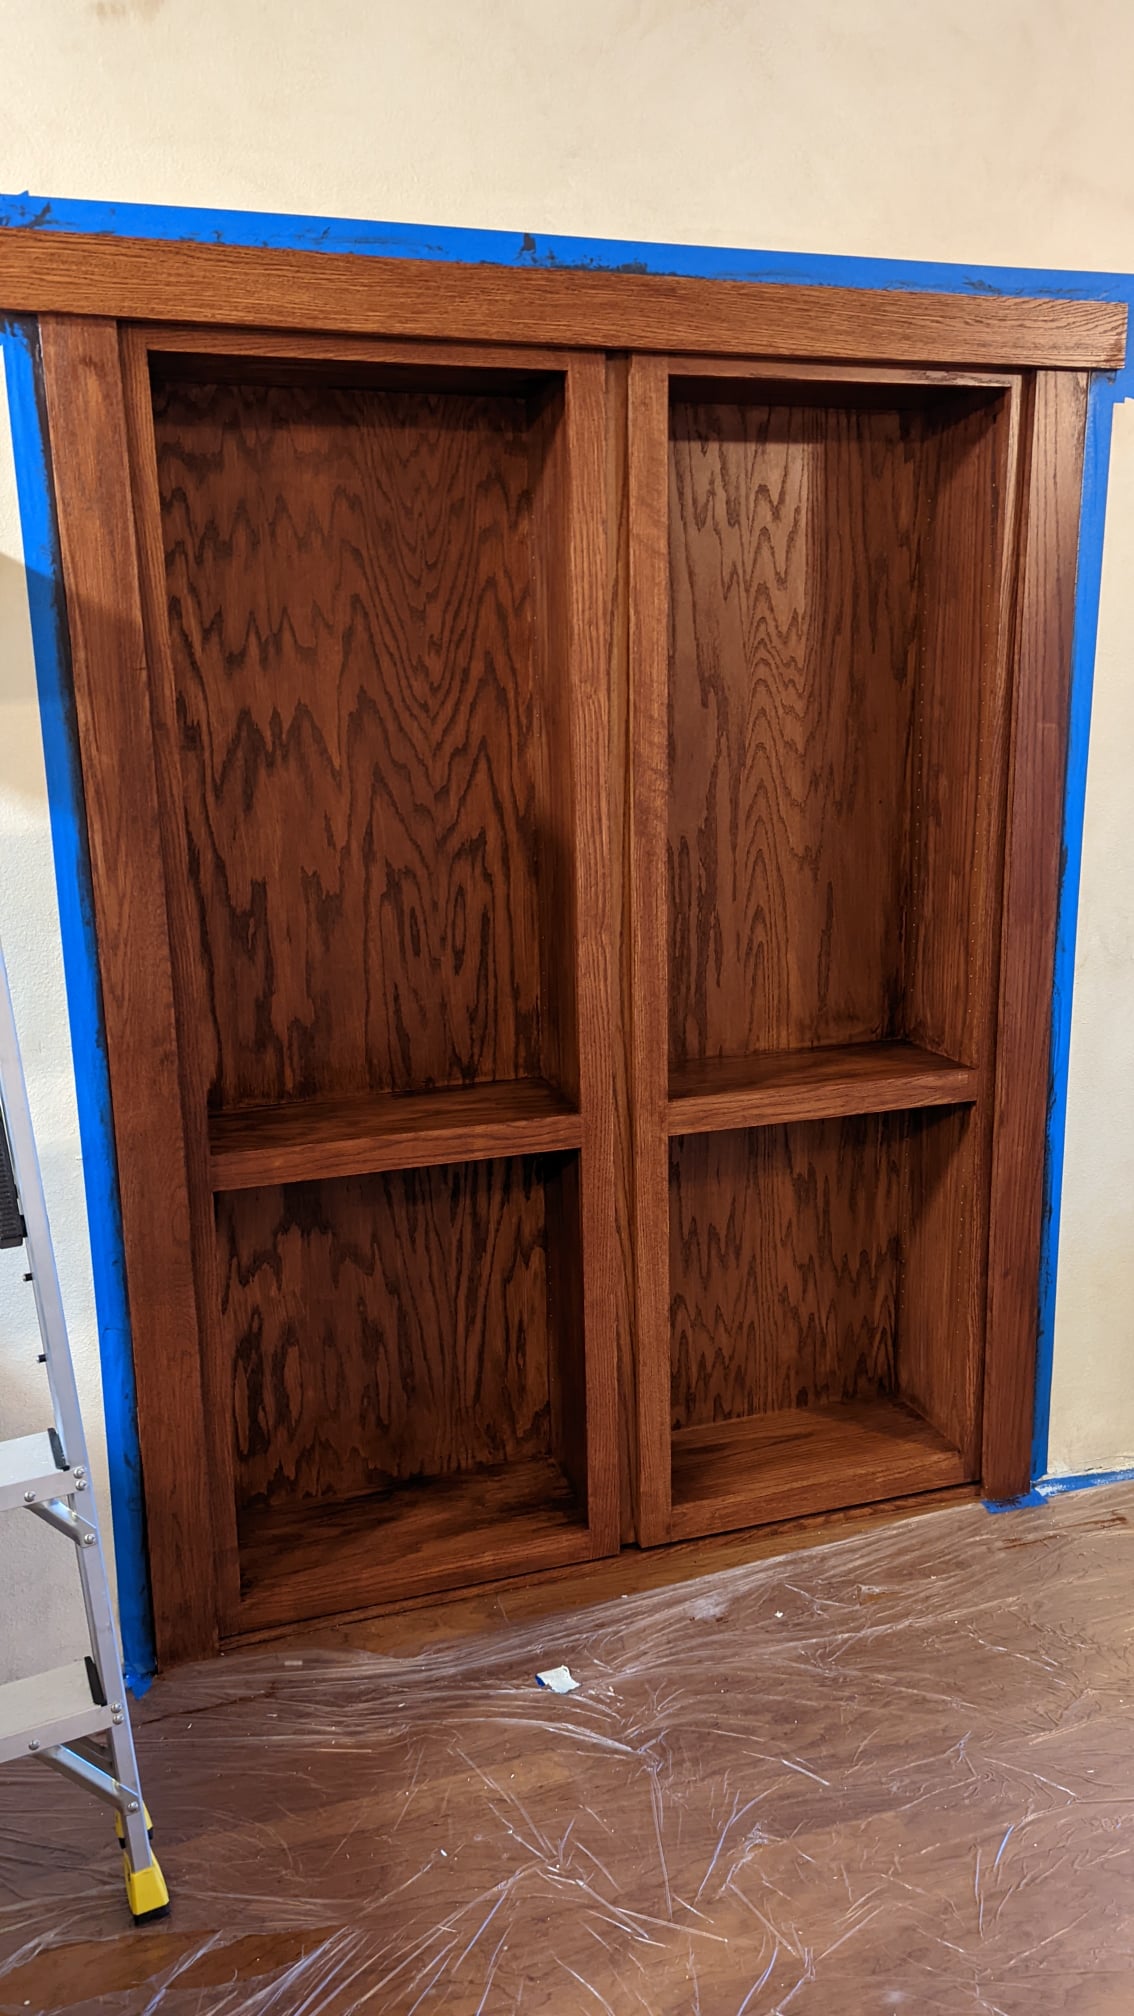
This process required some demo of the doorway, and we chose unfinished wood because we knew we were going to have stained wood accents in the room, and figured we would stain the bookcase to match. All things considered, the installation was relatively easy after demolition.


")


")
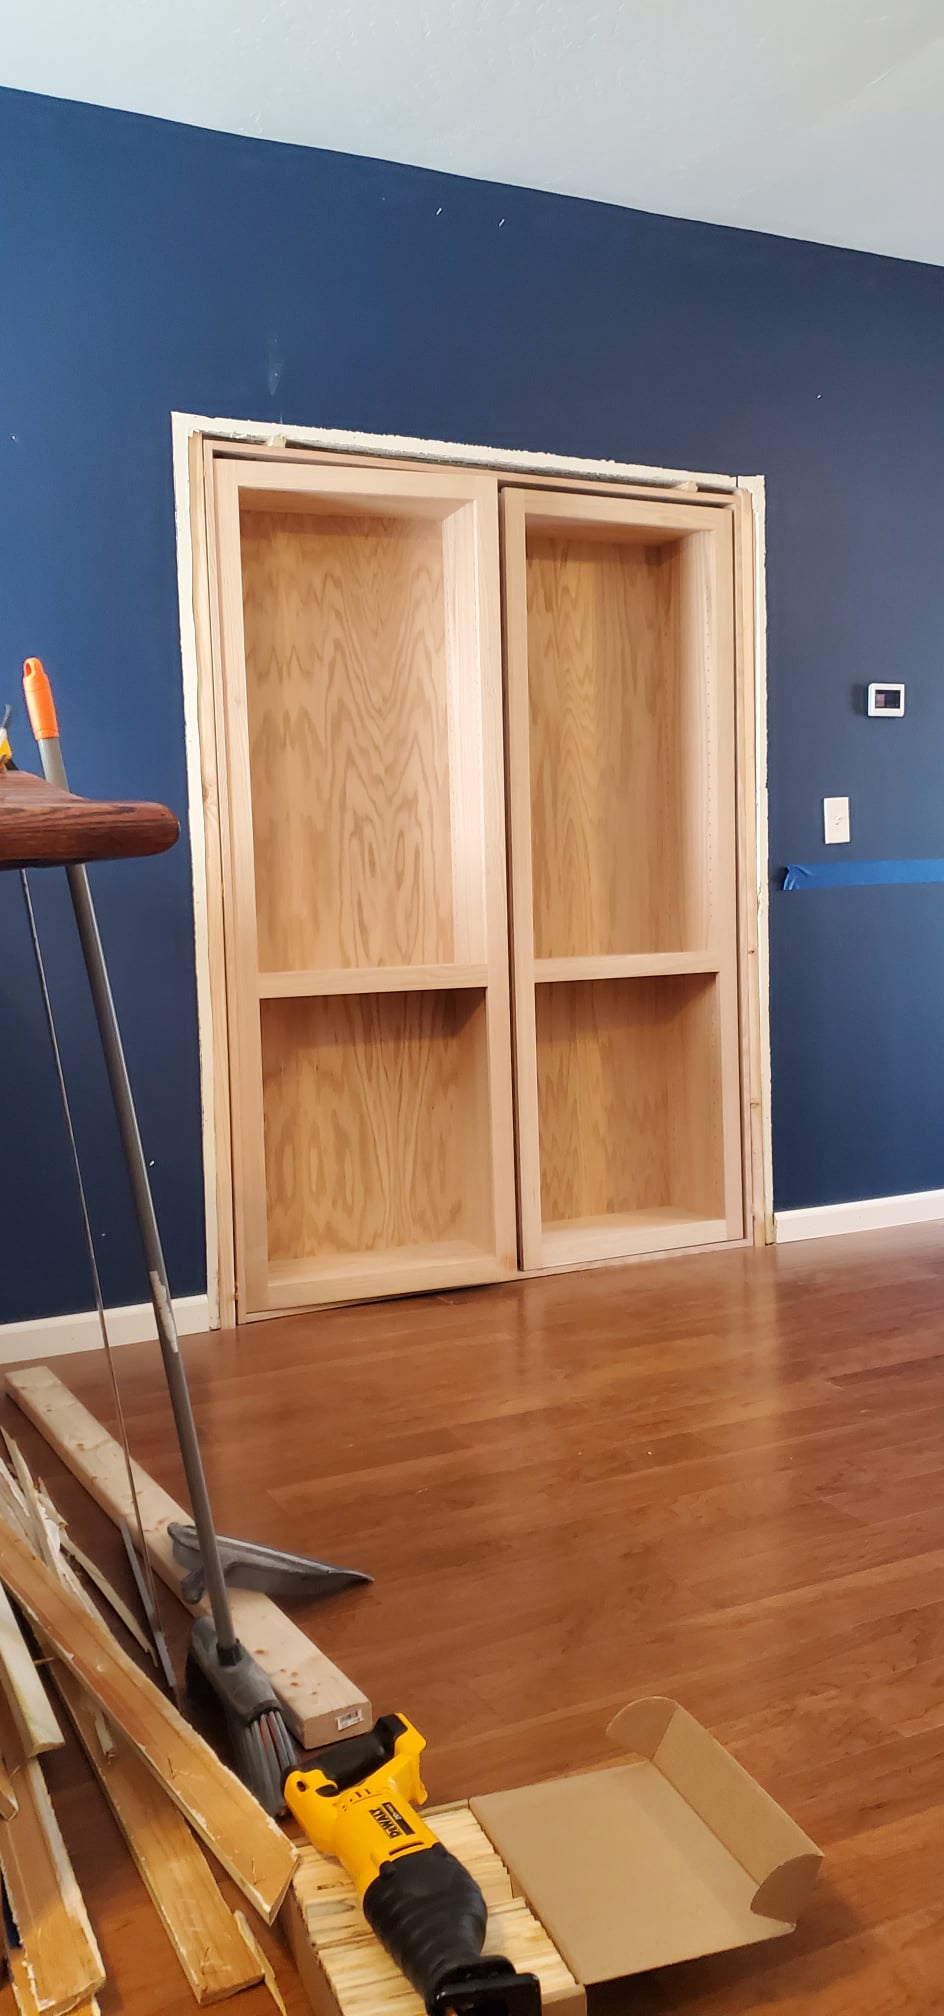
Here’s a video on what it was like to snap in the second door to the hinge/frames:
And here’s how it all worked after installation (with Quinn gleefully being a dork):
After we installed the bookcase doors, we sat on the designs for a few months as we figured out what we were going to do about the cobblestone. Ultimately, we decided not to use cobblestone, and instead do more of a plaster-wall type of tavern after looking at a bunch of other peoples’ D&D rooms.
Here’s an amazing build (click the picture for link) that we love from 2009. Also, holy cr*p, that is a ton of books! Eventually, we plan to also do recessed lighting and surround sound to be accessed by a DM tablet.

Here’s another awe-inspiring build that gave us the idea for how to paint our tavern, by Mr, Fruit.
Not gonna lie, we felt paralyzed for weeks after seeing that video. Neither of us are particularly gifted artists, and we didn’t really want to spend the money to pay someone to paint the whole room. Thus, we looked into other options that wouldn’t require actual artistry, but would give us the dirty, grungy effect, if not the “authenticity.” Meet: glazing a wall over faux plaster (ultimately, we forewent the plaster).
This guy’s video is super informative on how to glaze a wall.
This was another top contender for style/technique that we looked at.
Ultimately I took techniques from both videos (and others), and developed a system that would work for us. But first…we needed the walls to be white-ish.
We went with Behr’s Linen White at Home Depot (our closest hardware store, not a preference). Although the paint chip sample looks really yellowed, it looks a LOT whiter on a wall. But, it was off enough from bright white to satisfy our initial coat requirements for staining later. NOTE: FLAT MATTE PAINT IS NOT EASY TO CLEAN. The paint mixologist warned us that this would be very difficult to clean, unlike glossier paint. We acknowledged that, but decided we wanted it anyway because we didn’t want any gleam on our walls. Also, we (purposefully) don’t have kids, or plan to have kids in the tavern much, so we aren’t too worried about getting stuff on the walls.


It took 3 coats on the walls (1 on the ceiling) to get it white enough to not see the blue through it. The lighting/phone camera make the 2nd coat look whiter than it was. It still needed that 3rd coat.


Staining the Walls
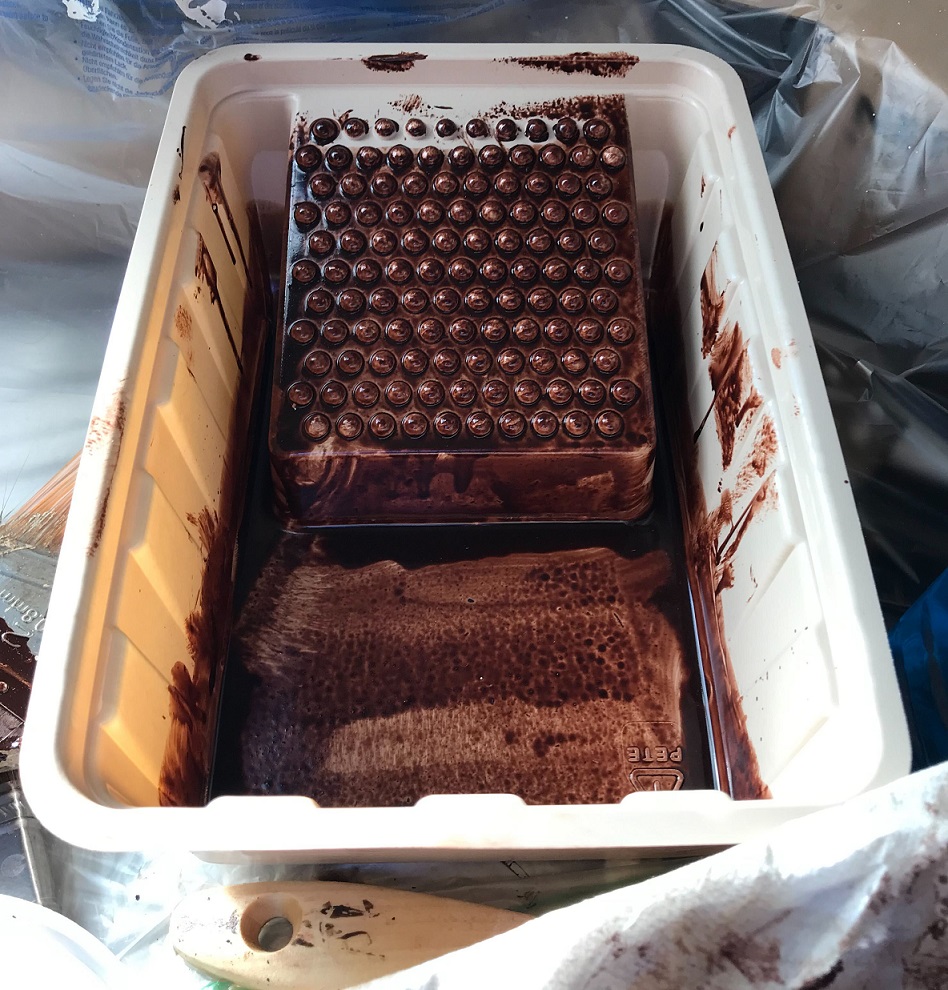
We were again at a standstill on this for a few days while I worked up the courage to tackle this project. But, once I found some glaze (had to try 3 different hardware stores), I decided to just have a practice go at it, since I still had all the paint materials out and I could just paint over it if I messed up. My first test was just the concentrated glaze, with no water dilution. WAY too dark.

I then tried diluting it with water and it ended up being much lighter and more of a ‘dusting’ of dirt, rather than outright mud.

Once Quinn approved the look, it took about 3 or 4 days to finish the rest of the tavern. Sometimes I got in a great groove, and sometimes it looked like we now had water damage. As I did the ceiling bit, I realized that I didn’t know how to properly blend the bottom and top sections, which meant the overlap was darker, and it sort of looked like the place had been flooded up to the limit of my reach/range. Not gonna lie, that bothered me for a long while. But then we decorated the tavern, and now you don’t notice it. I mean, you might not have noticed it anyway had I not pointed it out, but it’s one of those “it doesn’t have to be perfect” moments that I had to get past.


Here’s my staining technique (closed captioning available):
Tavern Wood Staining
This part of the build took FOR-EV-ER.
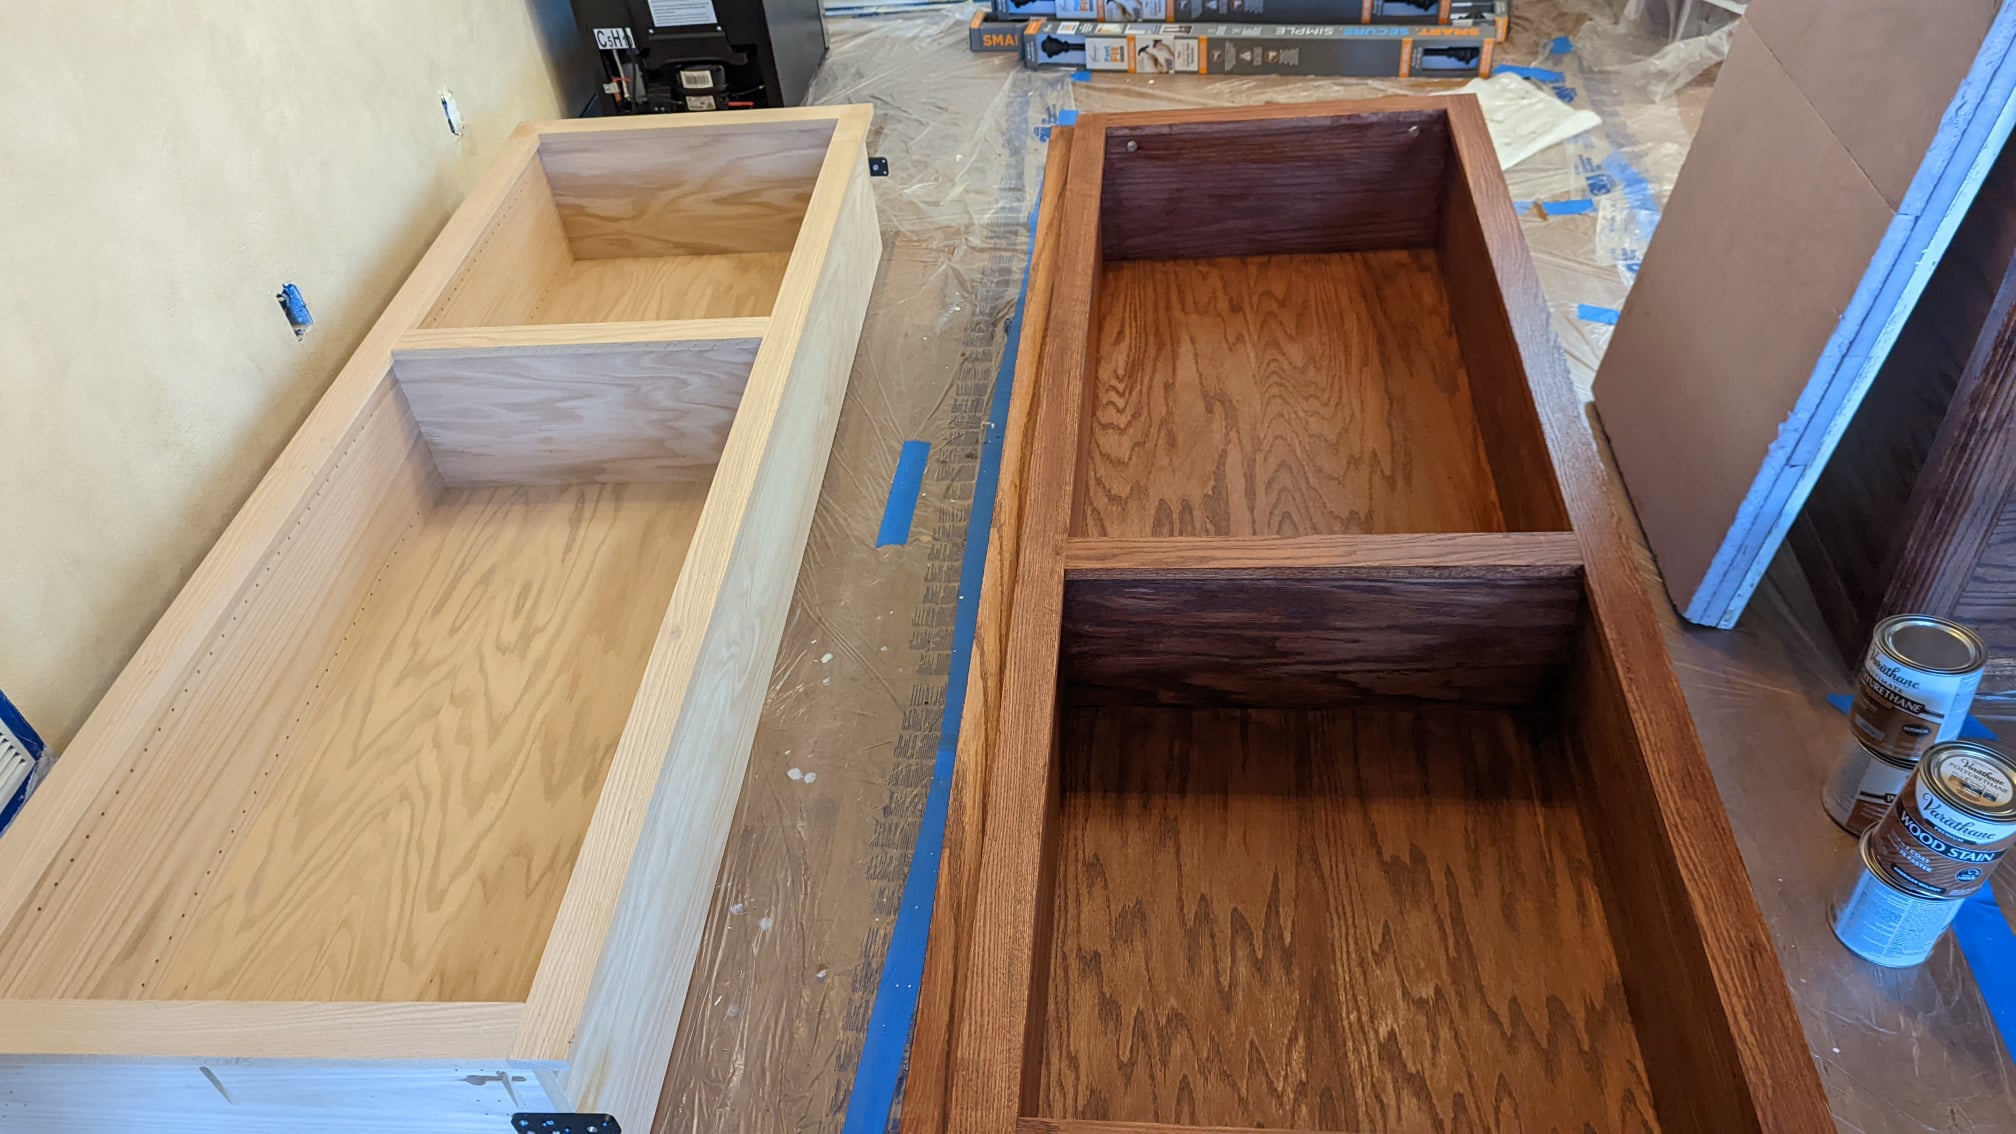
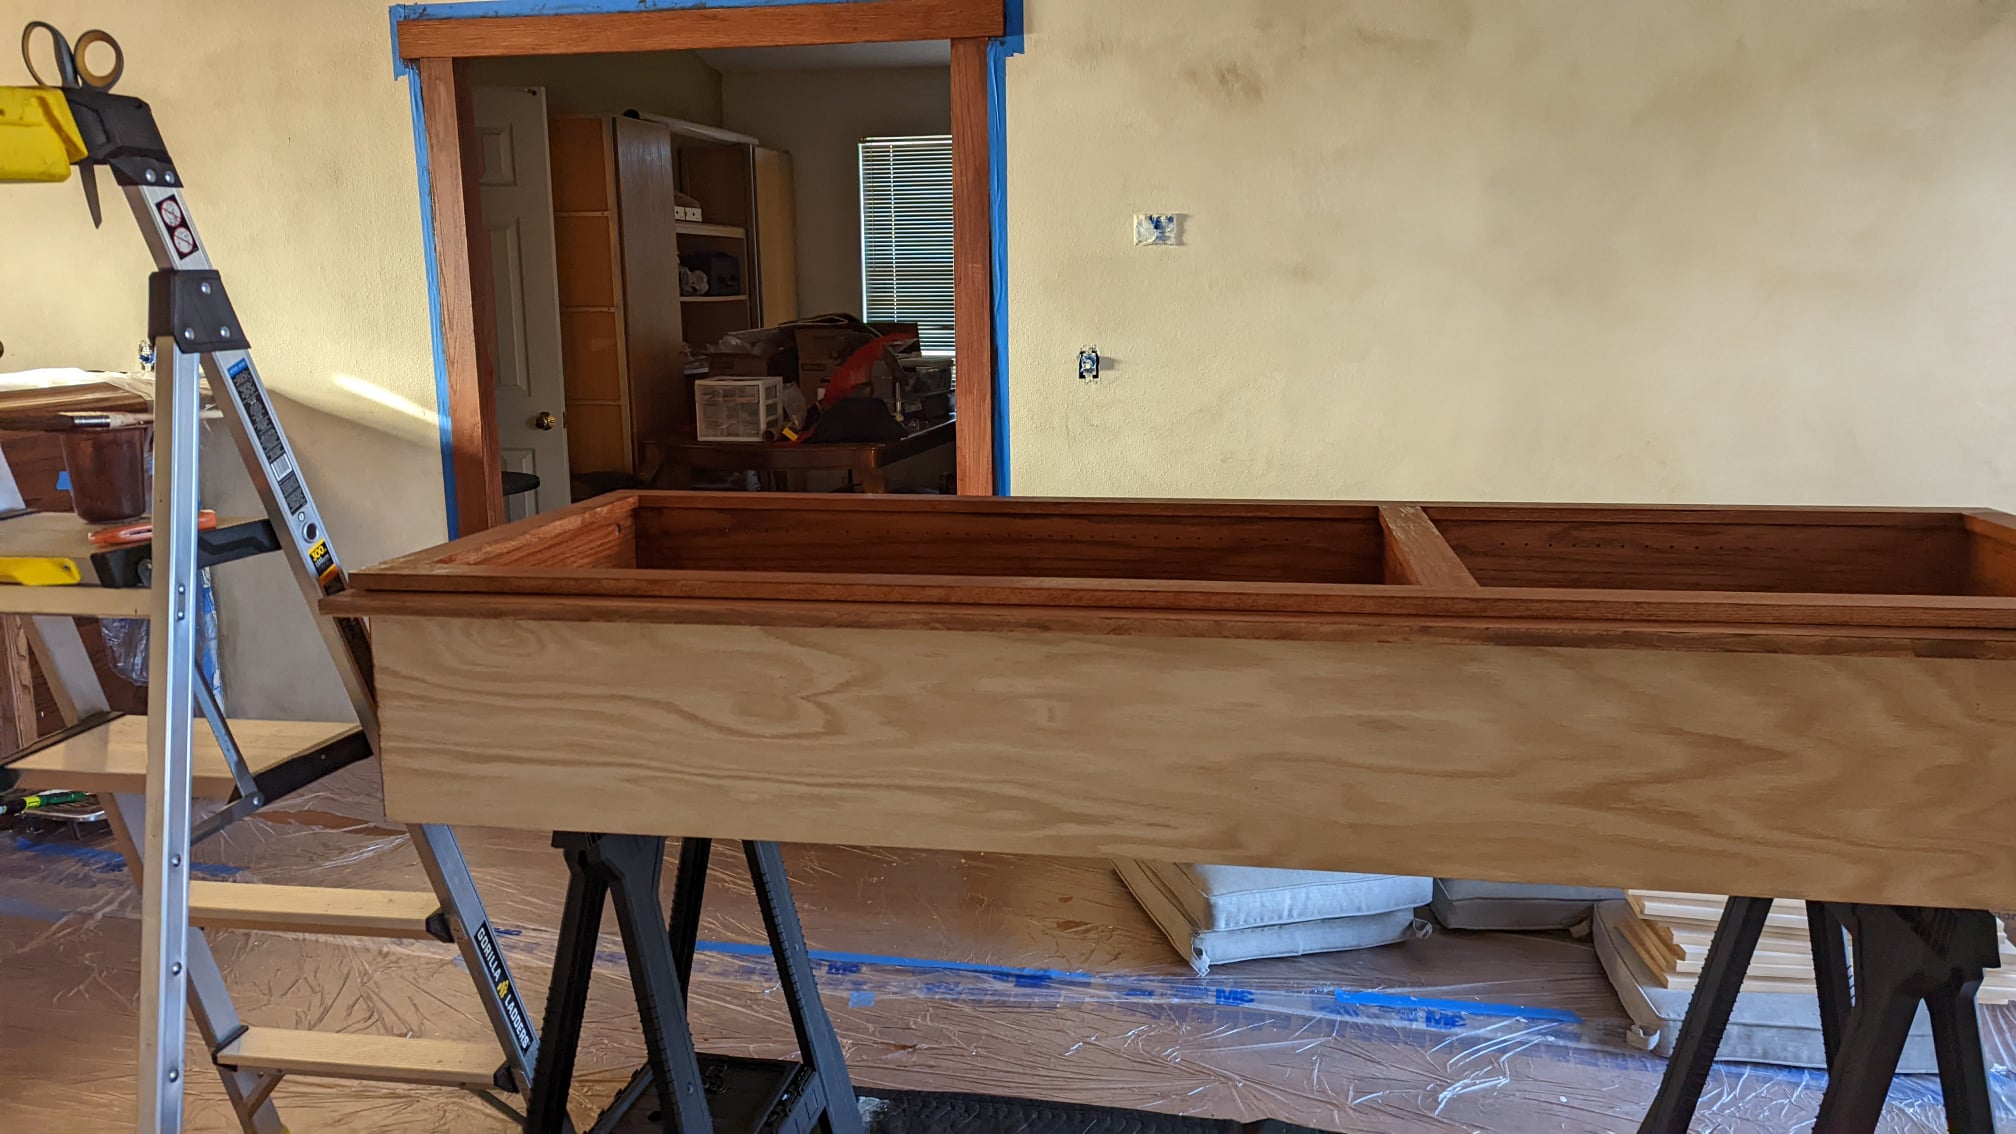
Because our walls are a bit wonky, and since some of the boards bowed in or out, we didn’t know which side of any given board we would want to use. To save time (so I’d hoped), I stained all 4 sides of every board (didn’t do the ends because we would be cutting to fit and would touch up later). I wasn’t quite as thorough with the sealant, though, which I only applied on 3 sides of every board. The base/wall boards only got 1 coat of stain and sealant. The bookcase got 2-4 coats of sealant, depending on the location (more coats applied to places we anticipated people touching the most, since they’re doors to the bathroom, and would be used frequently).
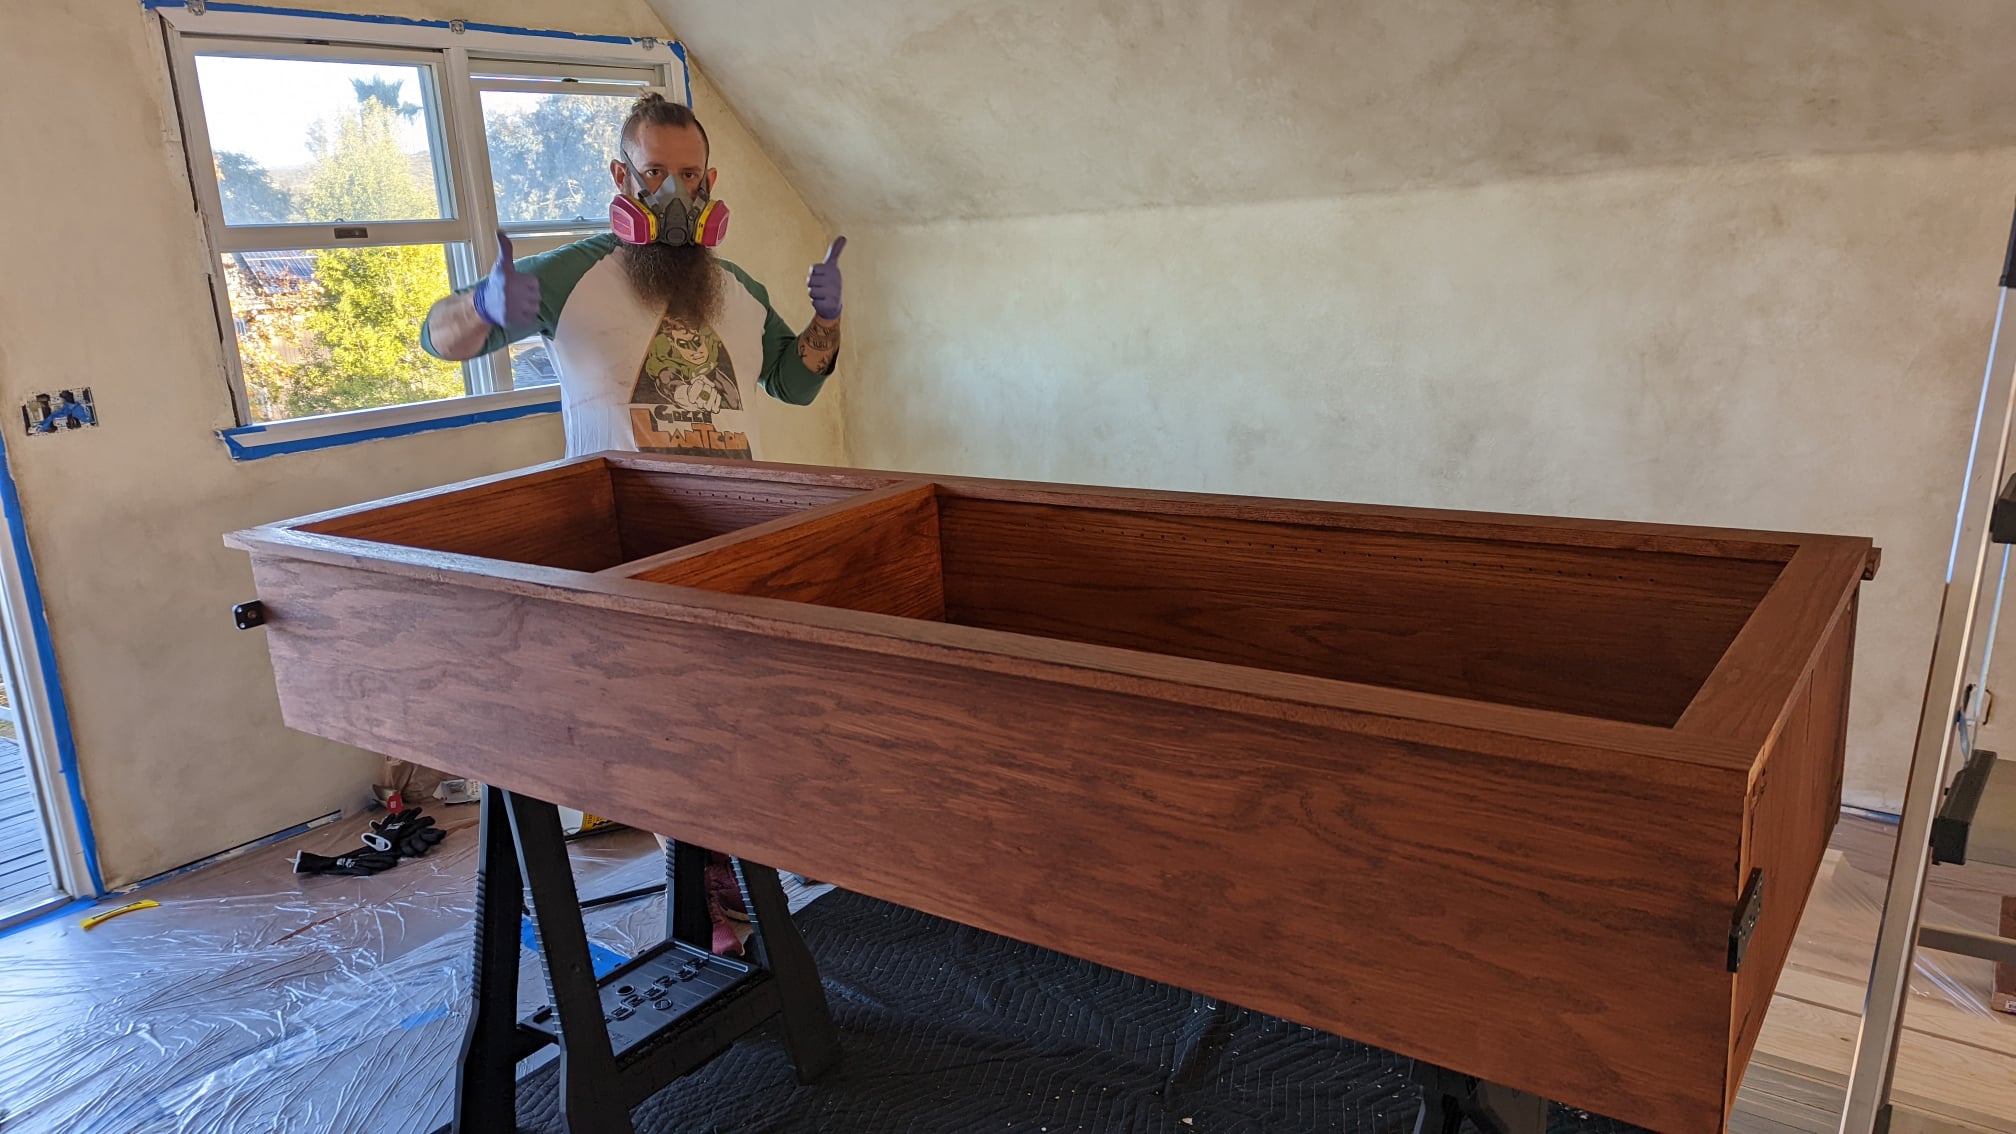
After some tests on a 2×4, we went with Varathane – American Walnut Premium Fast Dry Interior Wood Stain as our stain color choice. We only did 1 coat of stain, as two was too dark for our purposes and obscured the wood grain.

Since we didn’t want to spend the money replacing the vinyl flooring, we needed a warmer tone (i.e. red) stain so that it would relate to the floor but not look like we were bad at matching color. We went back and forth over what to do about the dark brown color of the actual bar, and decided it was an issue for a later date. We had a task, and we needed to complete it, and the bar wasn’t part of that task. Ultimately, with the various wood colors introduced by the boards, painted-wood features, and furniture, the dark wood of the bar bench didn’t stand out as starkly at the end.
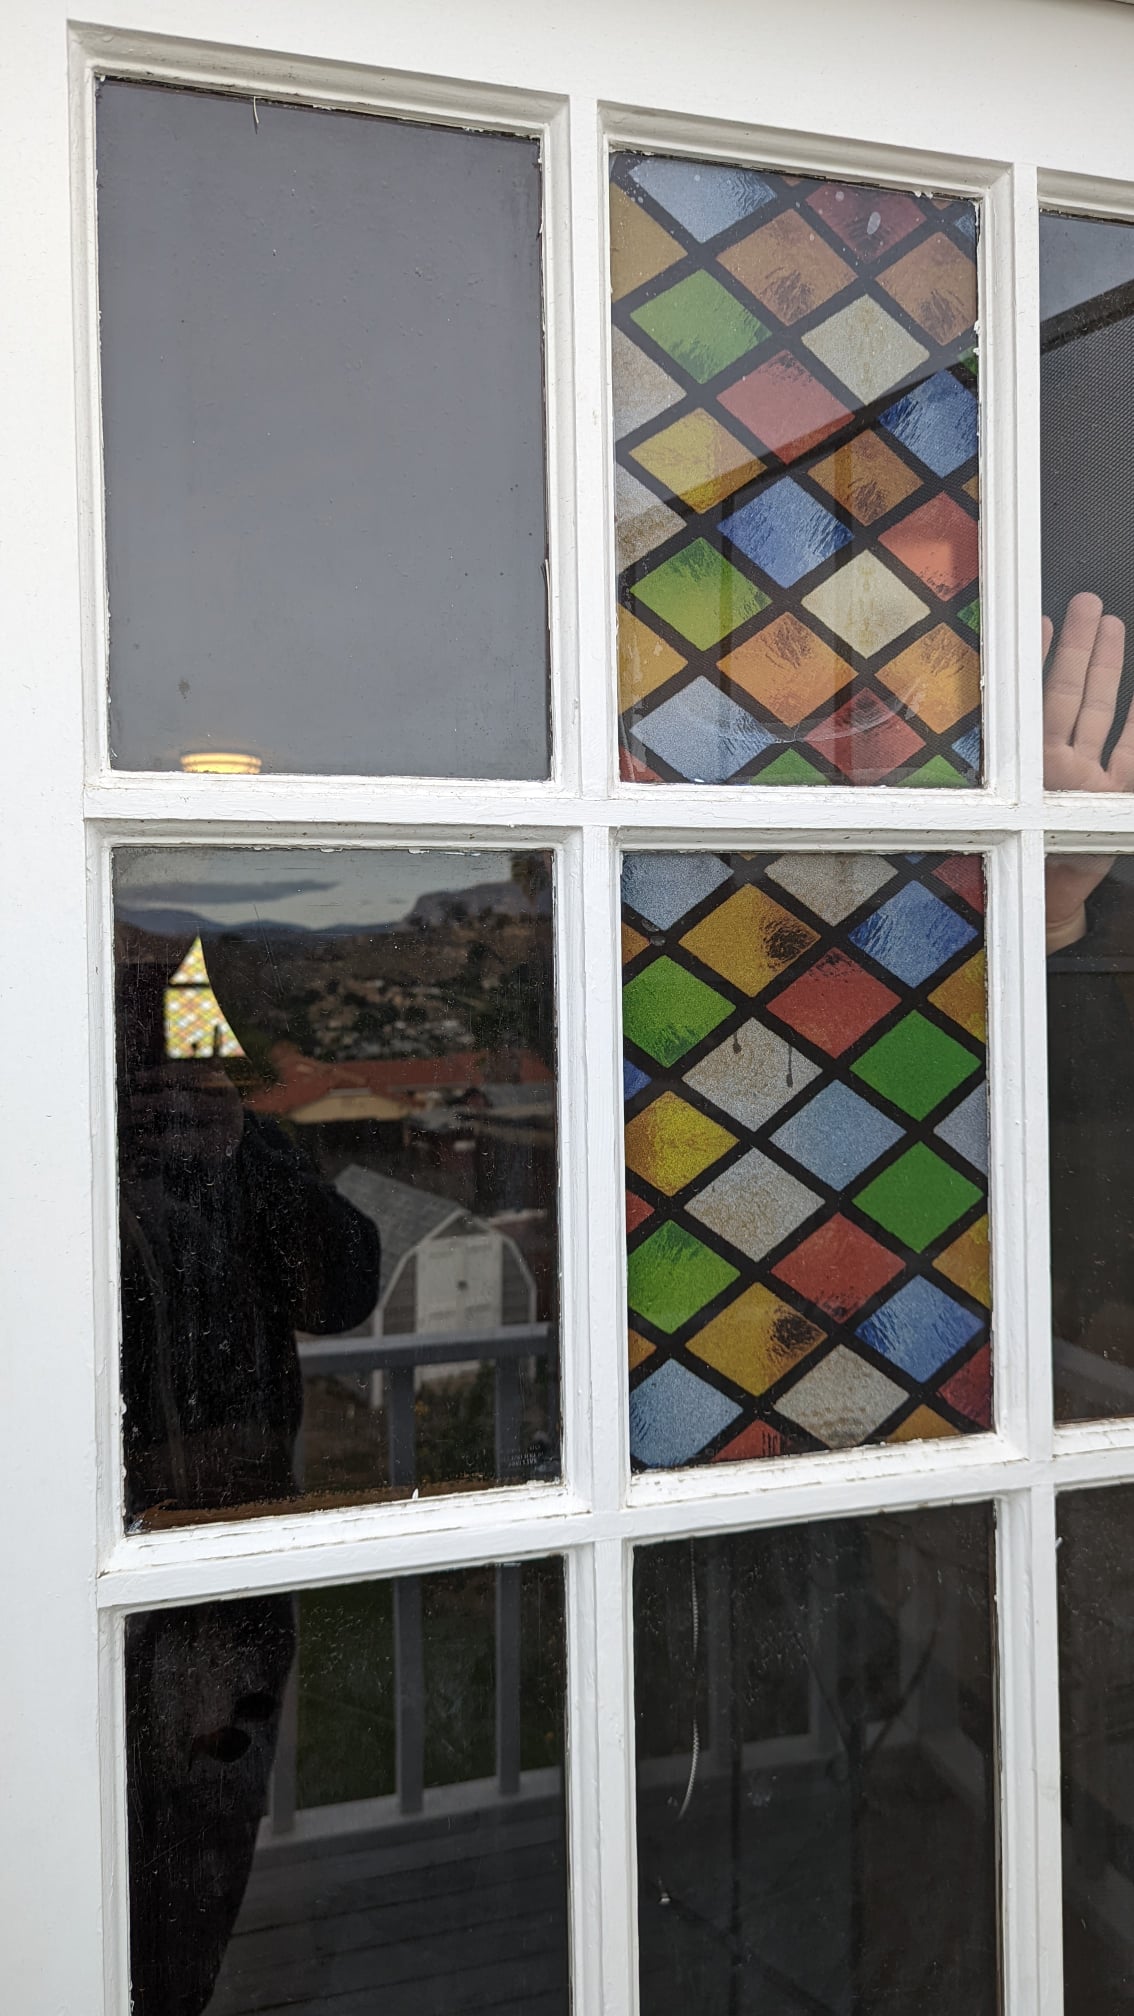
For a sealant, we used Varathane – Clear Satin Oil-Based Interior Polyurethane. There were a lot of choices, and the internet basically said this would be fine for our uses. I was afraid it would feel tacky after drying, but it’s not. It feels fine, and seals in the color of the stain–a particular concern for high-touch surfaces, such as our bookcase doors. Since we were going to put stained-glass stickers over our windows, we weren’t worried about sun damage to the stain color, but I didn’t want to have to worry if some beer got on the floorboards, so they got at least 1 coat.

Tips for Staining Wood:
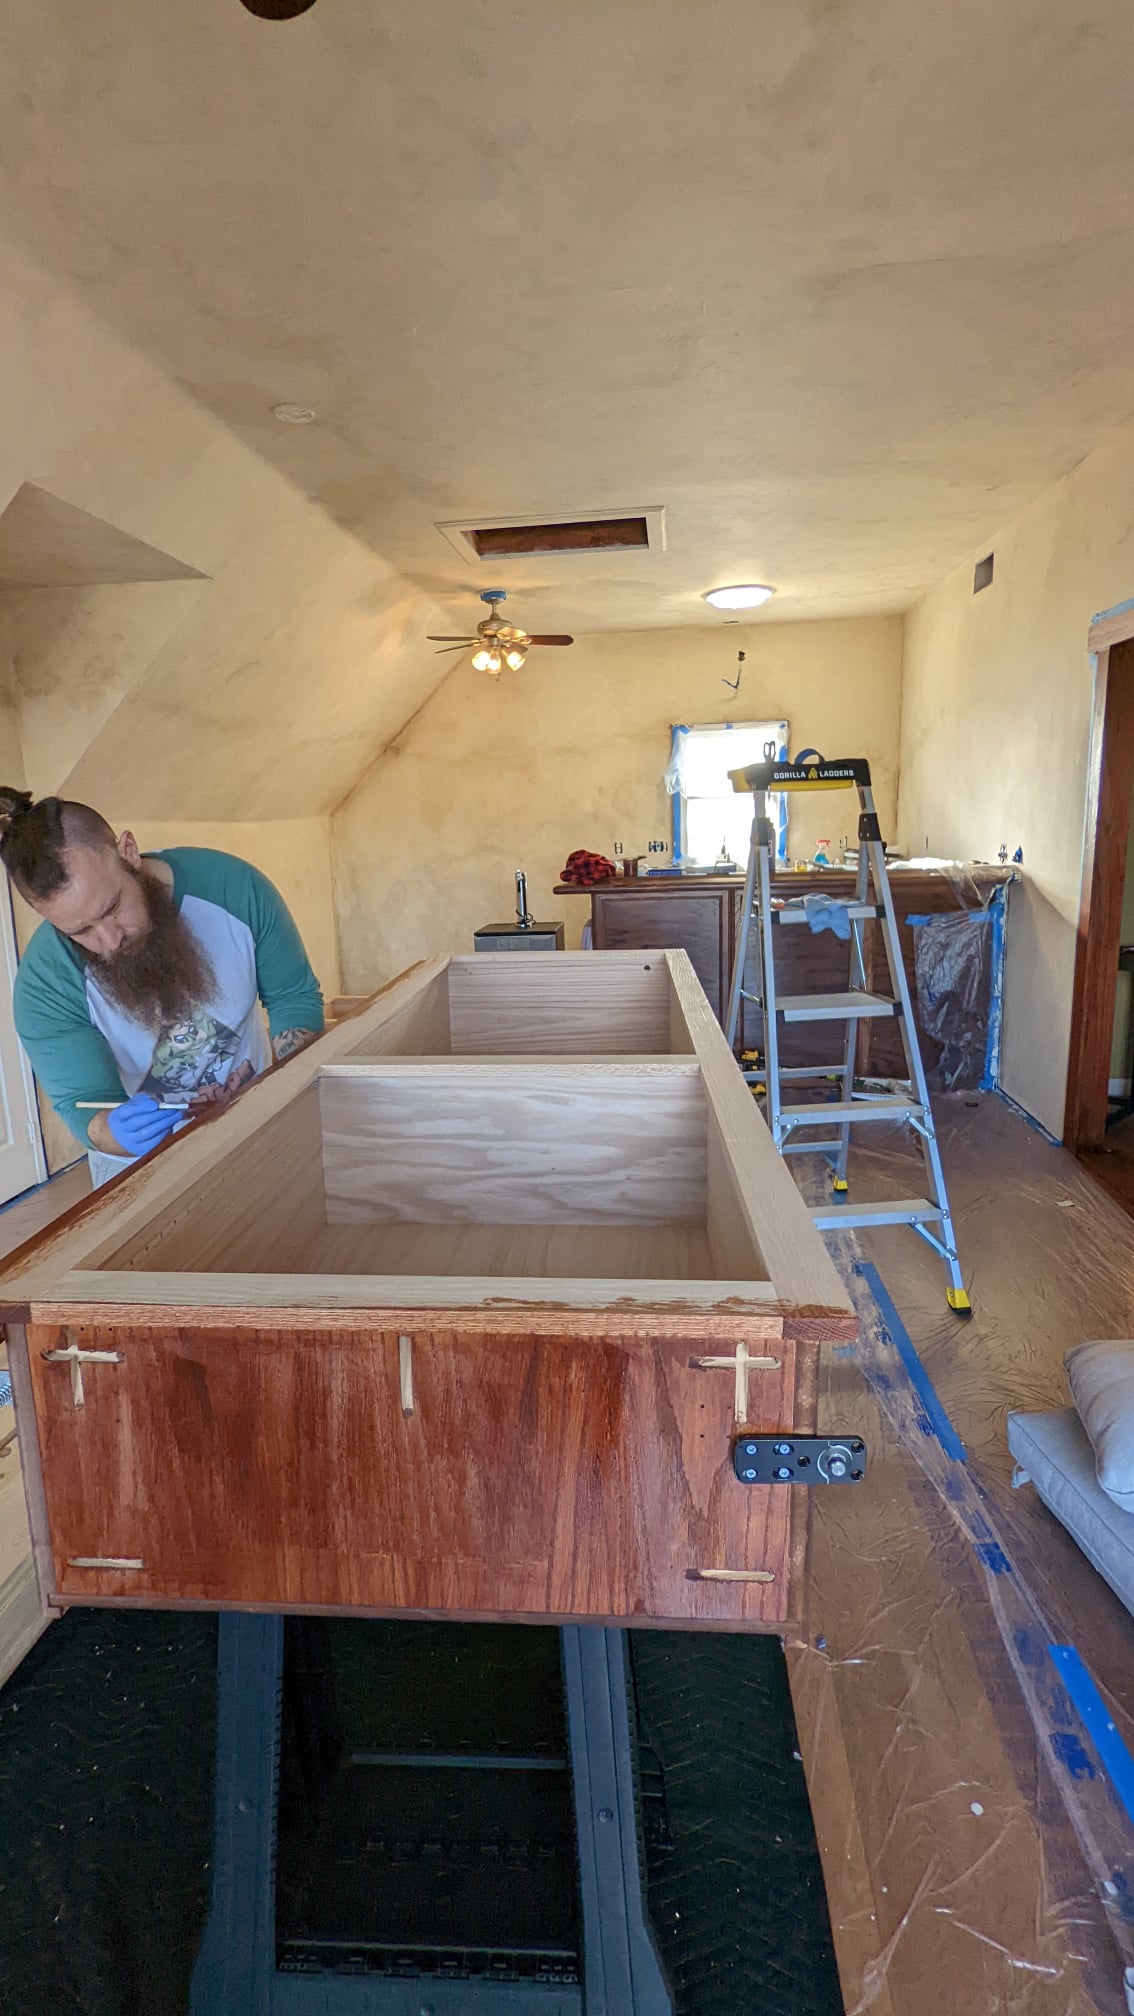
- WEAR PROPER SAFETY GEAR, SUCH AS N95 MASKS OR ACTUAL RESPIRATORS (PANEDMIC ALLOWING)—OR WORK OUTSIDE. These fumes are no joke. When working inside with poor ventilation, we used the respirators we got for dice making: 3M Professional Multi-Purpose Respirator, Medium (62023H1-DC). I don’t know if they’re 100% useful in this situation, but they helped a LOT with tolerating the stain fumes.

- Don’t wear anything you like, but DO wear long pants, if you can. While paint comes off easily, stain doesn’t. I looked like I had birthmarks all over for weeks after each staining session.

- Use a high density foam roller, not a fabric roller. Fabric rollers (like you would use for paint) will soak up the stain. You’ll waste a lot of stain and get an uneven coat. Foam rollers won’t soak up as much, and will give you more even coverage–BUT, you’ll also need a paint brush to get the “wood effect” look after getting the stain on the board.
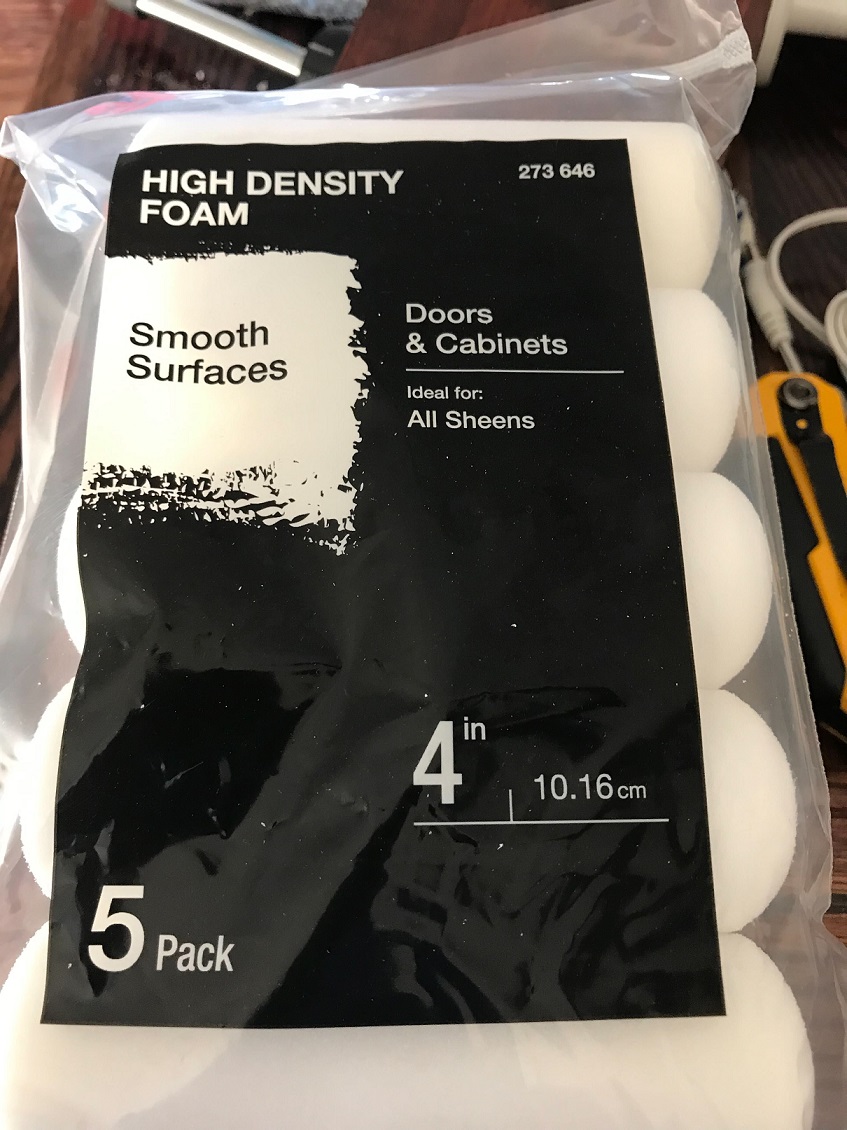
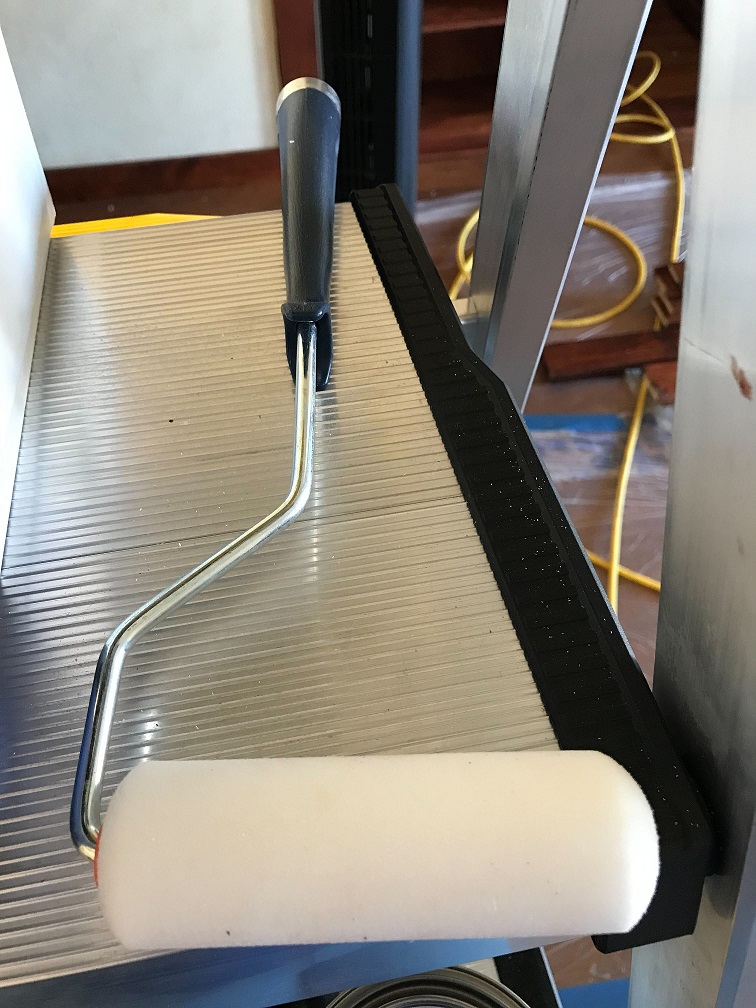
For example, left to right: (1) here’s what the foam roller looks like on its own (leopard spots), (2) half gone over with a paint brush for comparison, and (3) fully gone over with a paint brush. The paint brush gives you back that ‘wood’ look after getting the initial color coverage.


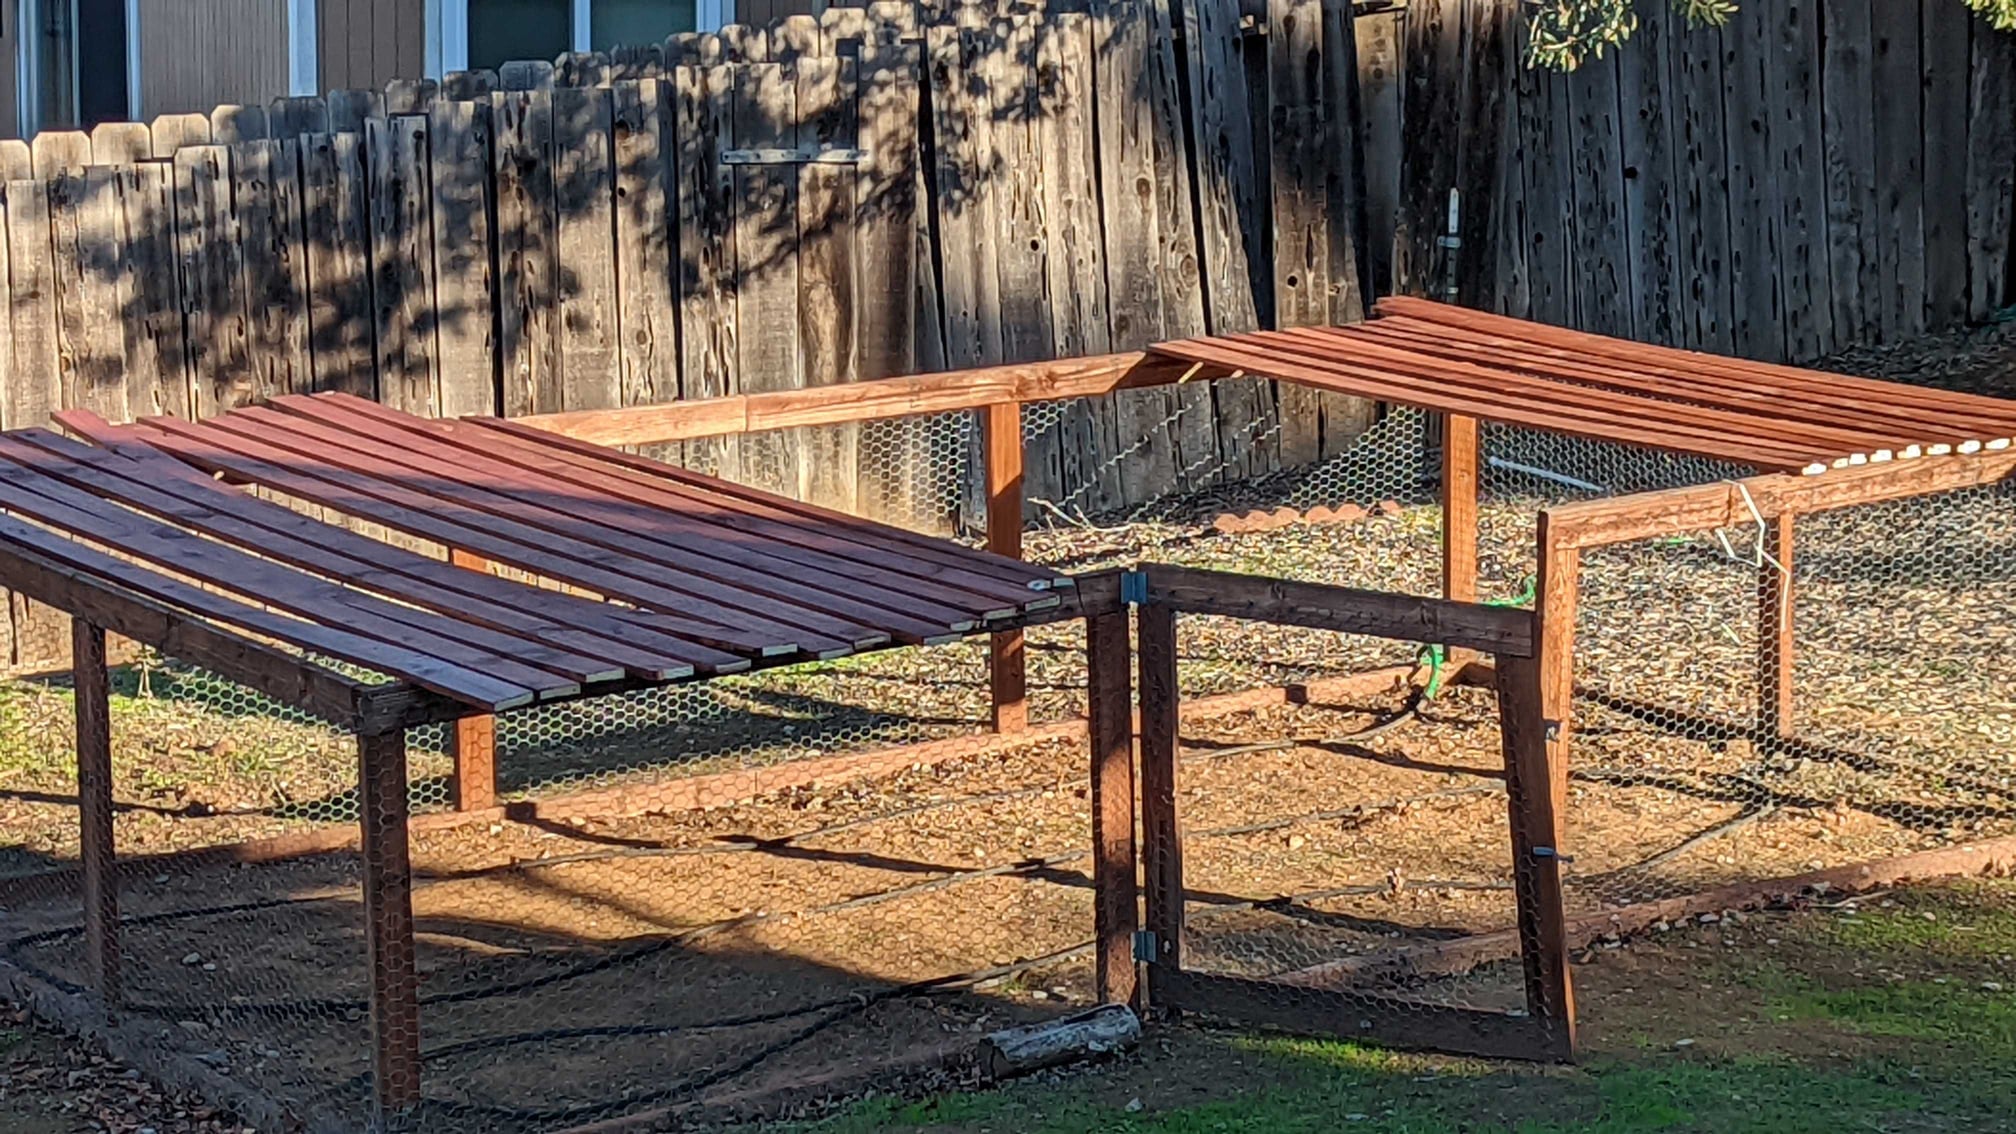
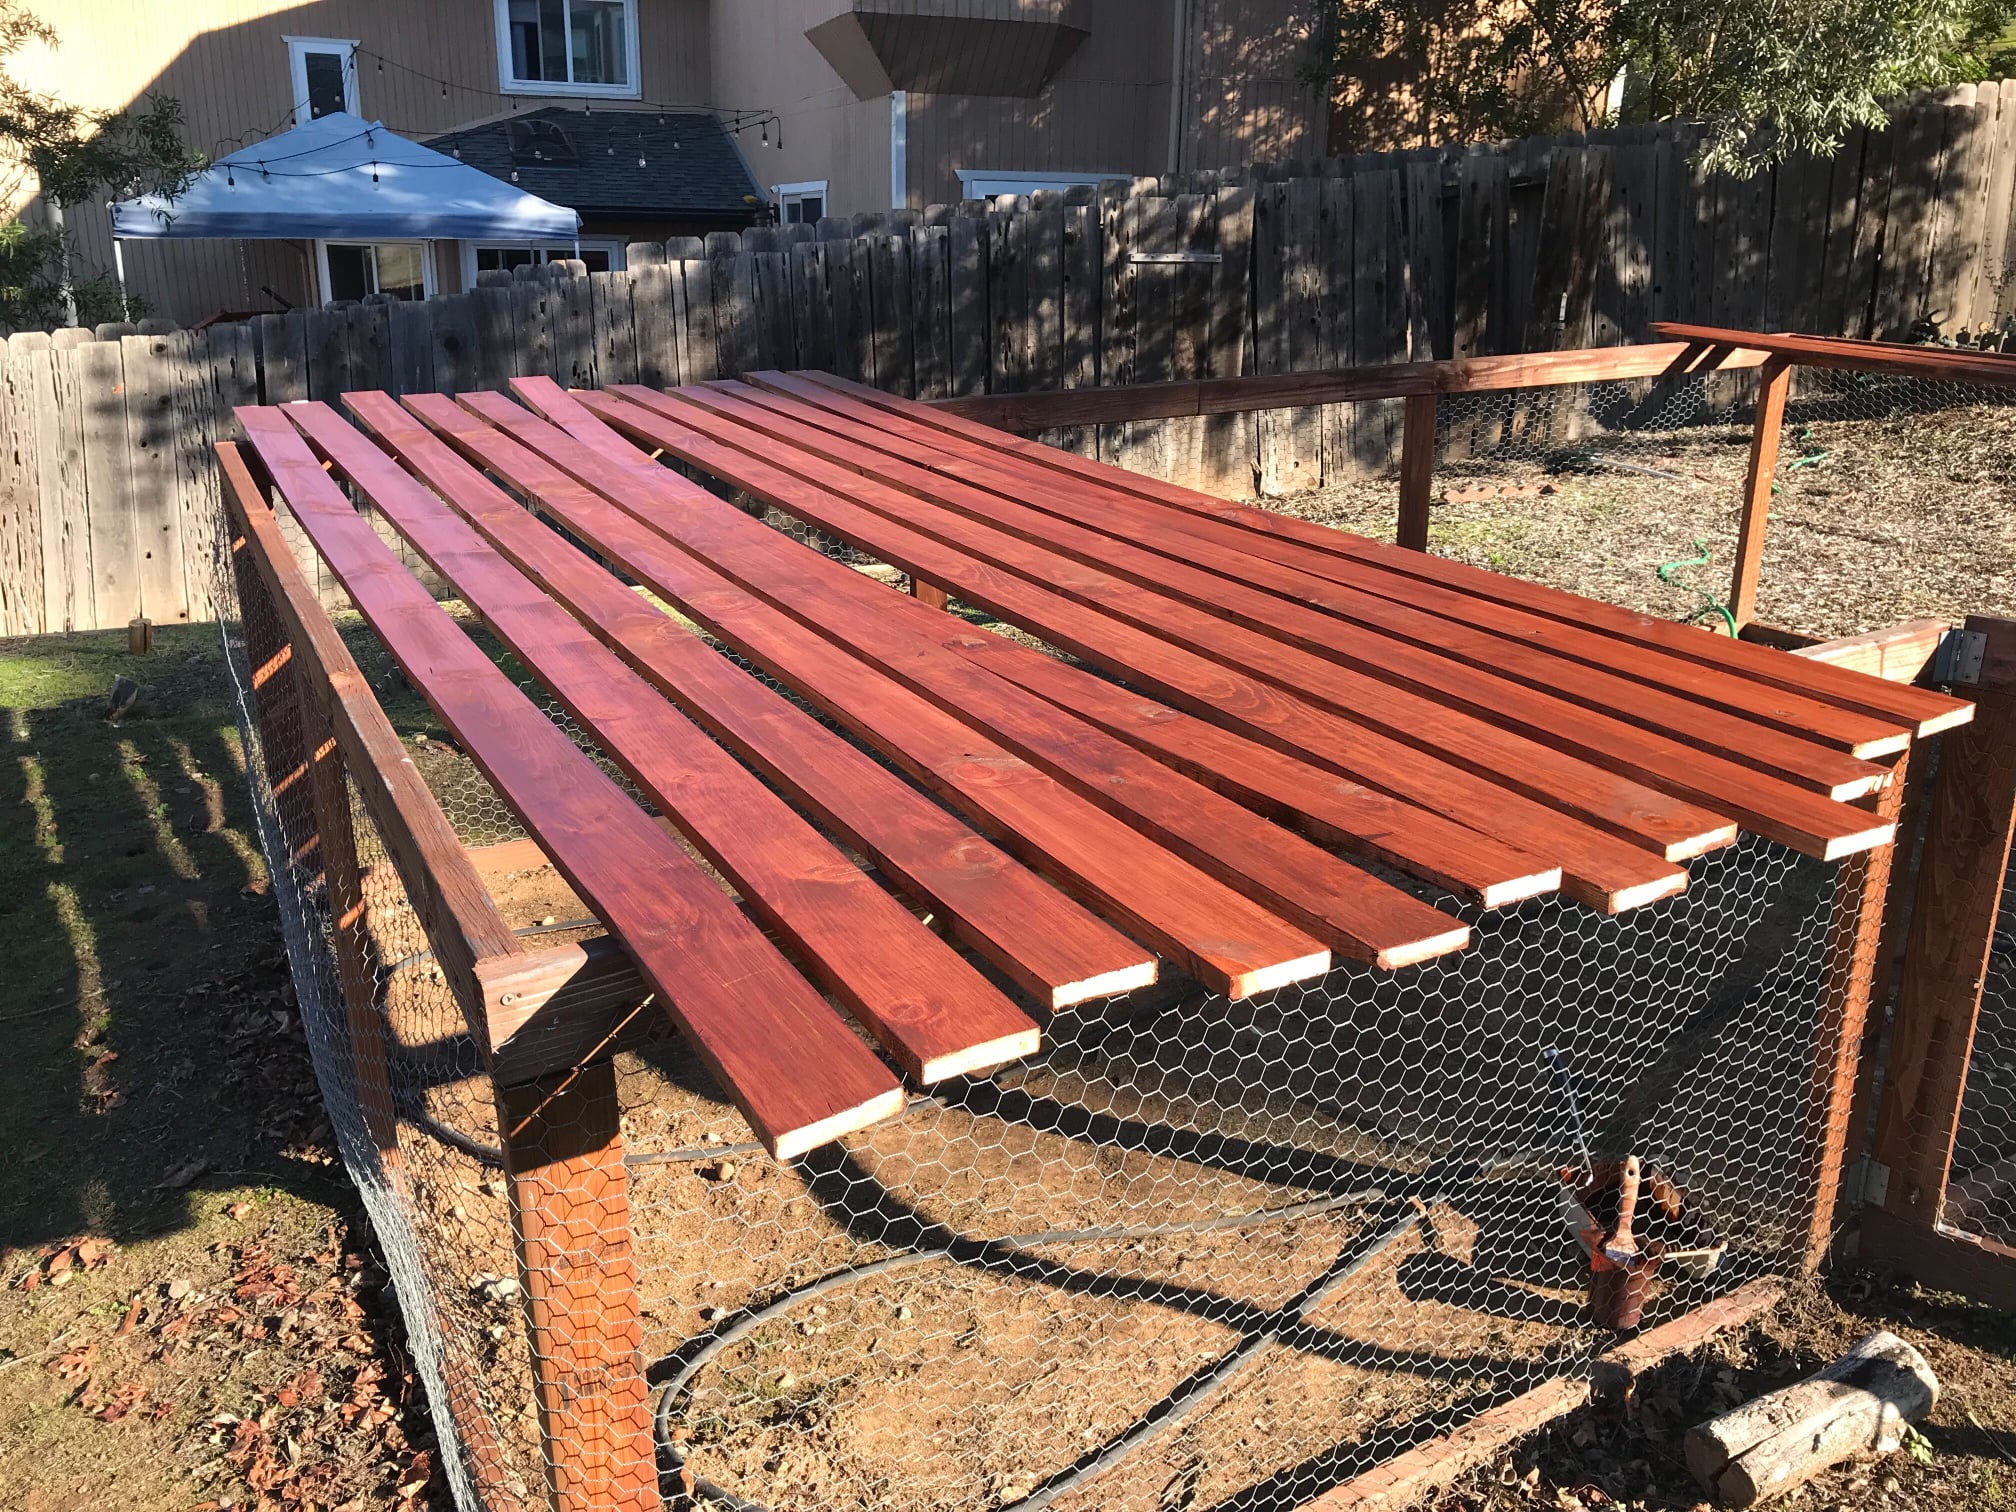
- However much time you think it’ll take you to stain and seal wood, it’ll take longer. I stained most of the wood in December, which in San Diego means a bit of rain and high humidity days. This slowed down the drying process. Low humidity/dry environment will give you the 1 hour dry time stated on the stain can, but if it’s humid, you’re looking at a few hours. Same goes for the sealant, which recommends 4-6 hours for a full cure per layer in non-humid weather. Sunlight/UV likely speeds up the process a little. Or it just made me feel better being outside. Either way, I had enough sunny days during staining to do it in the little veggie paddock that the prior home owners left us.

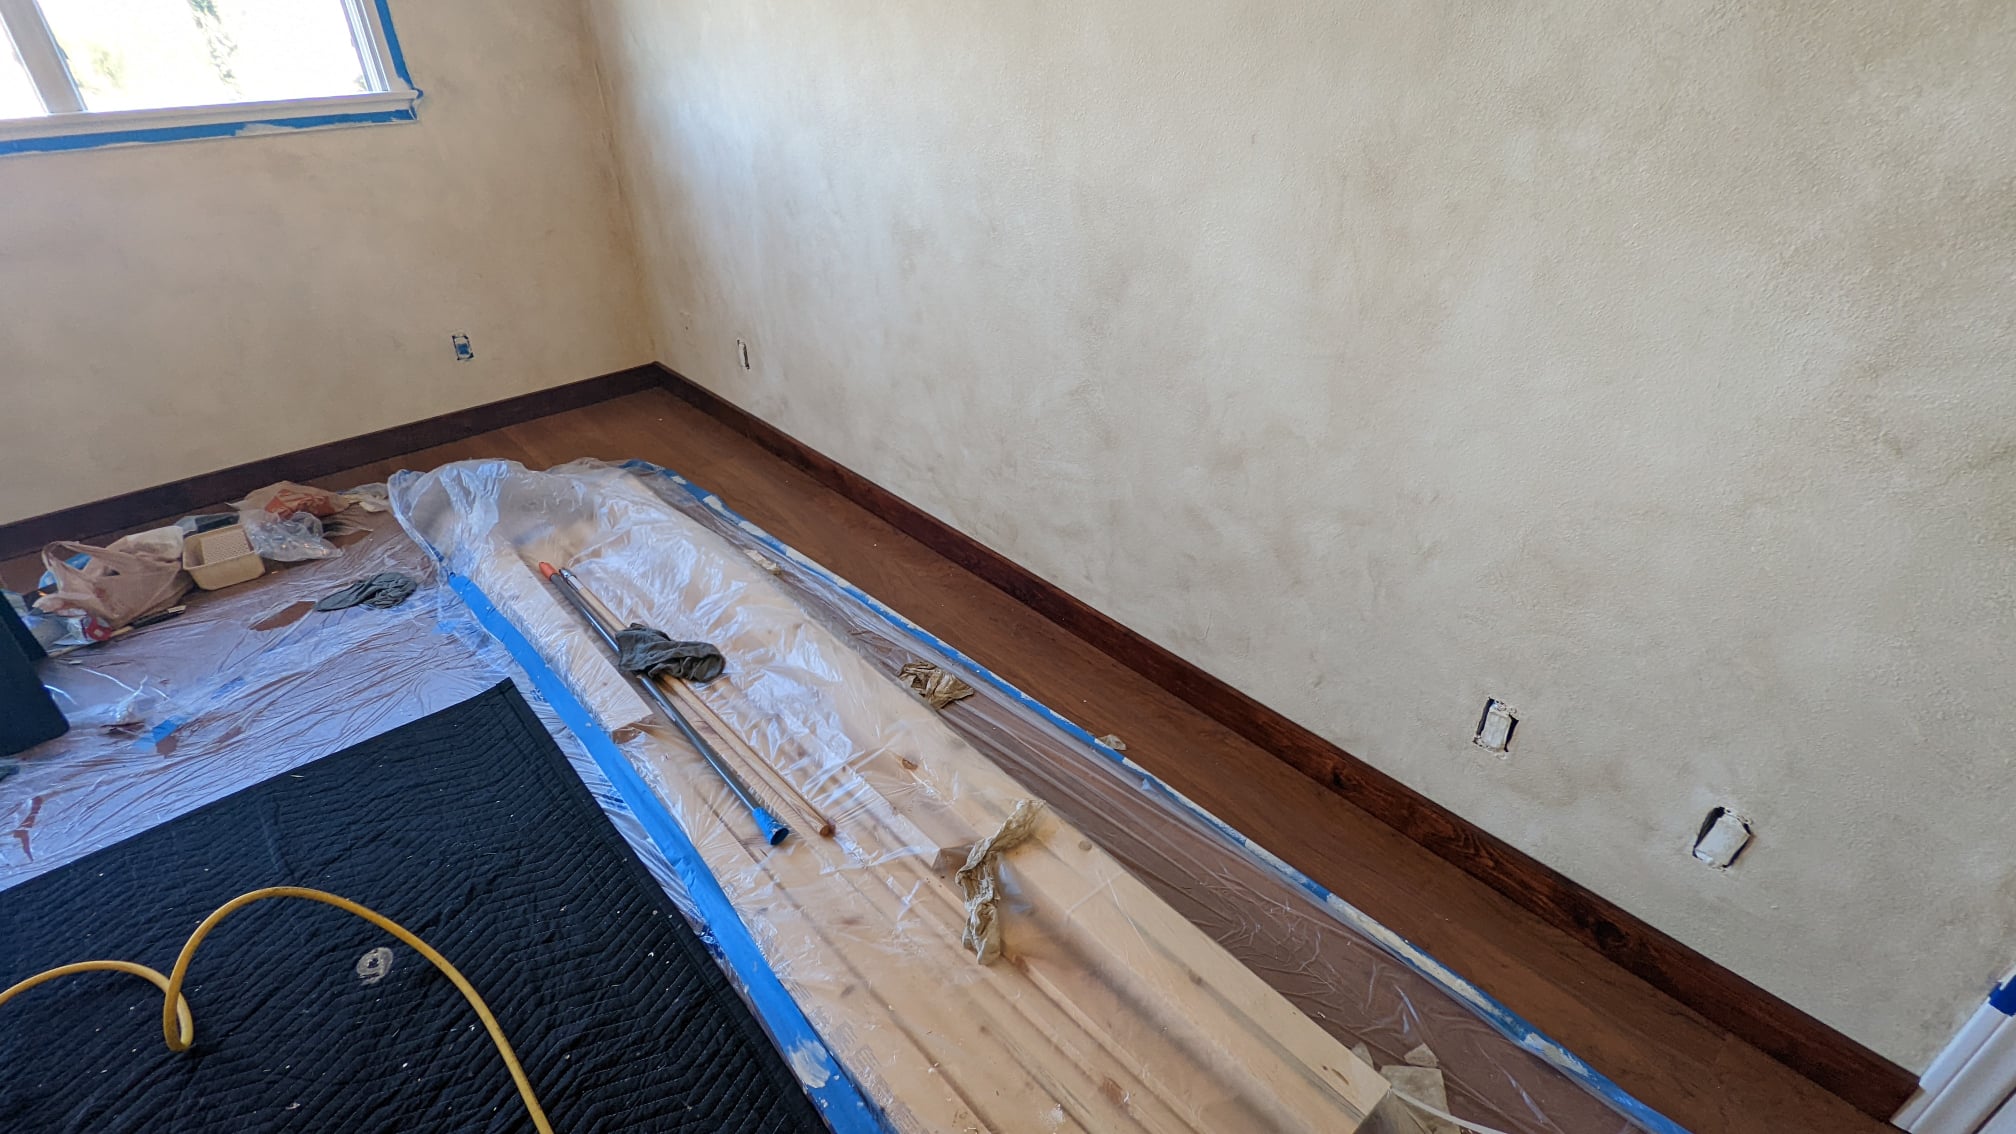
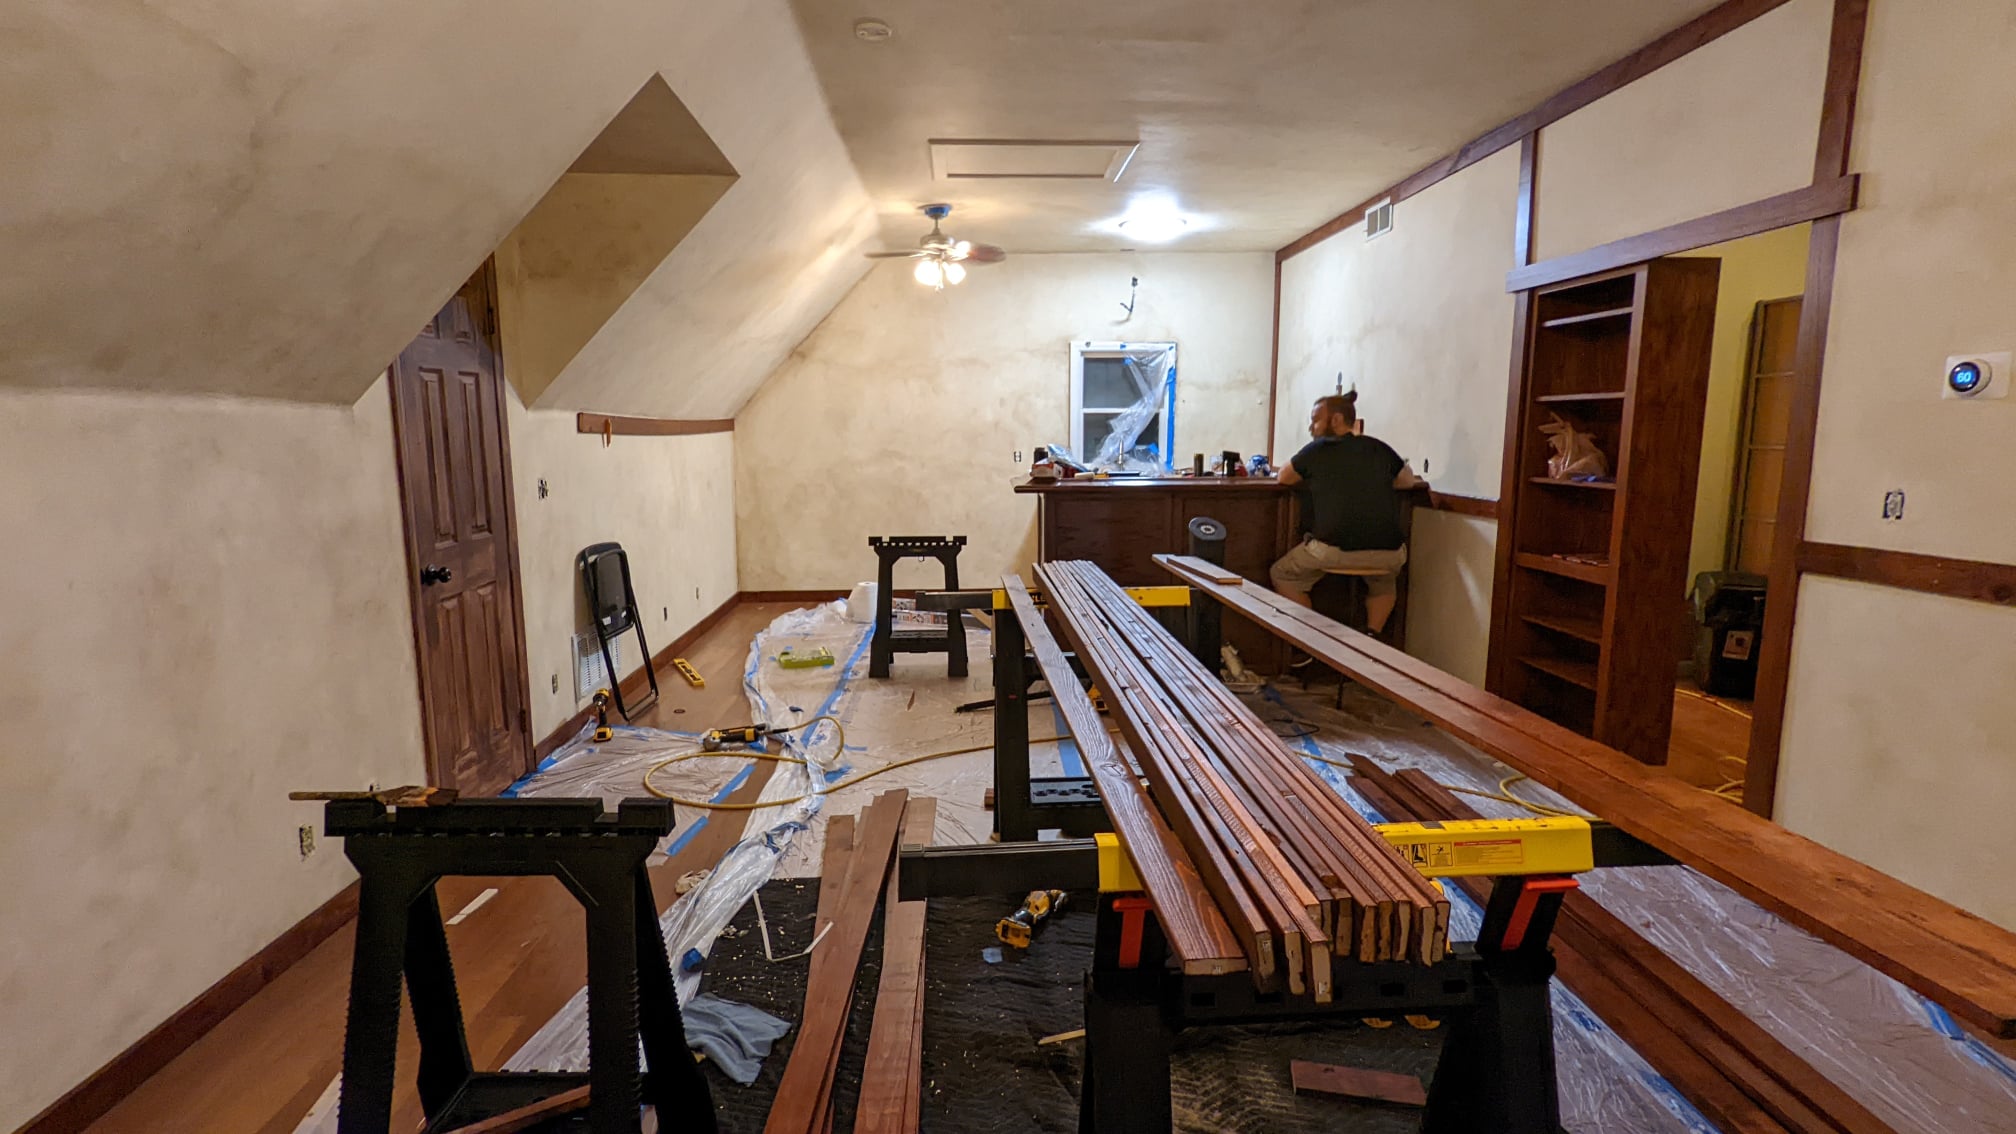
Tavern Wood Installation
Using a borrowed pneumatic nail gun, we installed the wood panels throughout the tavern, also using wood screws where there were studs to stabilize the boards. Some of our walls were wonky (not straight, bowing in/out) and required warped boards, but some of the boards were REALLY warped anyway, so it worked out.
NOTE: lol, remember to pull up the painting tarp before nailing wood to the wall (we did that…whoops!). Anyway, we started with the floorboards throughout the whole room.


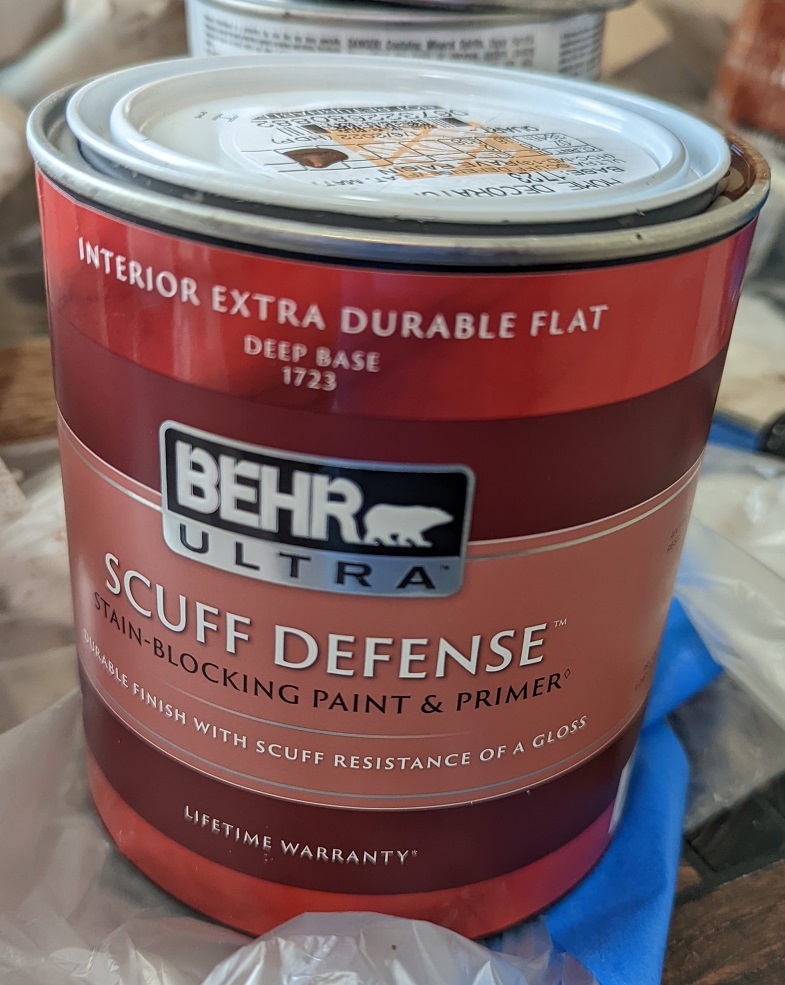
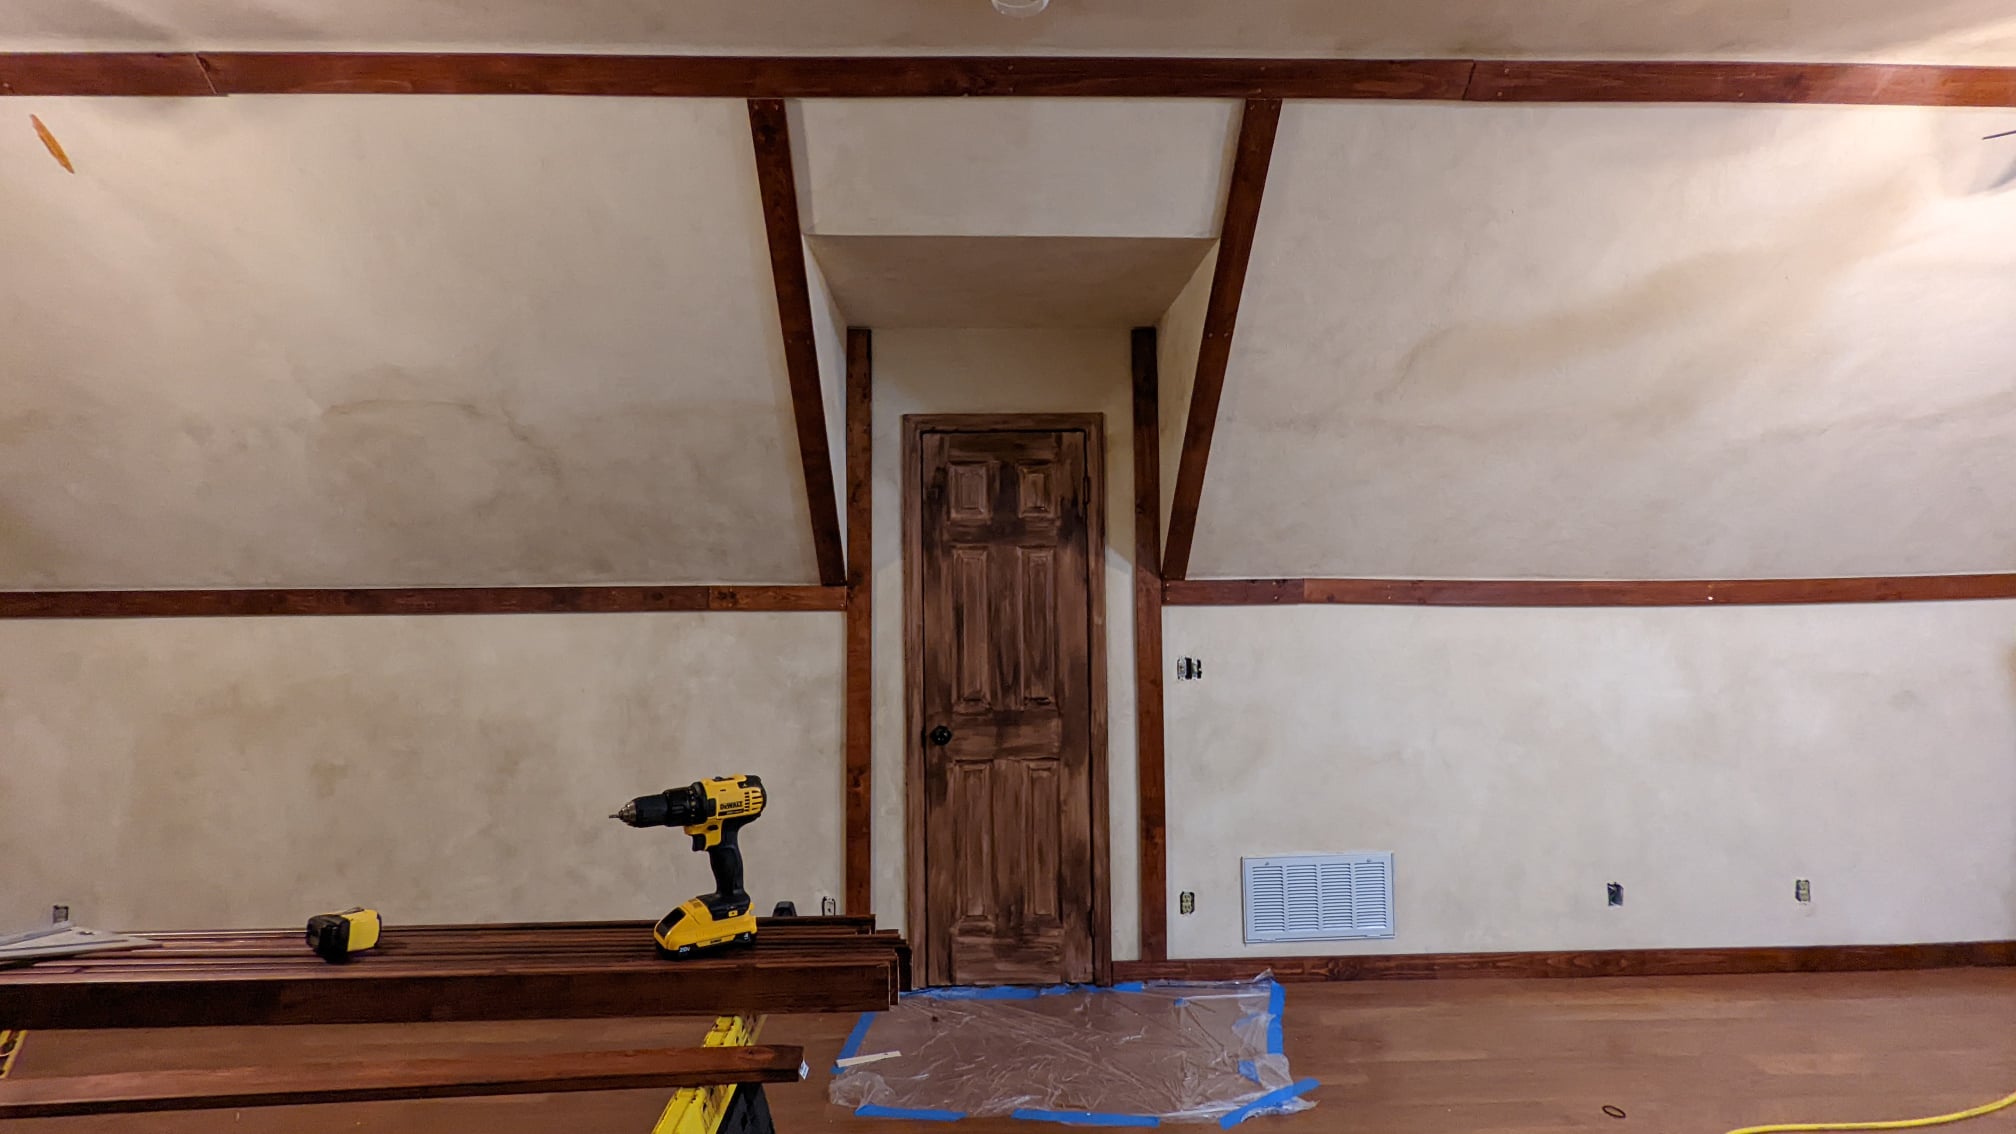
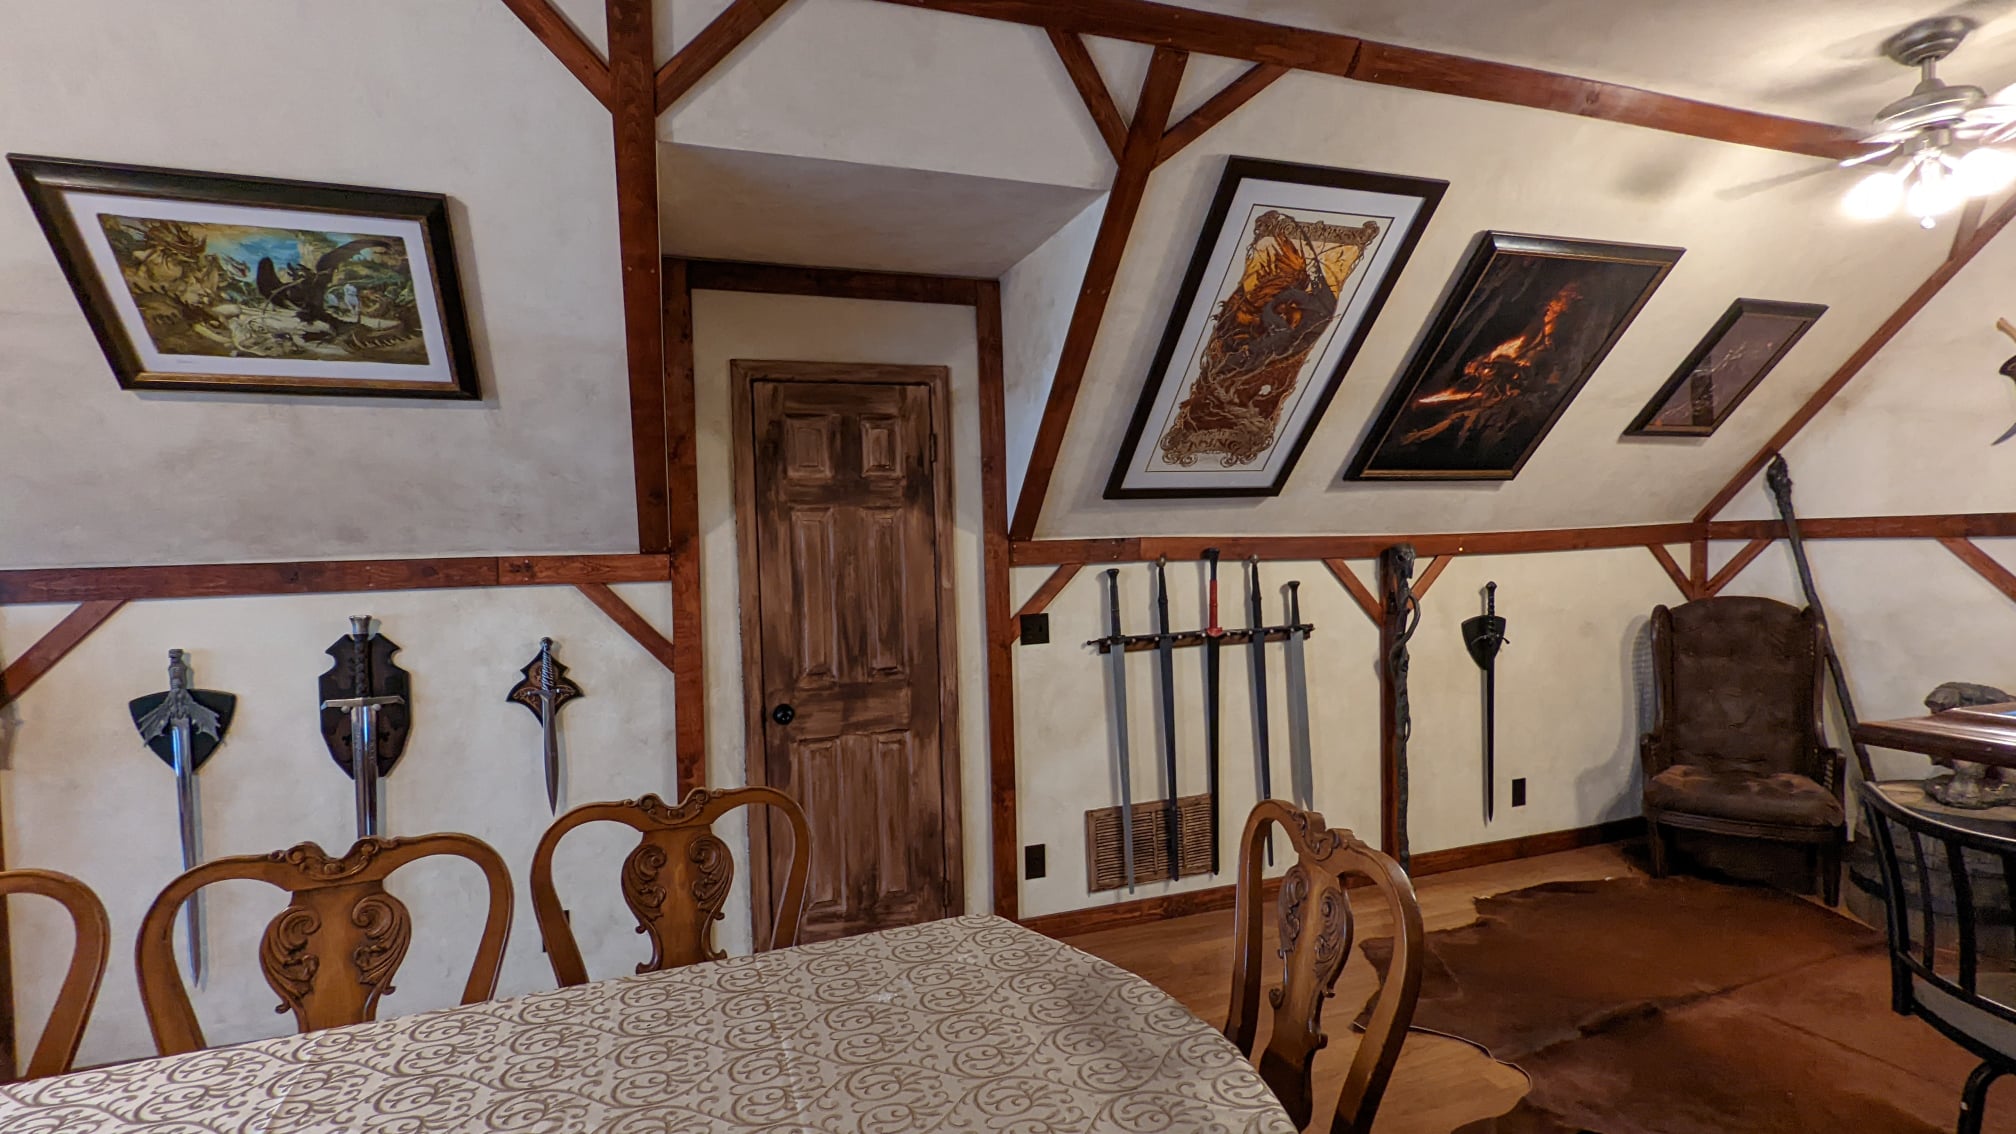
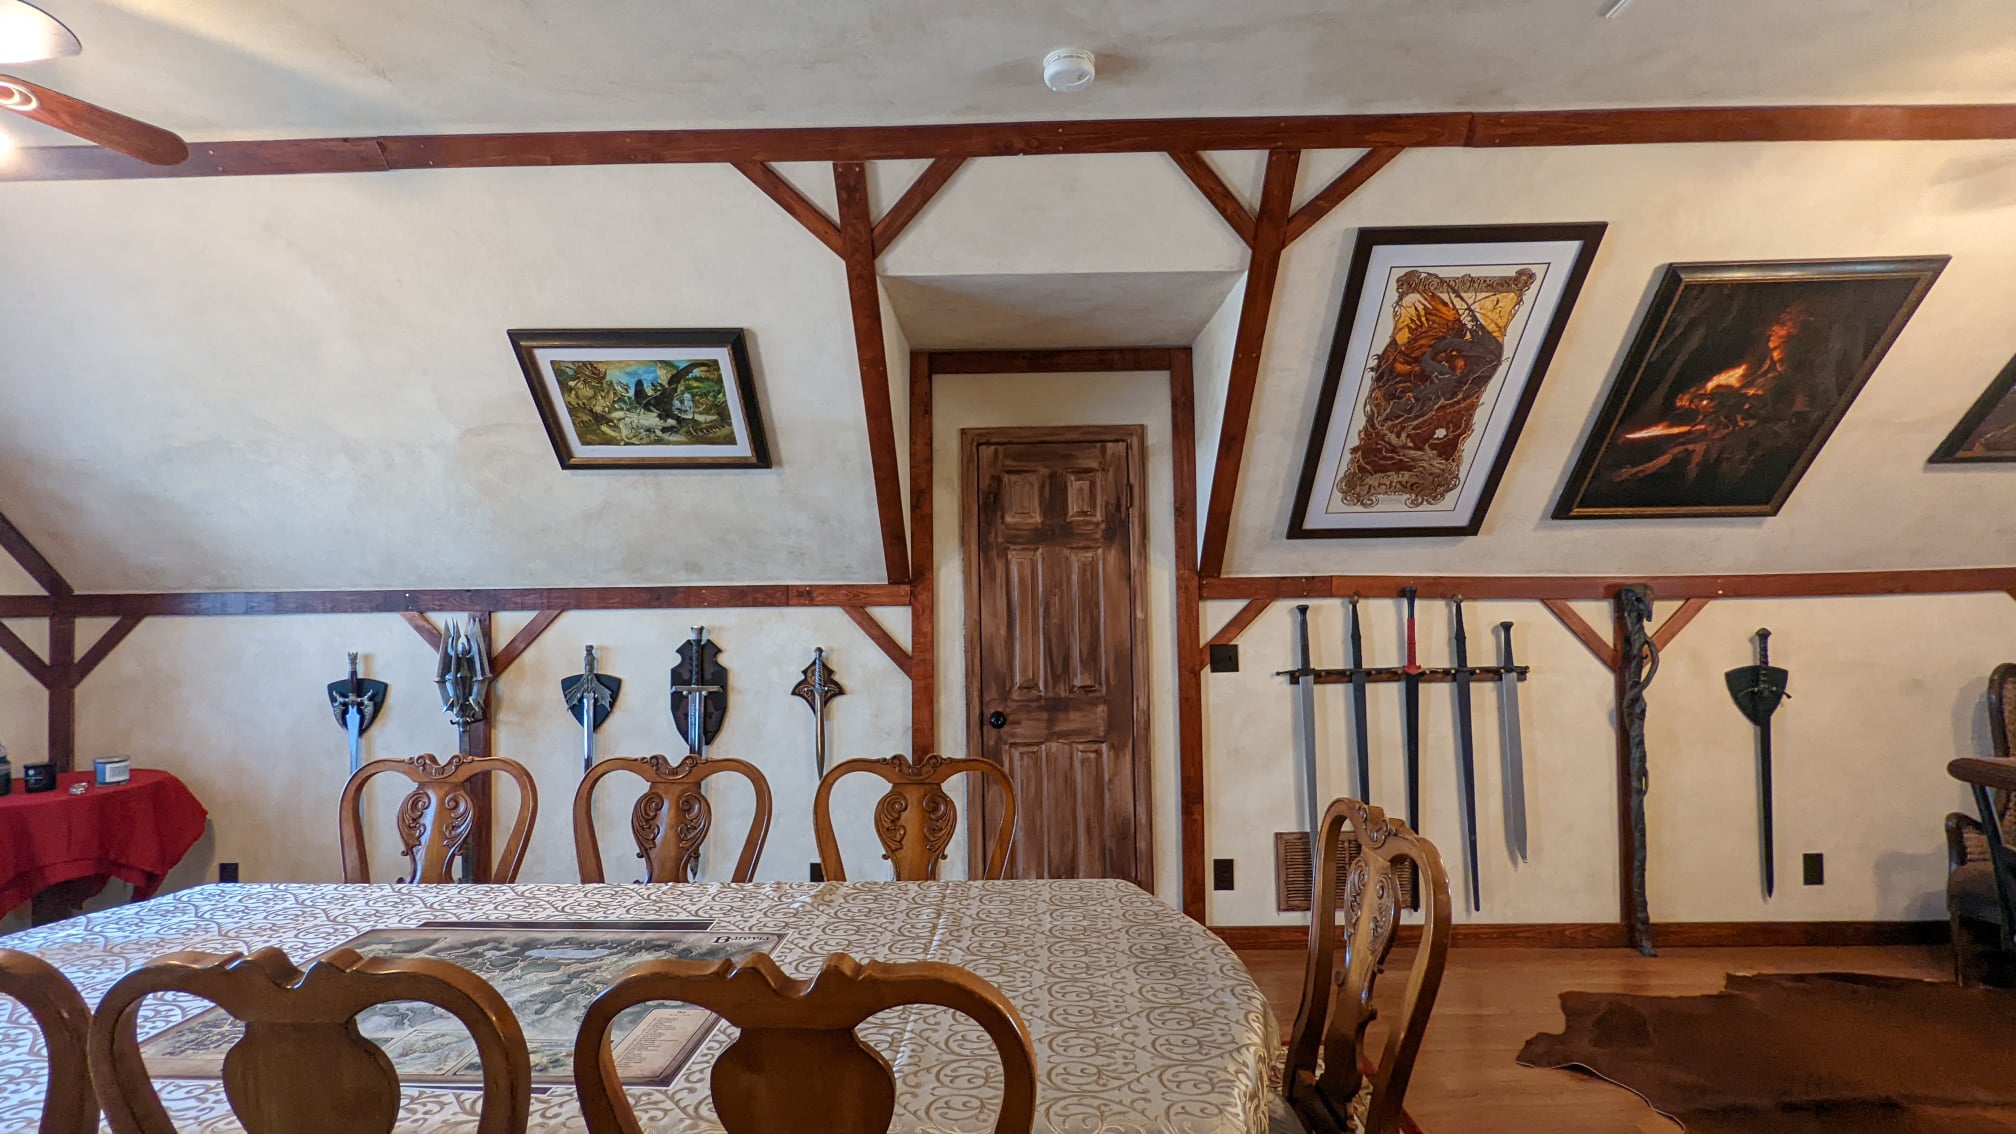
Next were the mid and high boards. To save money, we decided to try painting the closet door to look like wood. I used a flat/matte “rave raisin” by Behr. PRO TIP: painting flat/matte paint on a high gloss surface, such as a pre-fab closet door means that you’ll have ABSOLUTELY NO CONTROL WHATSOEVER ON THE HUE, INTENSITY, OR ANYTHING ELSE TO DO WITH COLOR. See how the painted door looks? I literally tried to get the whole door to just be the same color. Where it’s lighter/darker? That was the paint’s decision, not mine. Luckily, we were going for a ‘rustic’ look.
Here’s the paint and the updates of the mid/high boards we installed.


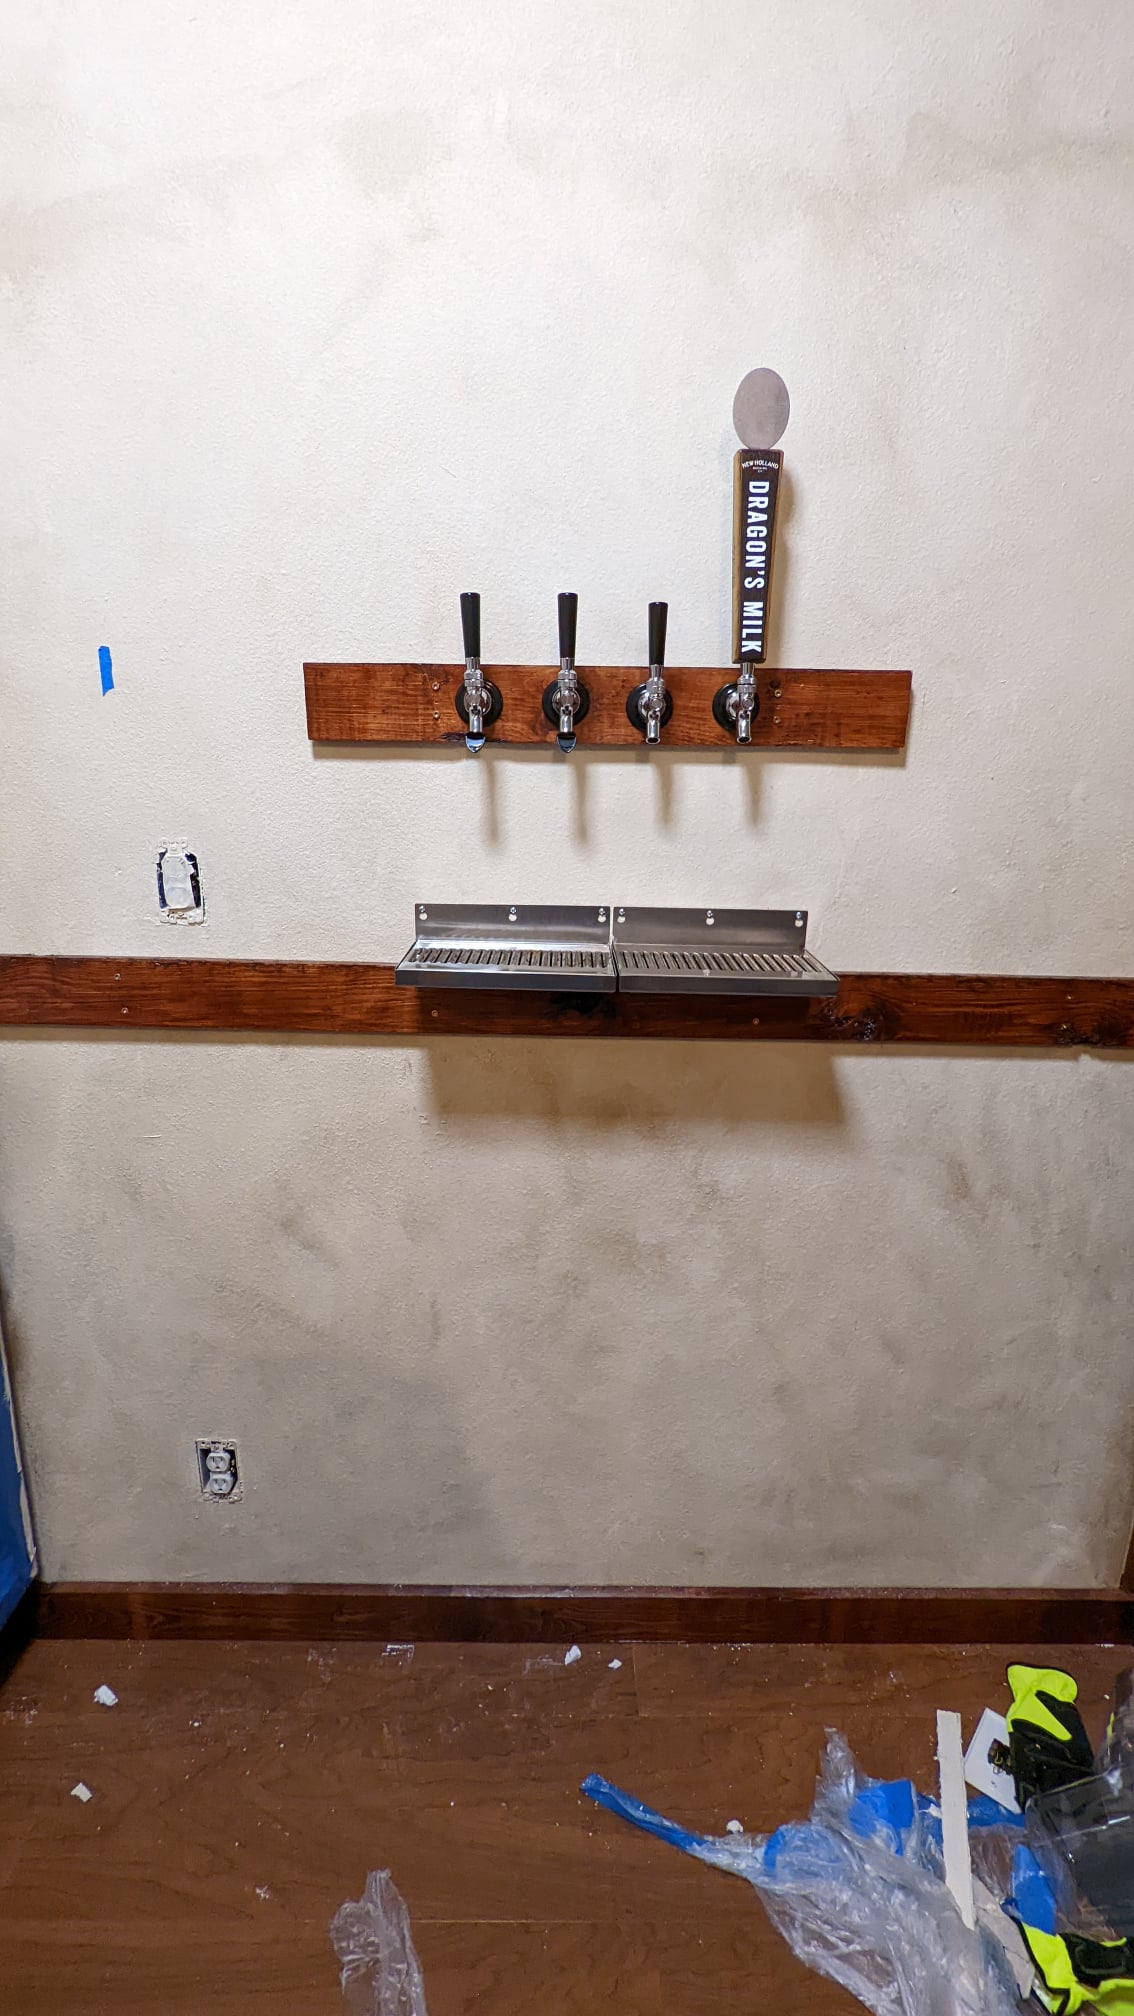

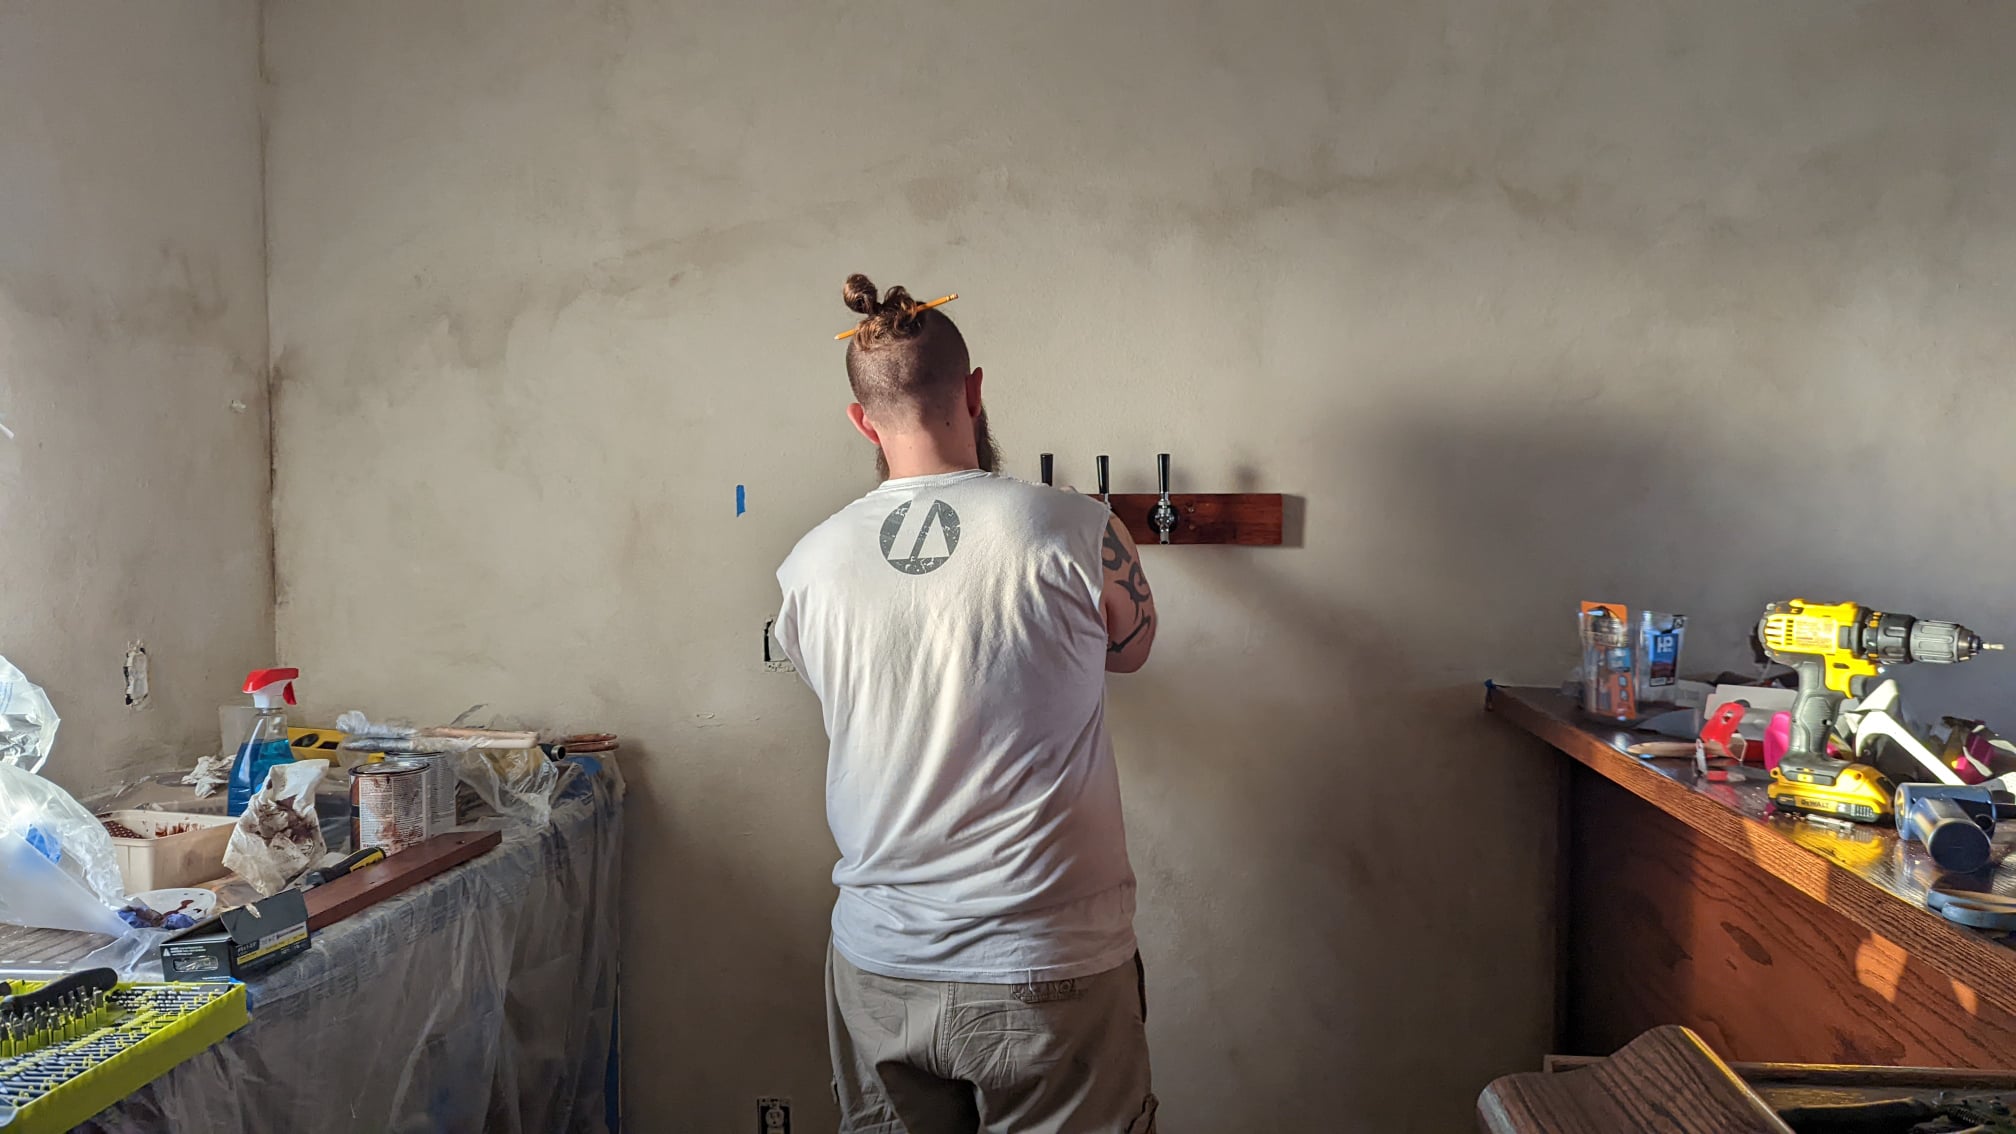
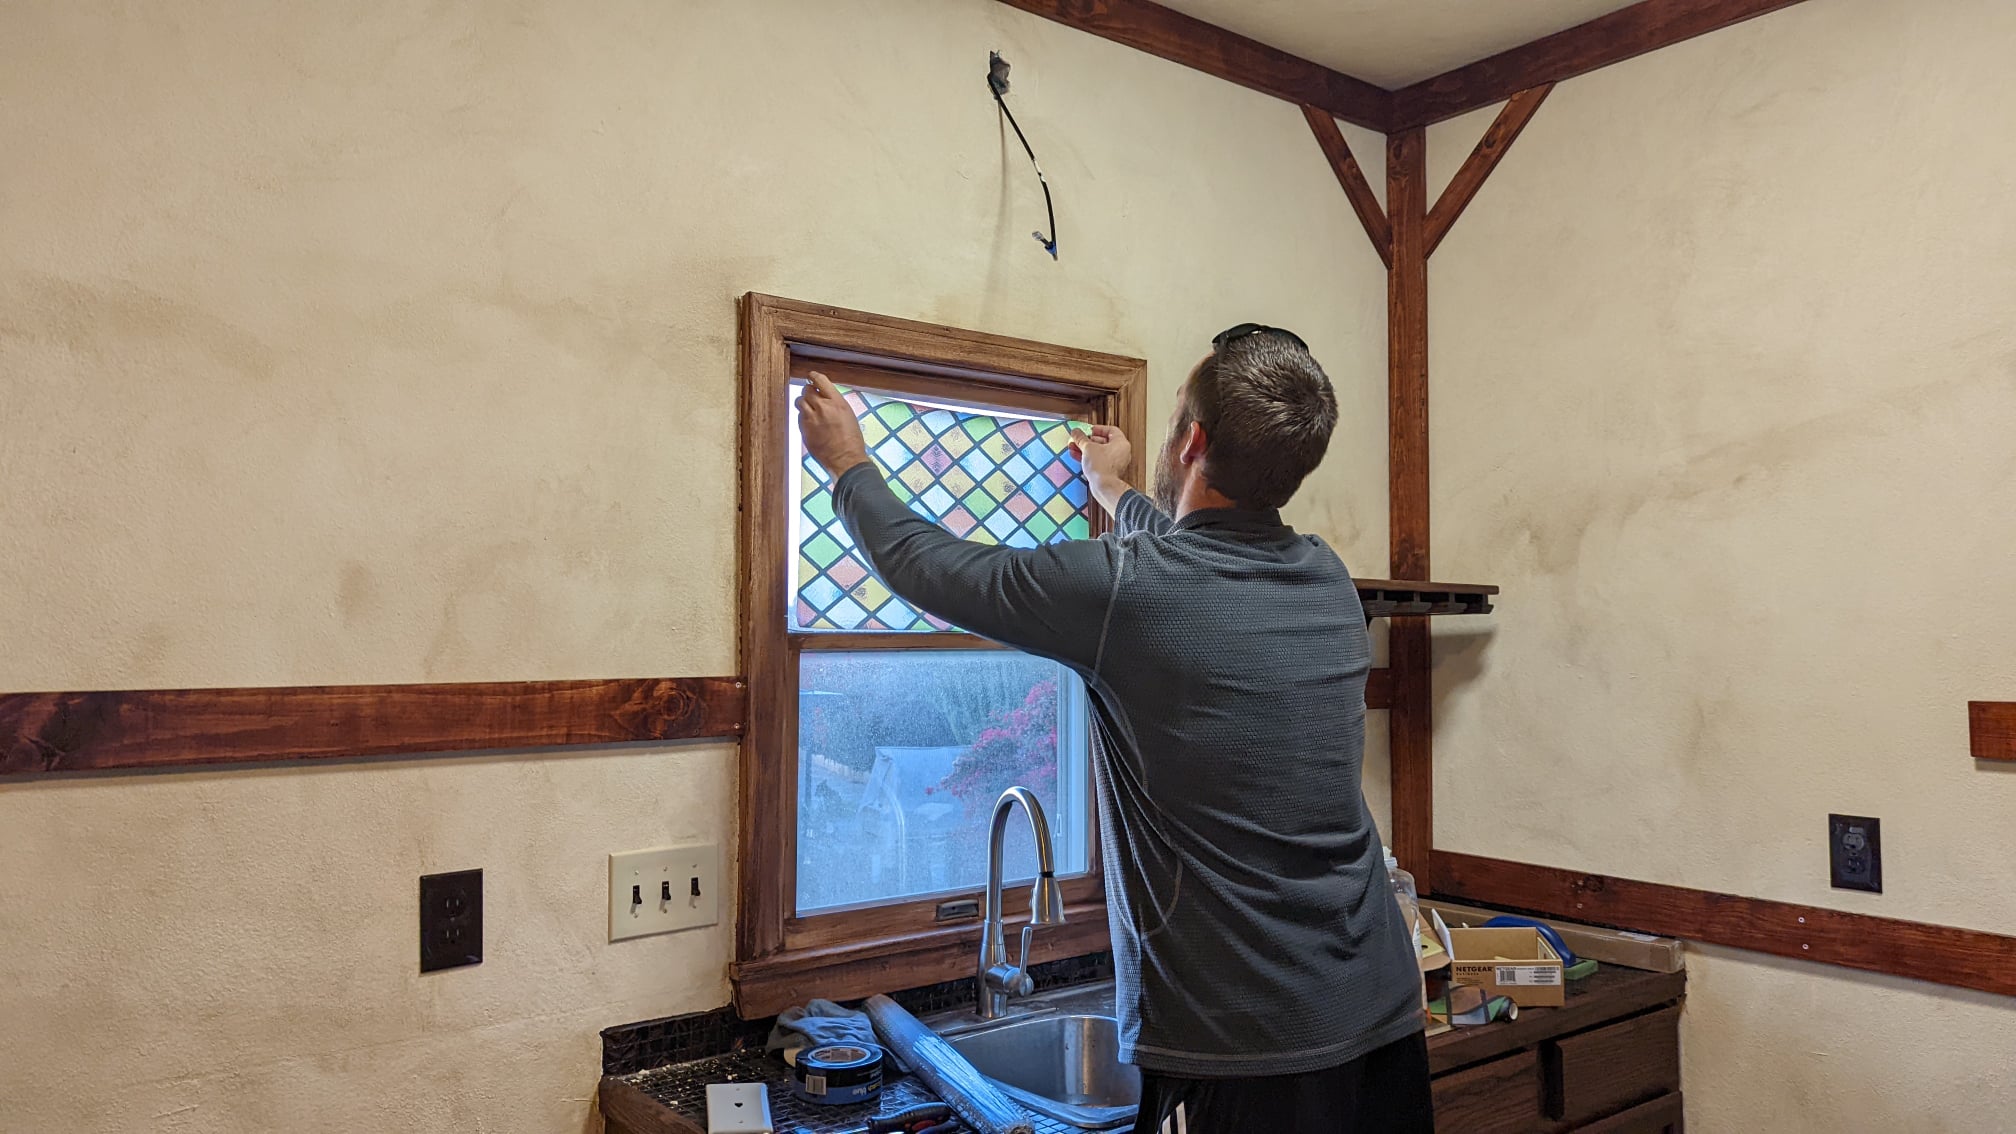
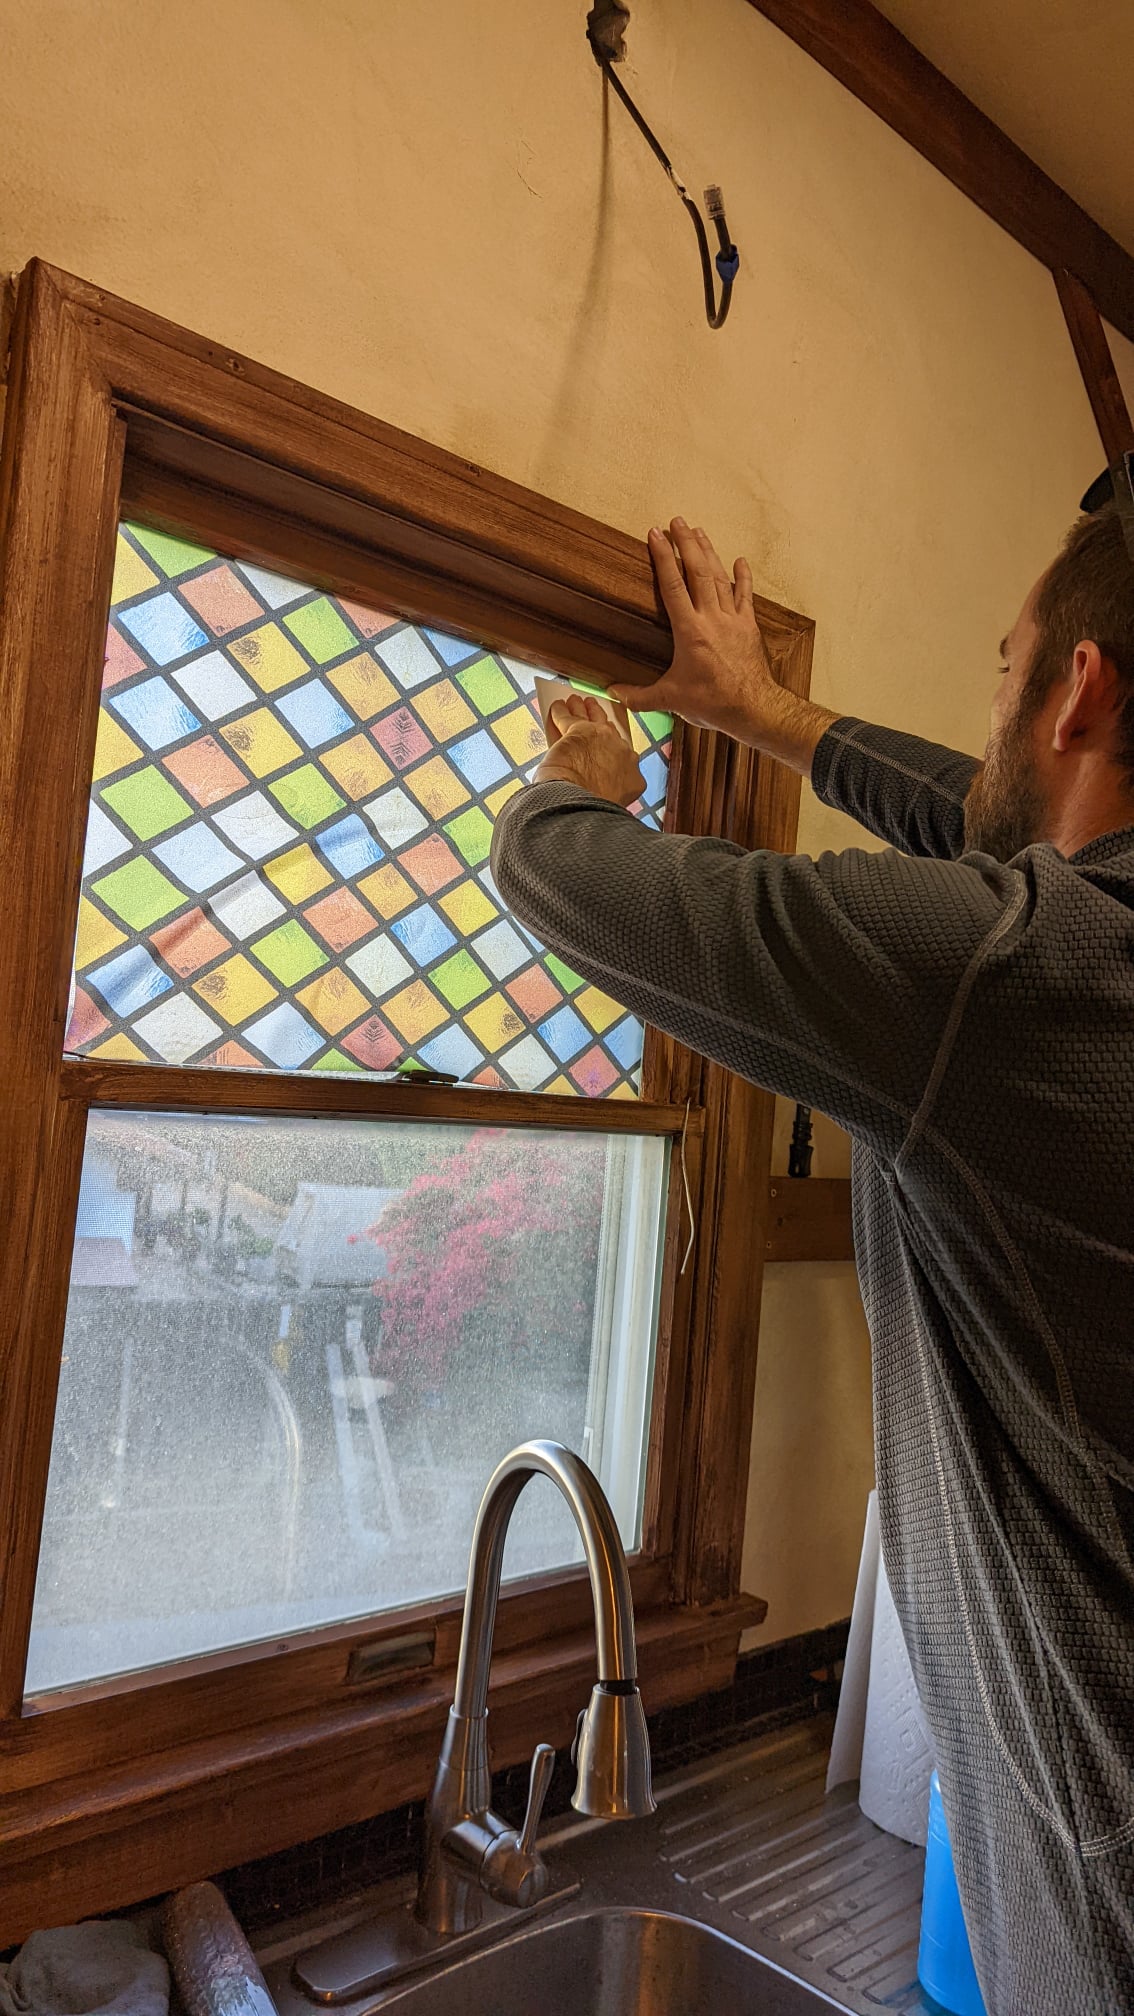
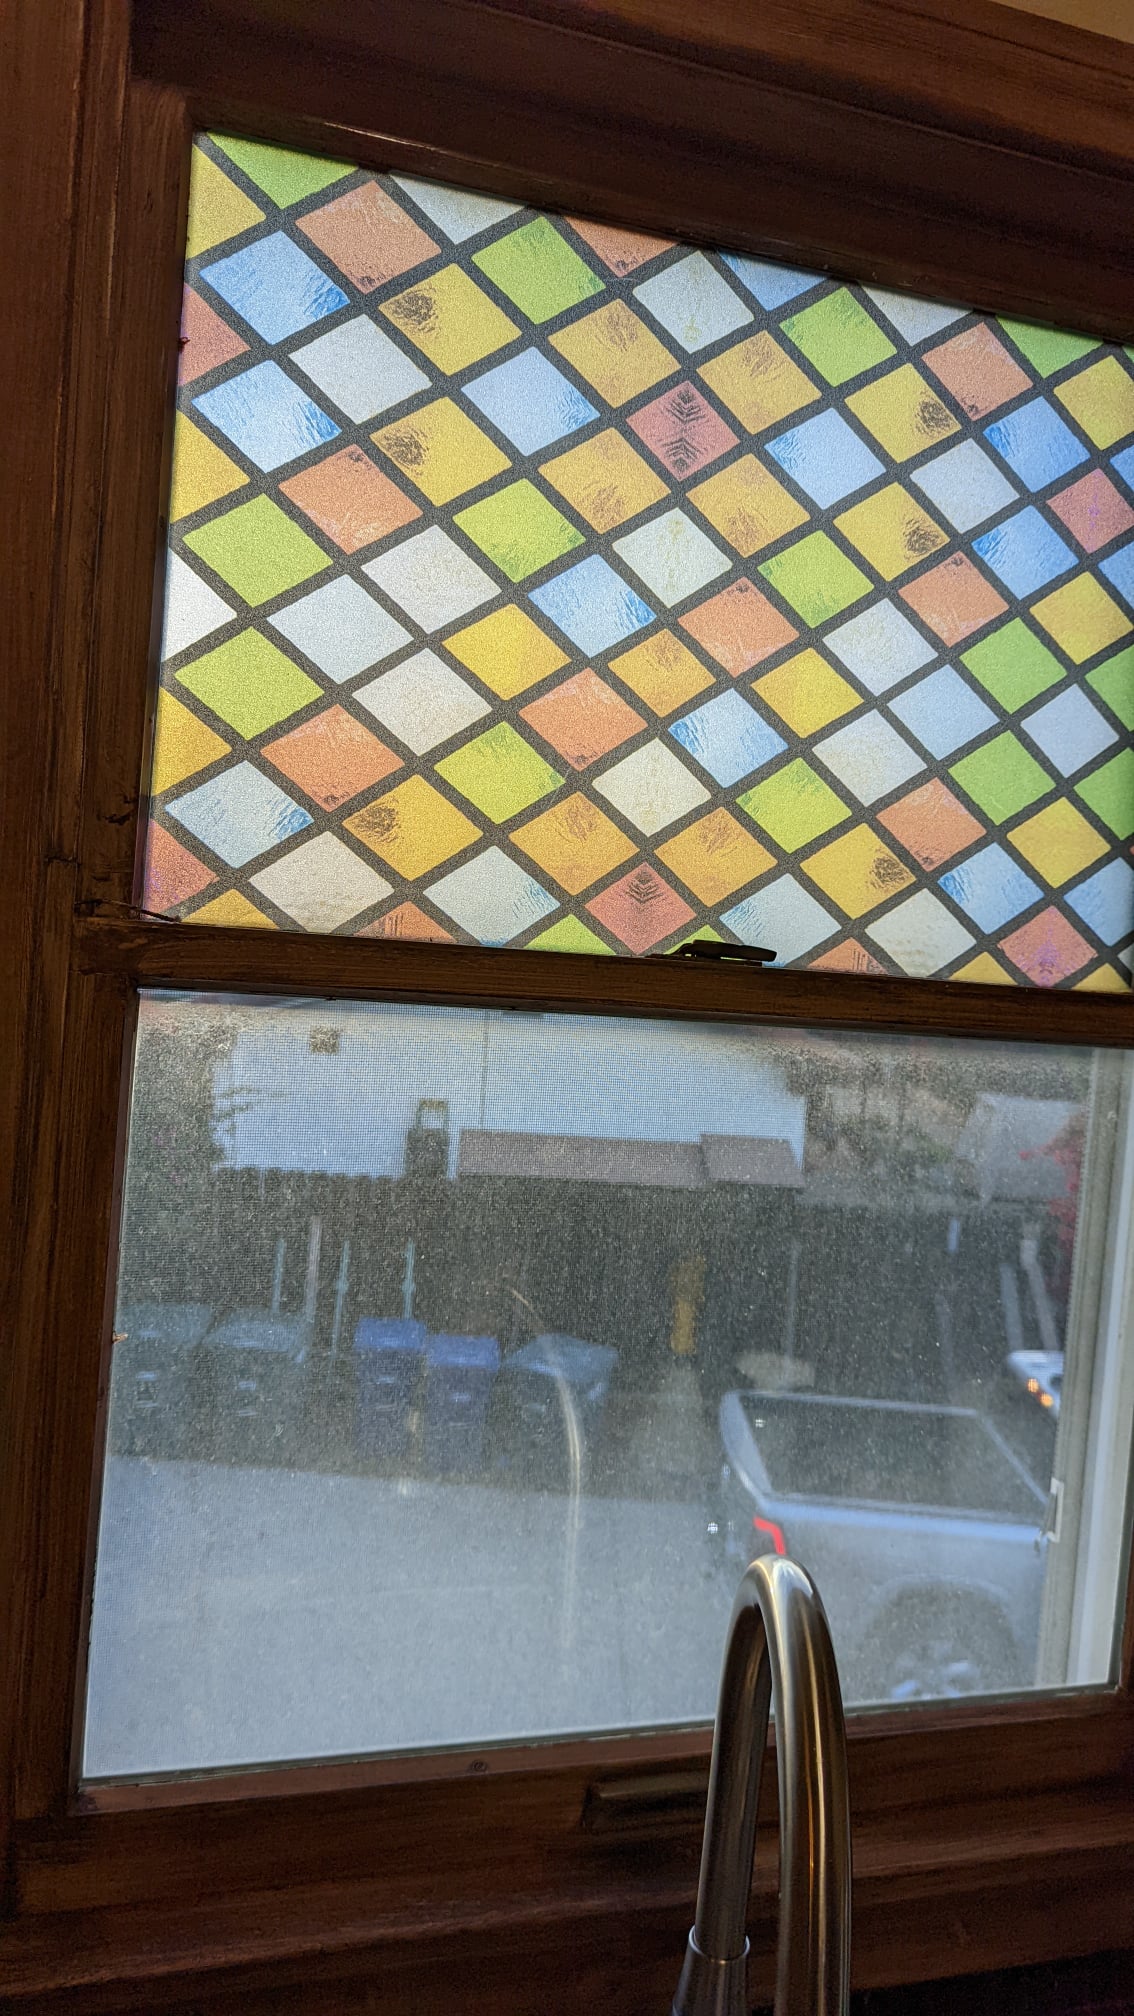
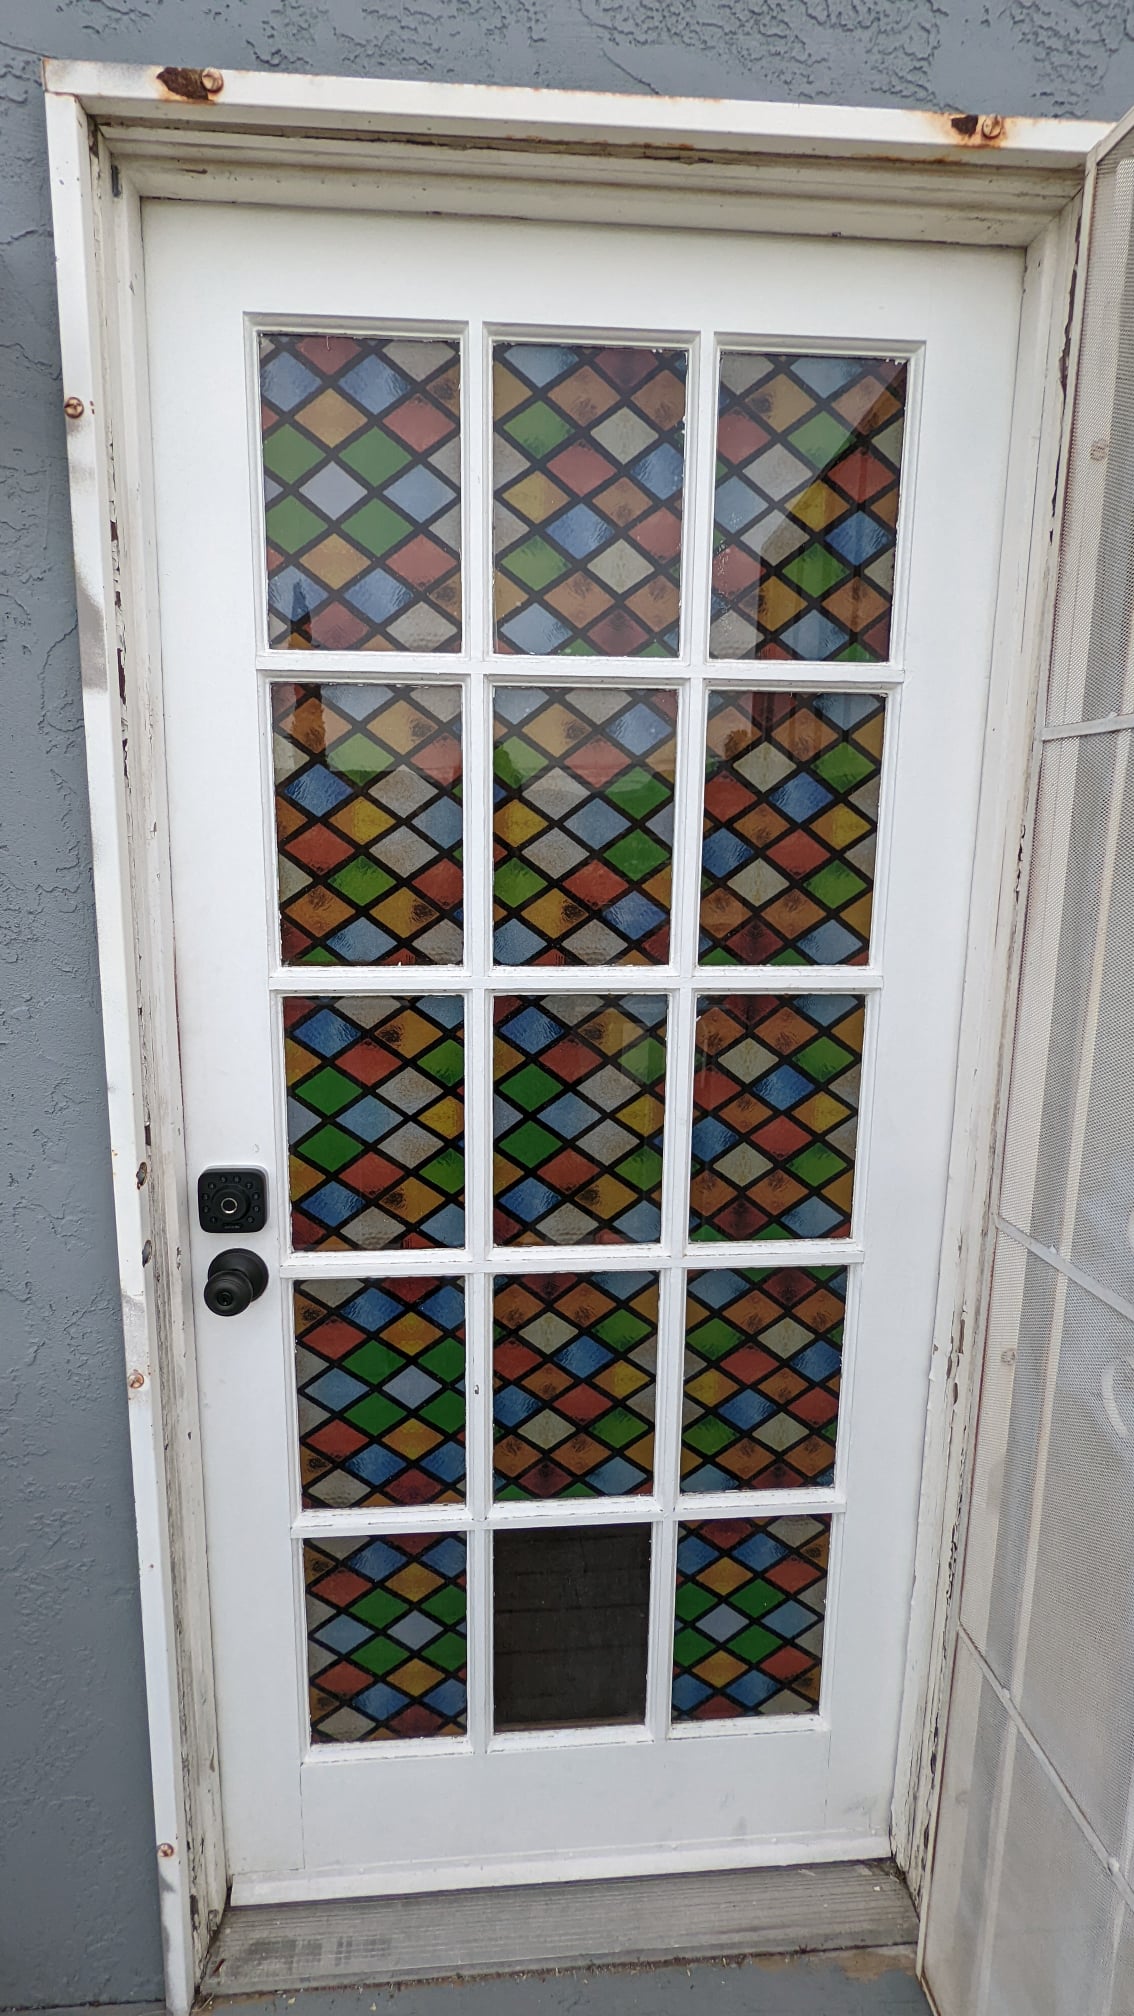
Next were the accent boards, which are thinner than the other boards. We also used some lsrrret Stained Glass Window Film on the window for the stained glass look. Application was a PITA to peel the sticker off the clear film, but eventually it worked out. We also installed some drip catchers for the beer taps. We wanted to put boards across the ceiling from the closet to the bookcase, but there weren’t any studs in that area, and gravity would have made the nail gun nails too unsteady for us to feel safe having them above our heads.

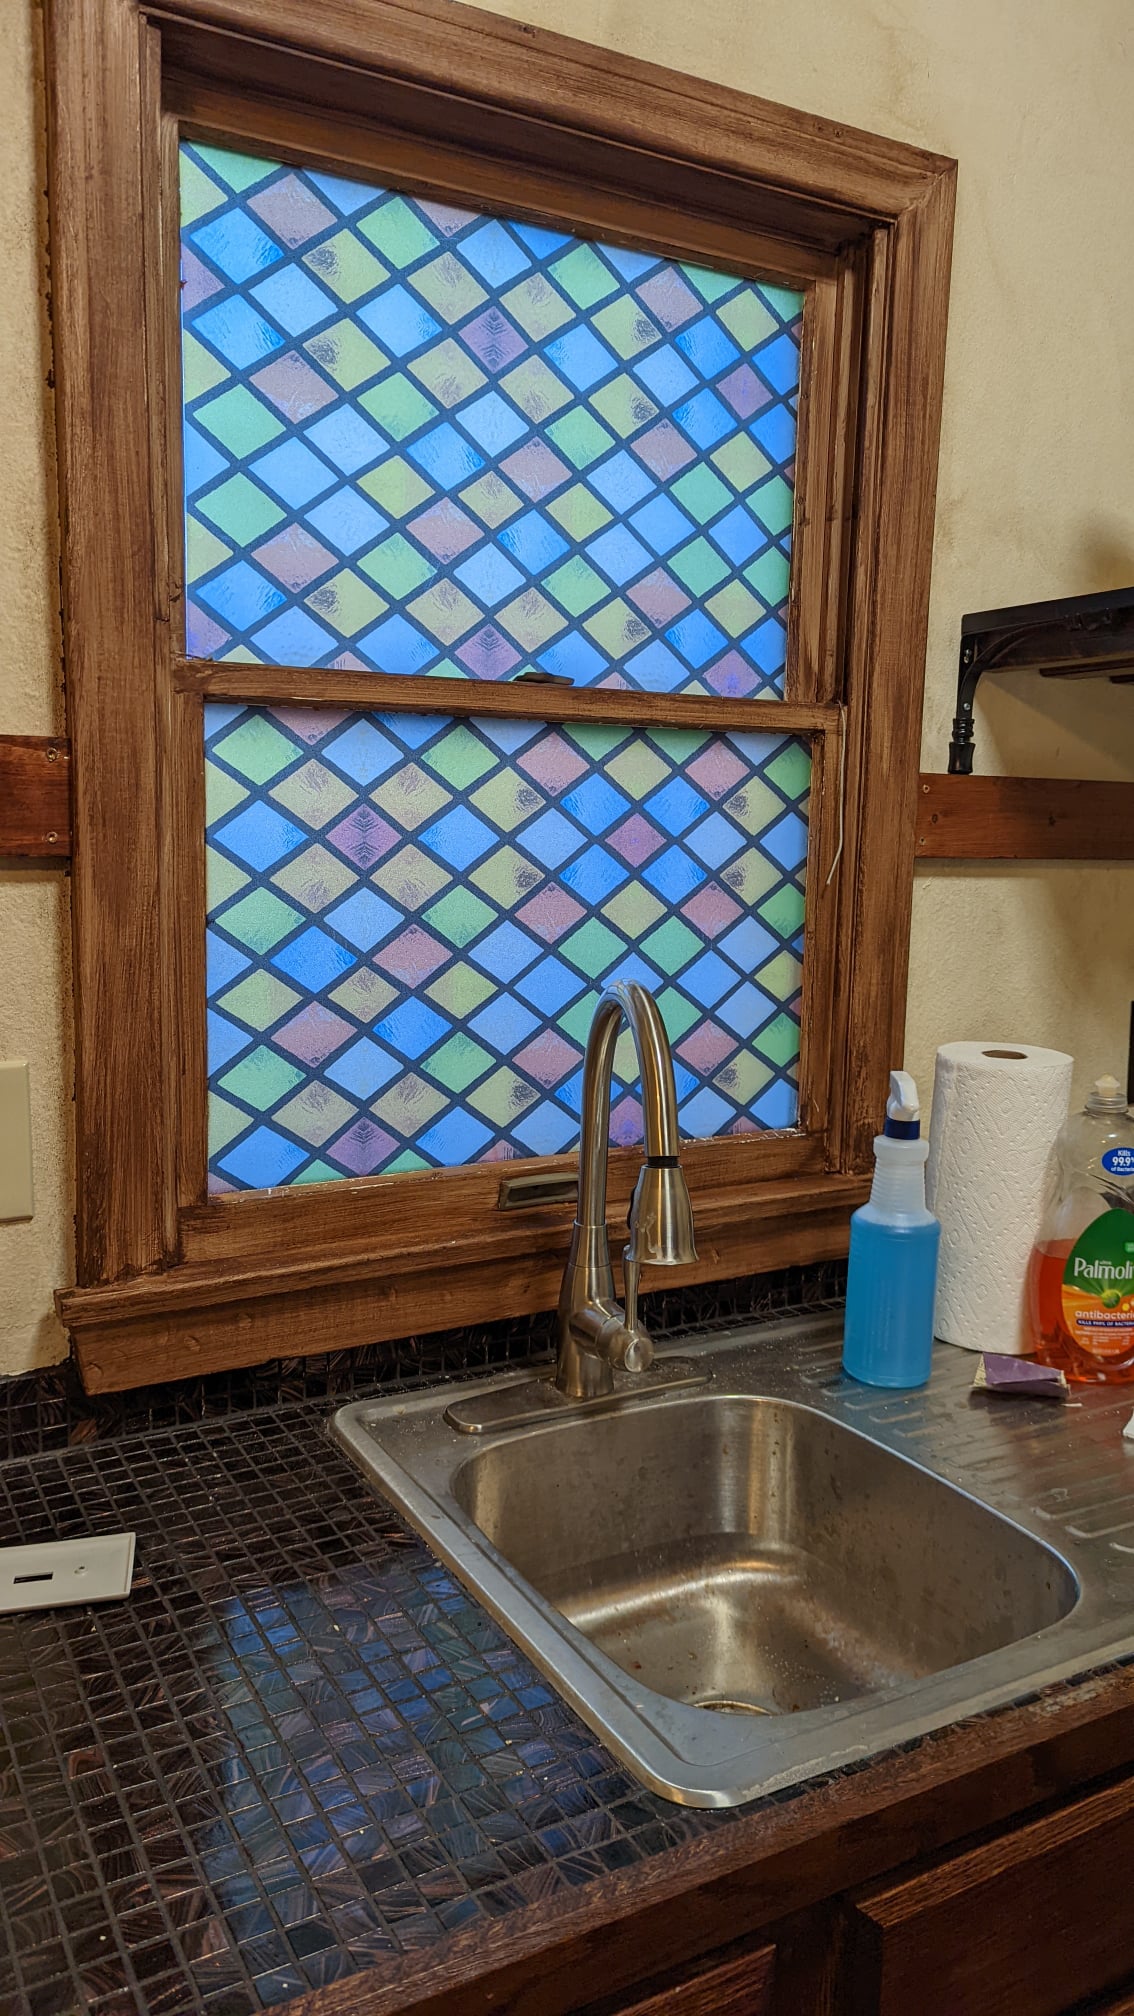

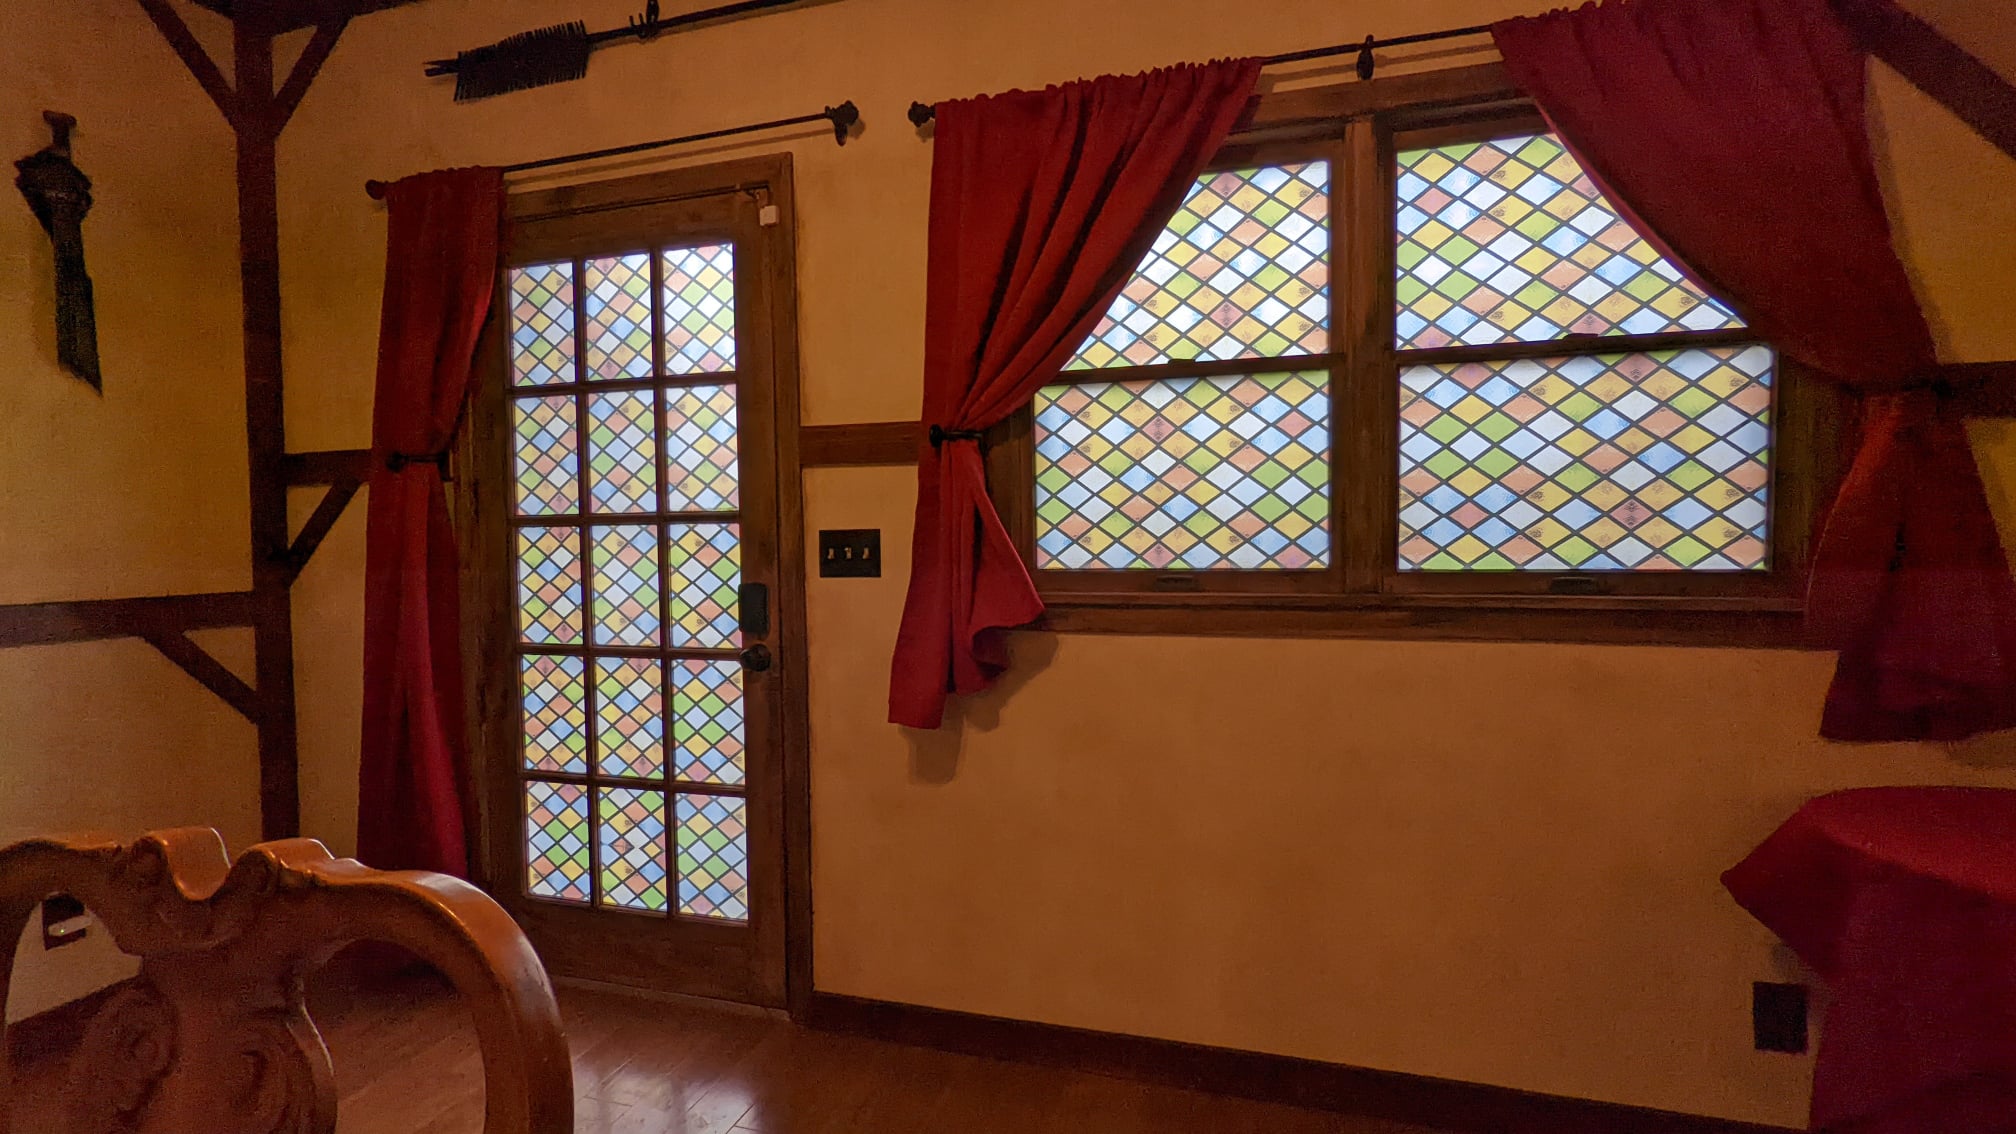
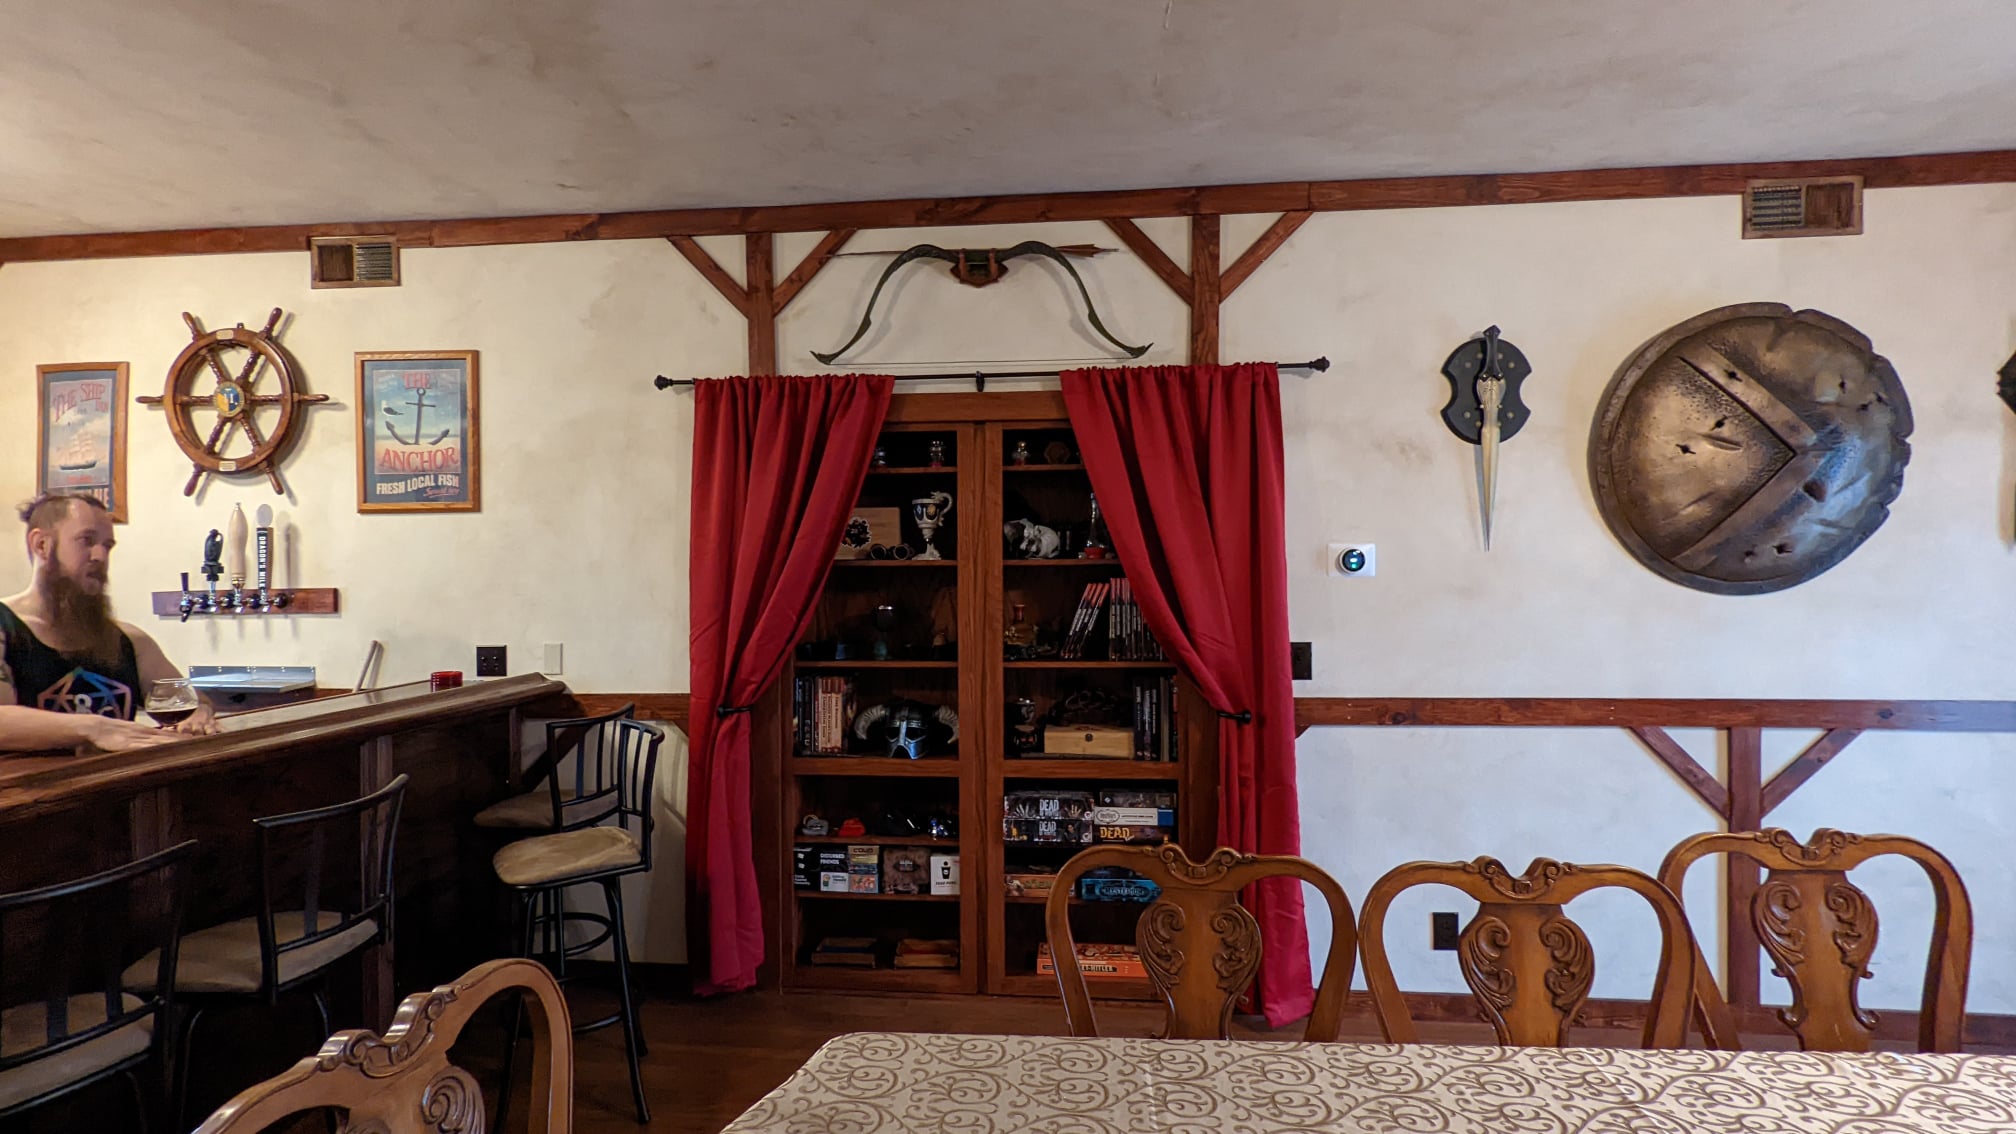
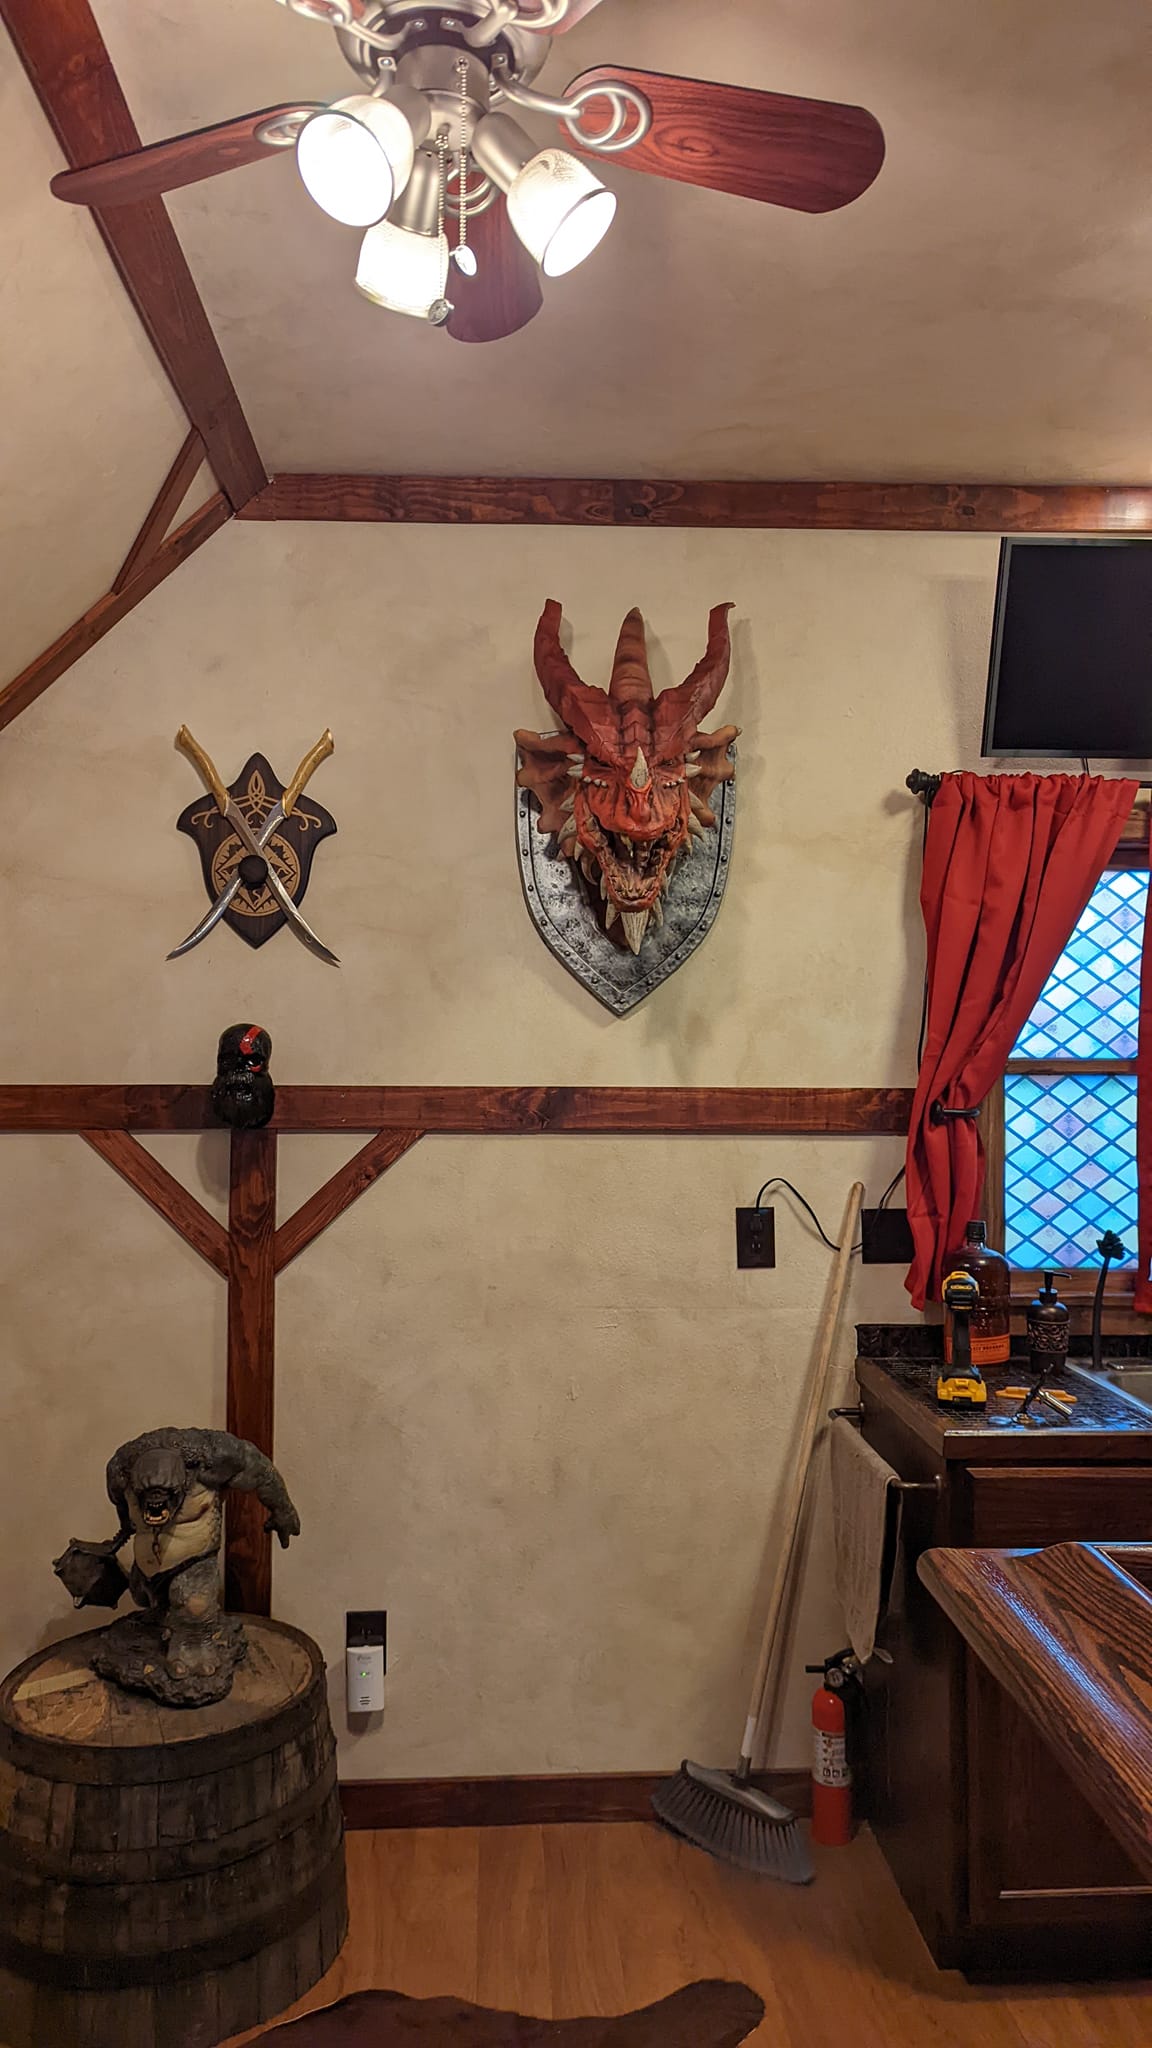
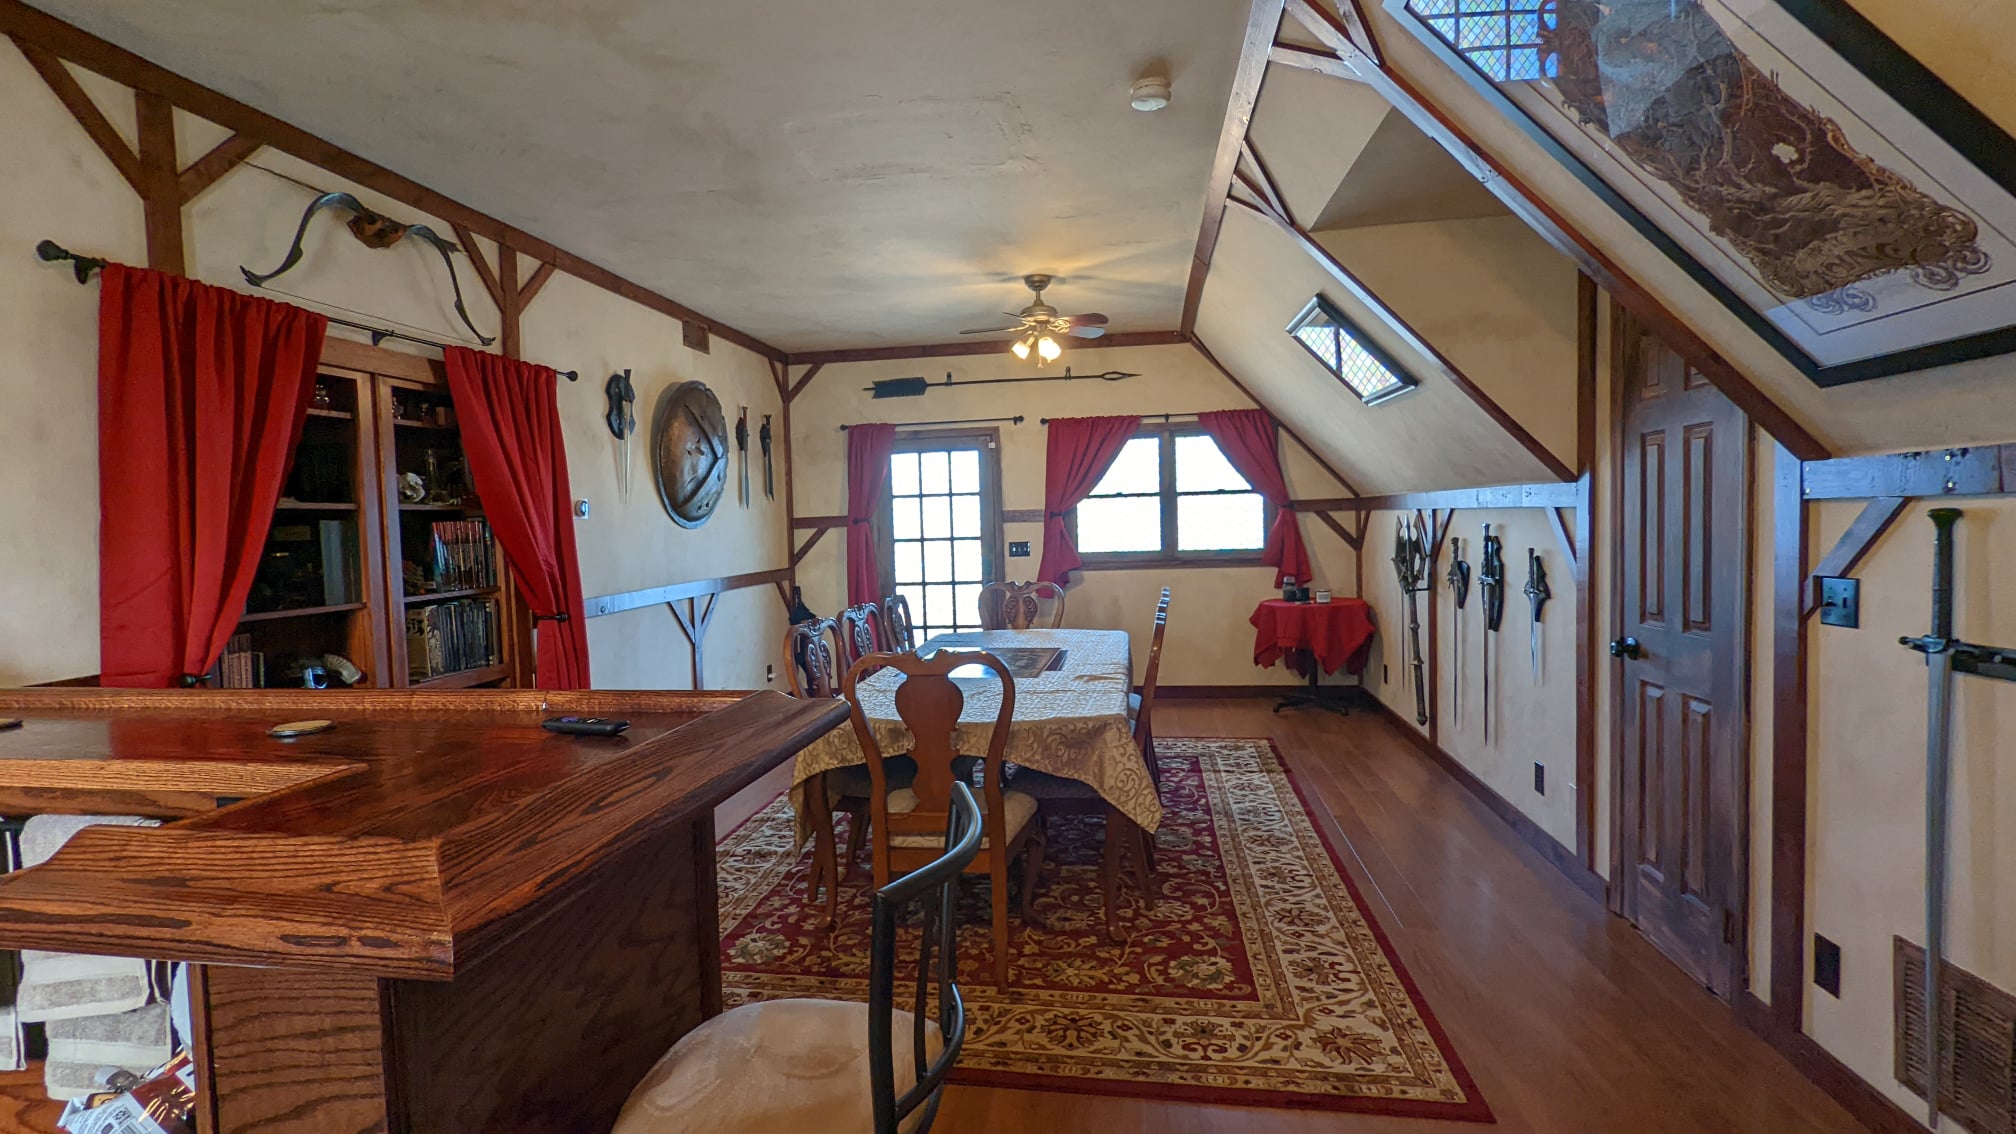
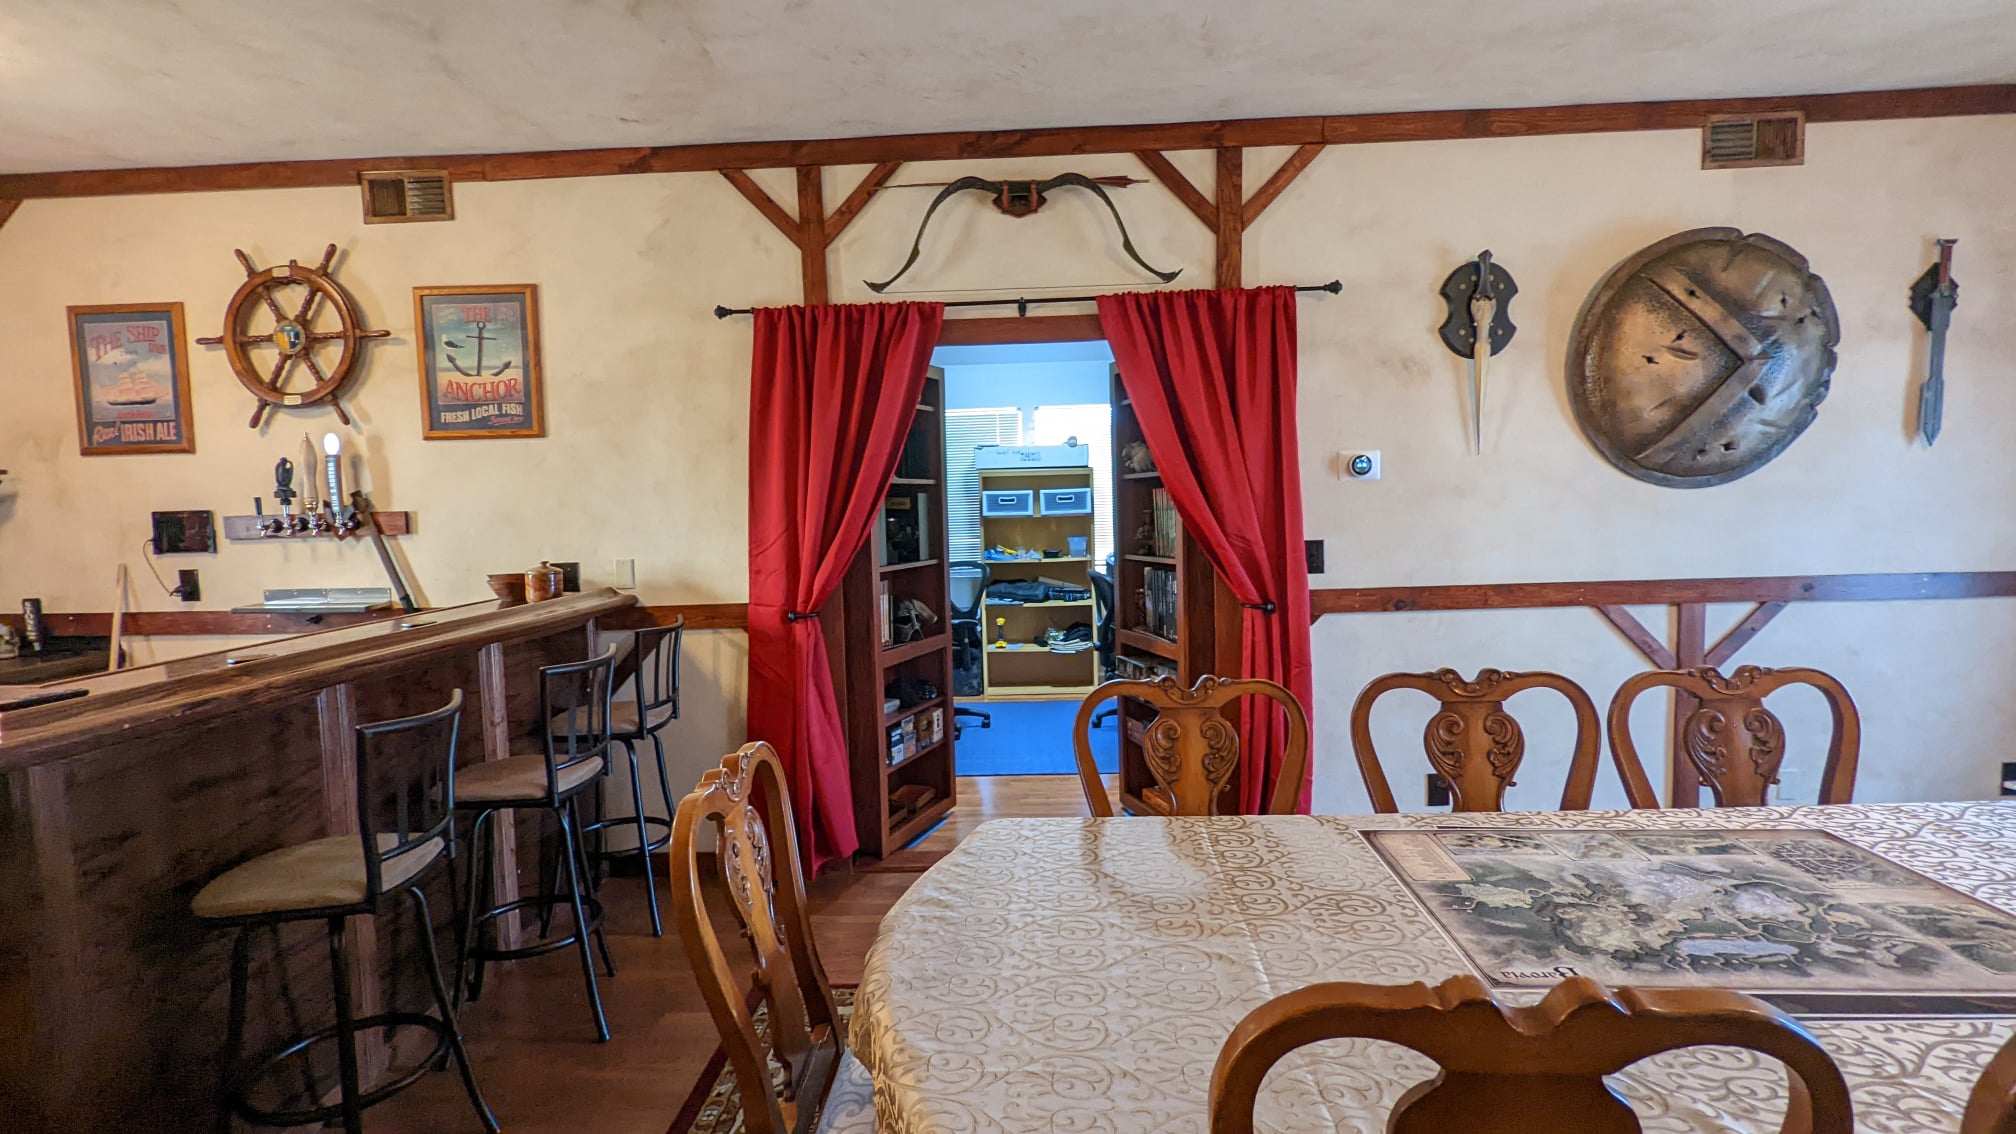
The curtains pulled the room together in a way we hadn’t expected–really gave it a cottage kind of feeling. The window next to the door required Quinn drill a hole for the rod to sit in the accent wood because it was such a tight fight that the end of the curtain rod wouldn’t otherwise fit.
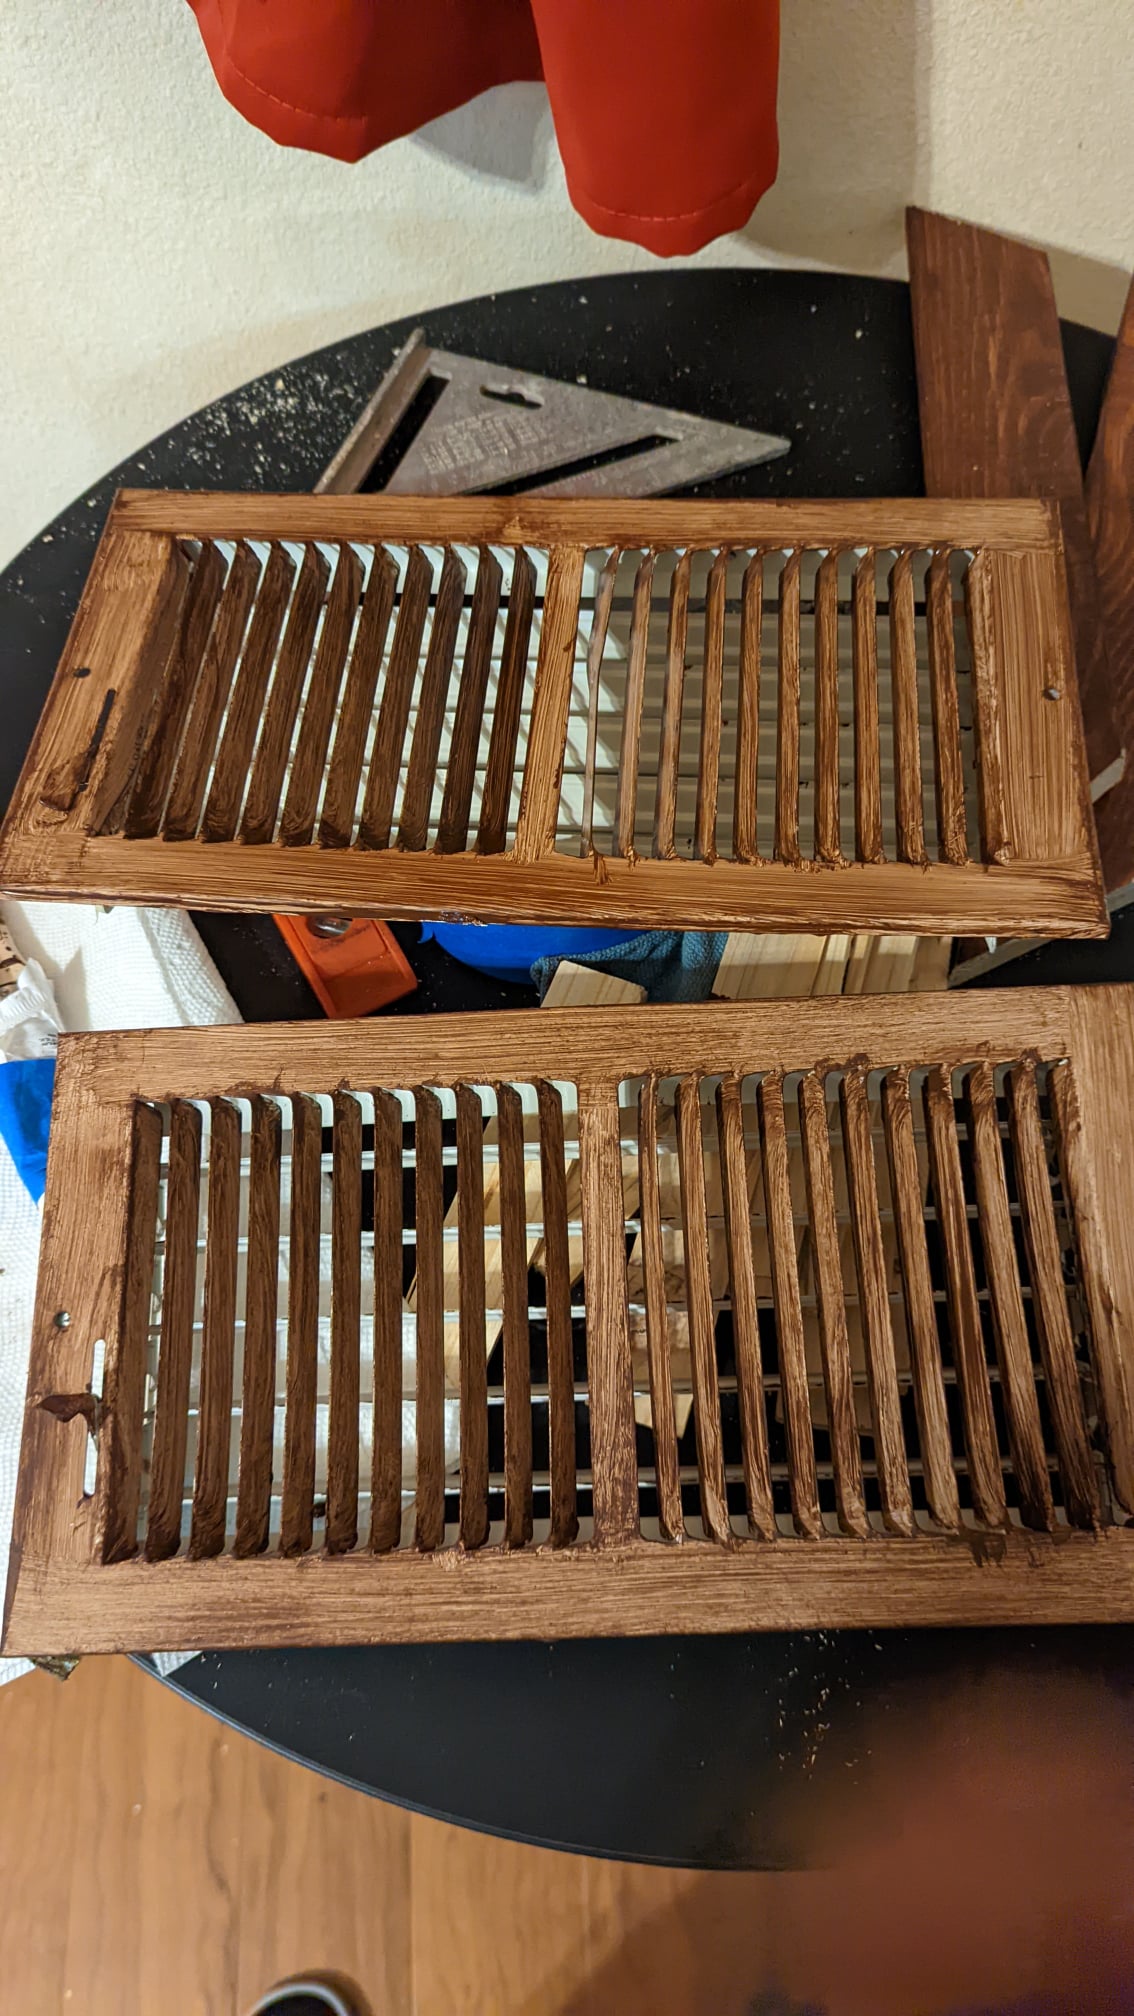
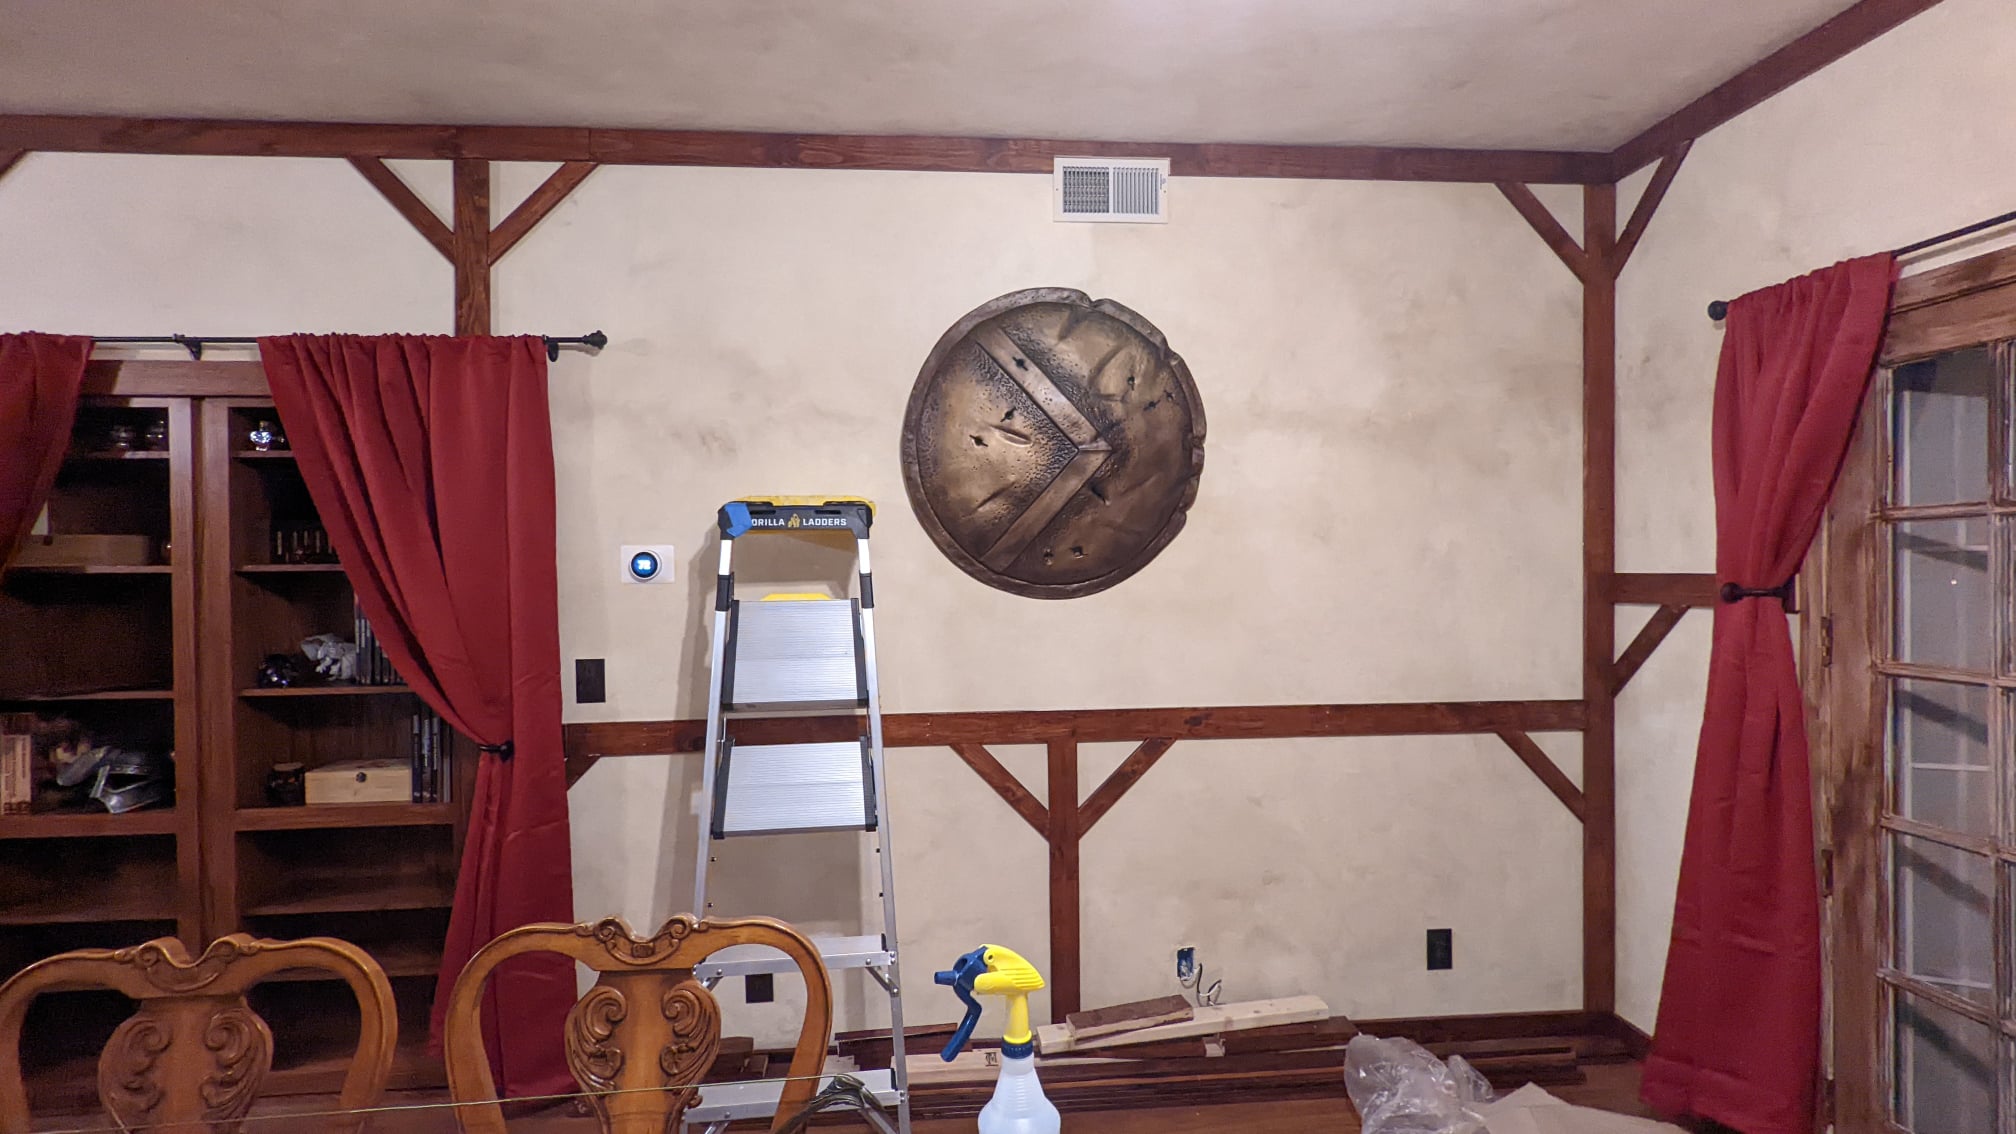
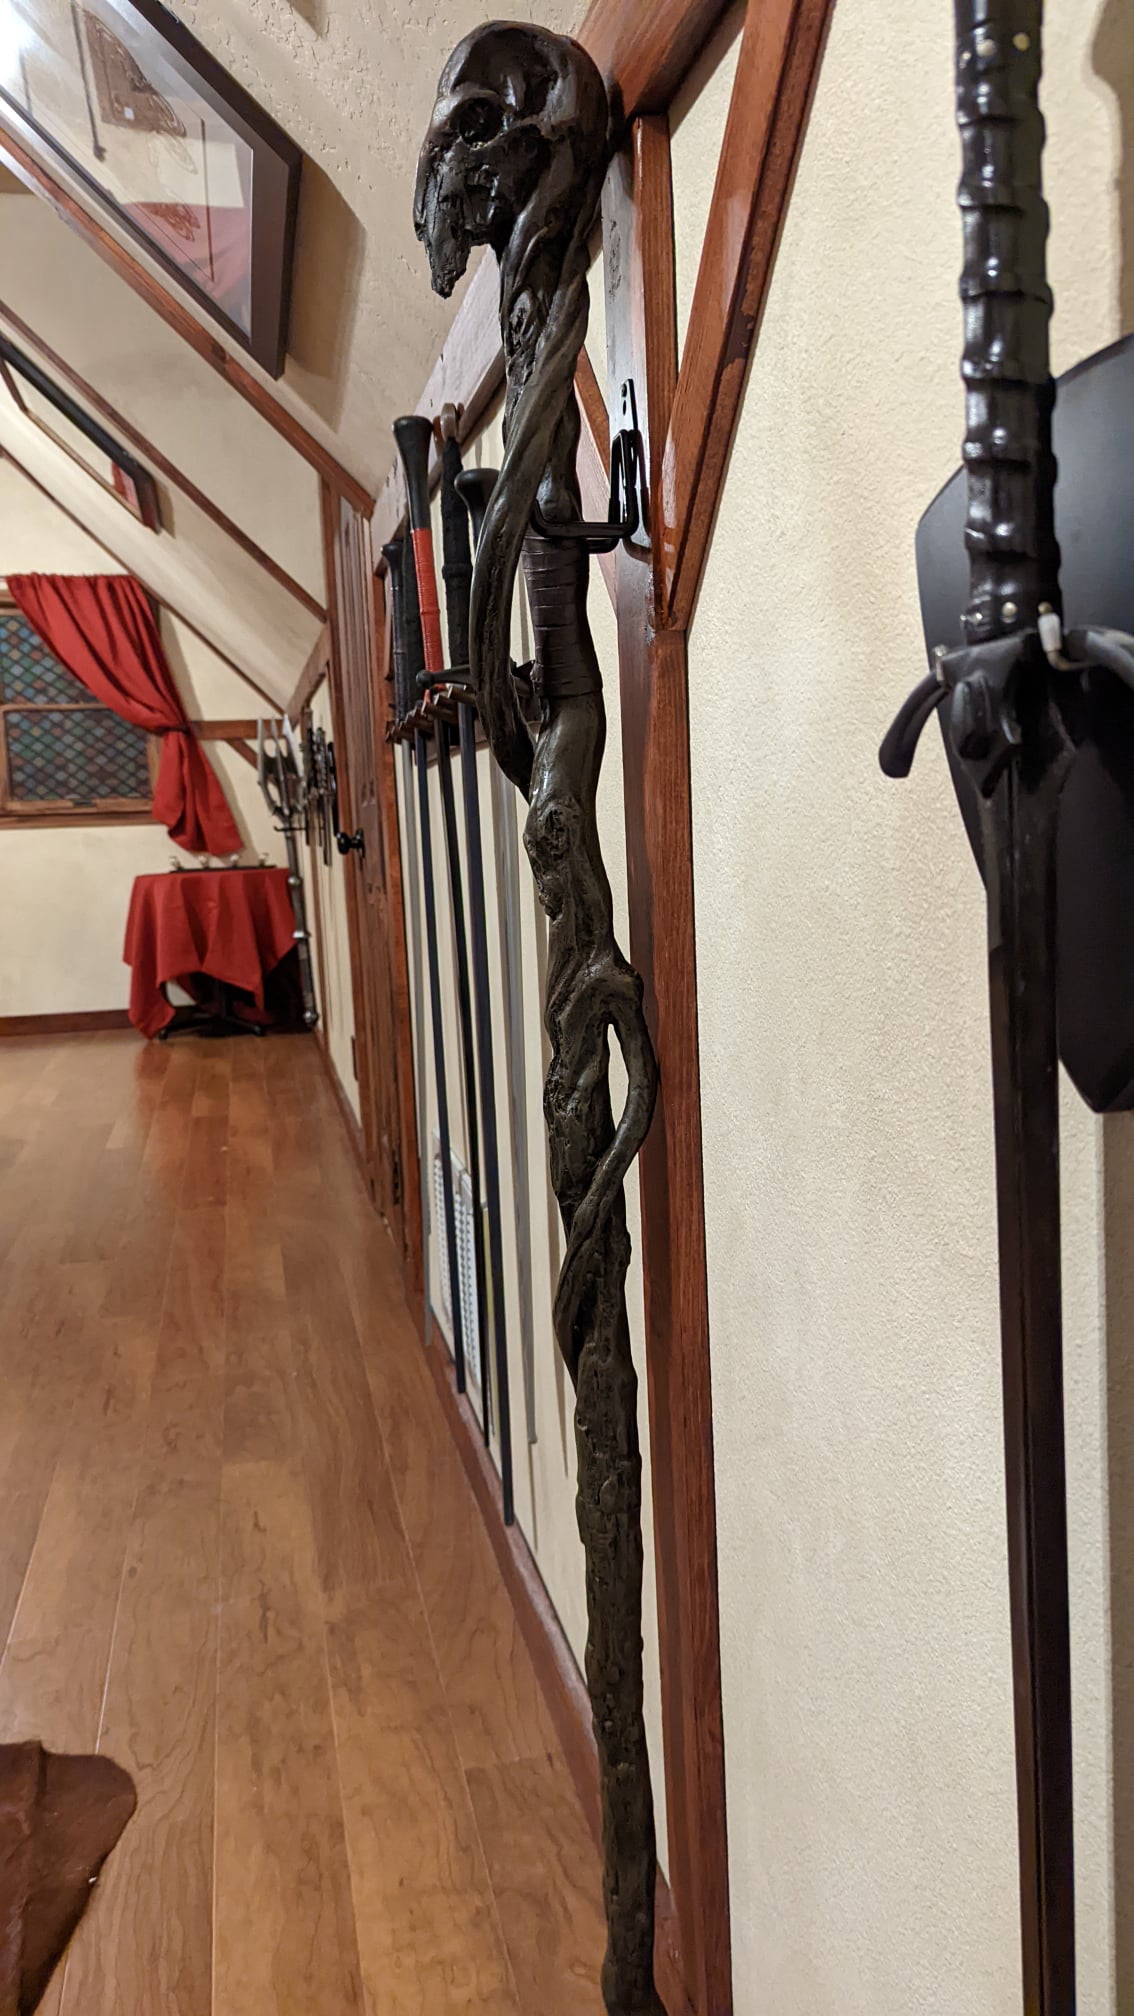
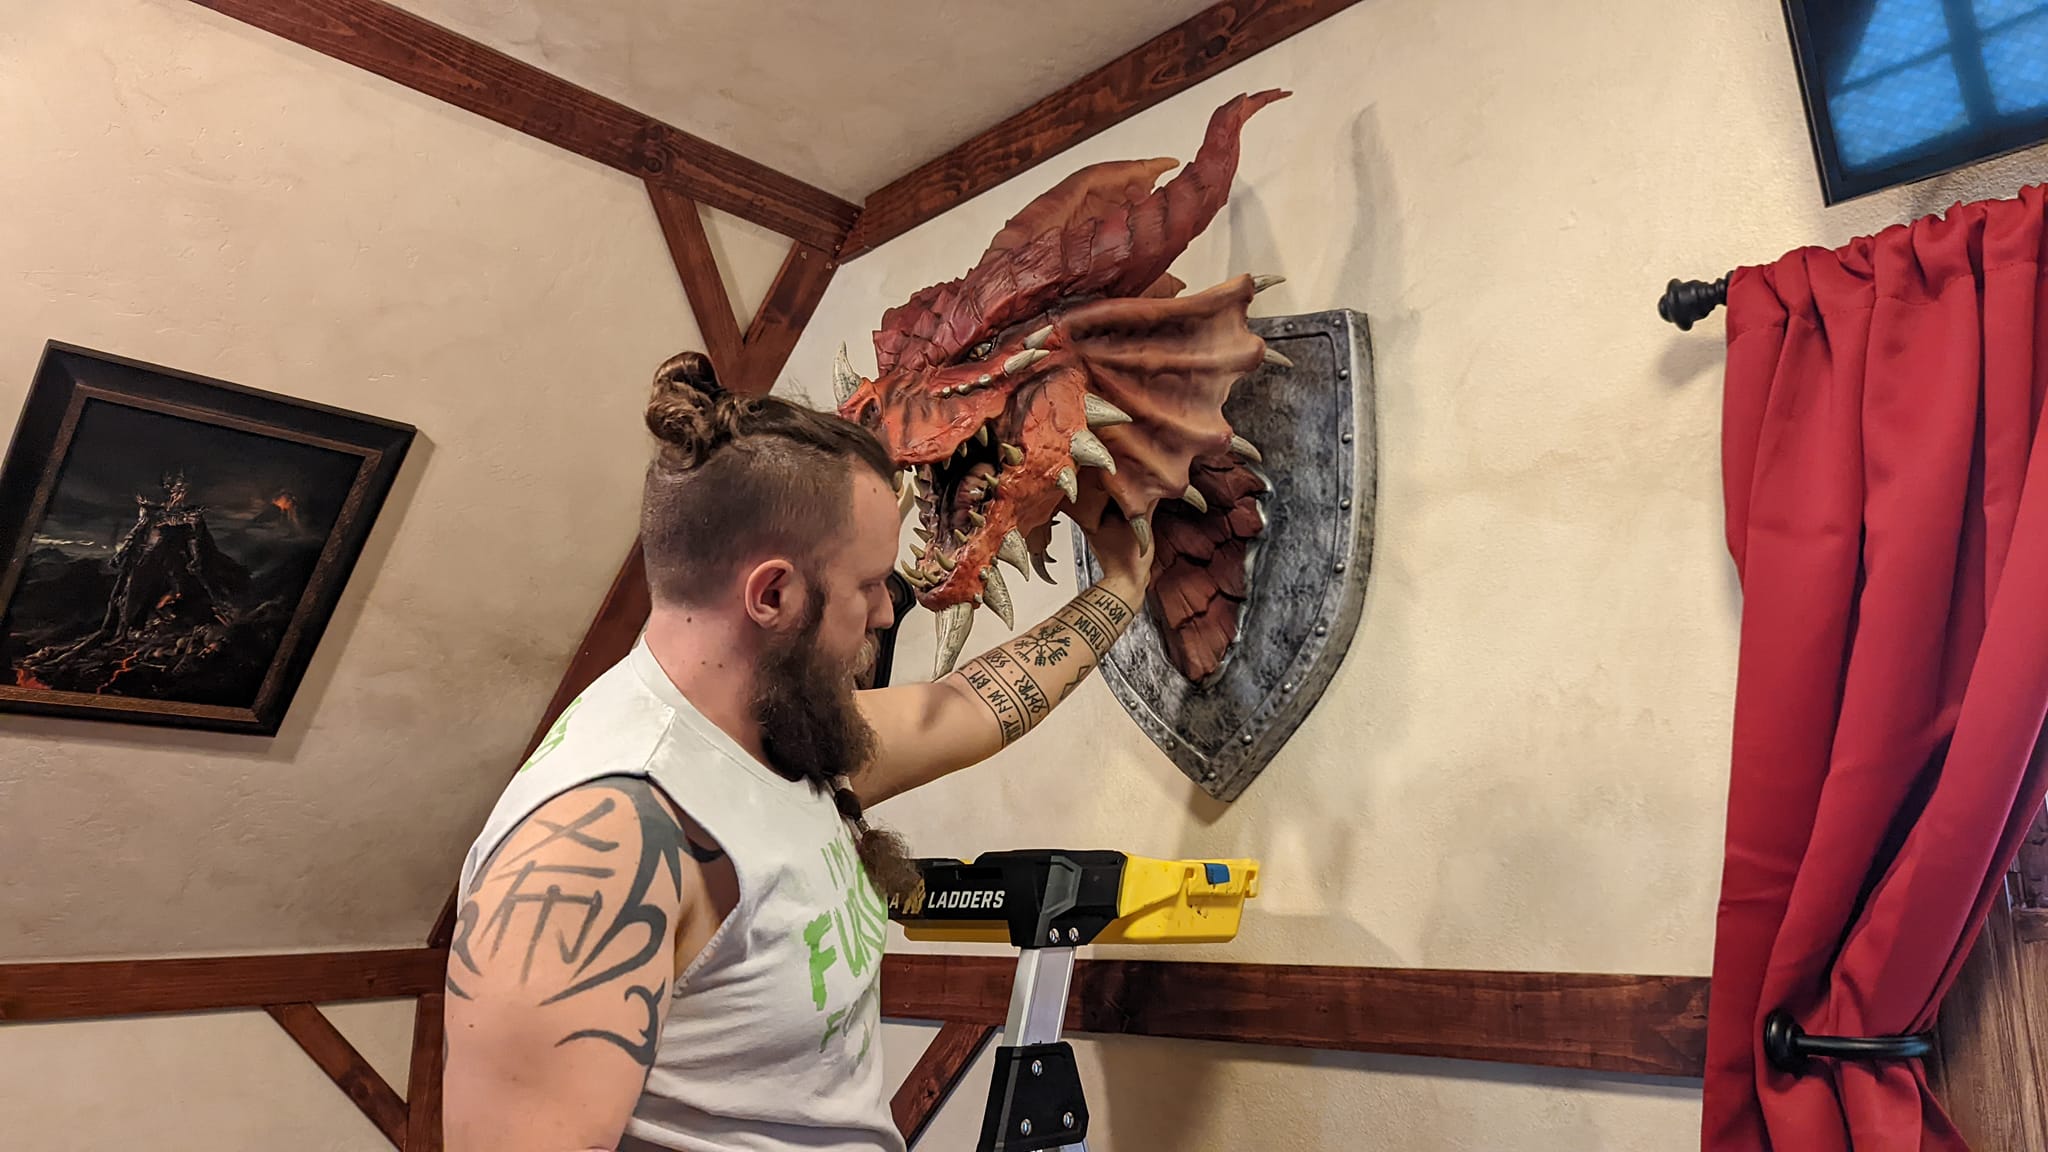
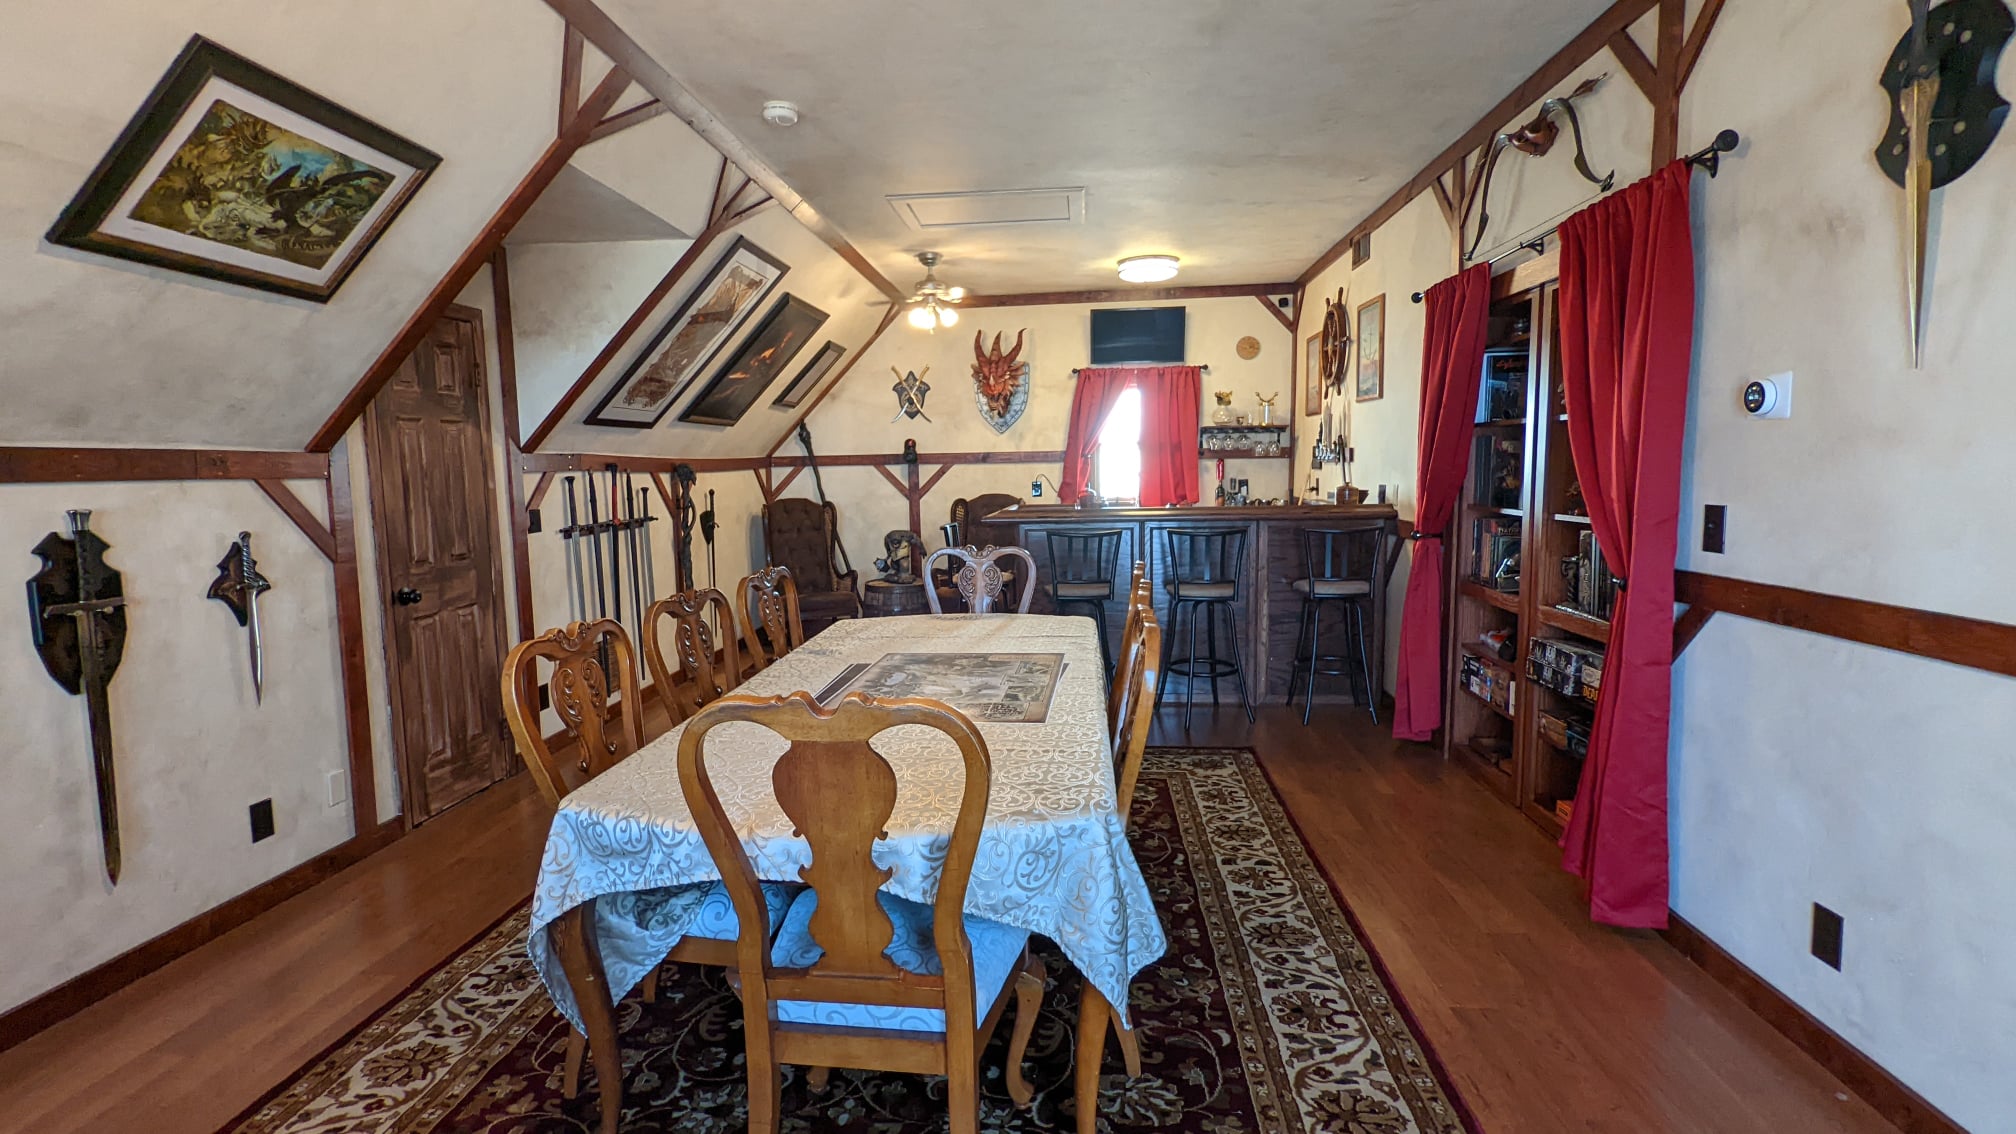
Also, after some friendly nitpicking by our friend Ryan (who put up the stained glass stickers for us), we decided to paint the air vents brown to look wood-ish. I used the same paint as on the door/windowsills to essentially the same effect. In addition to the curtains, we put up some weapons and artwork. At some point, we’ll re-order the artwork to properly fit next to each other, but we just wanted to test out the hanging mechanism (got it at Michael’s) on the tilted wall, and then were too lazy to re-do it.

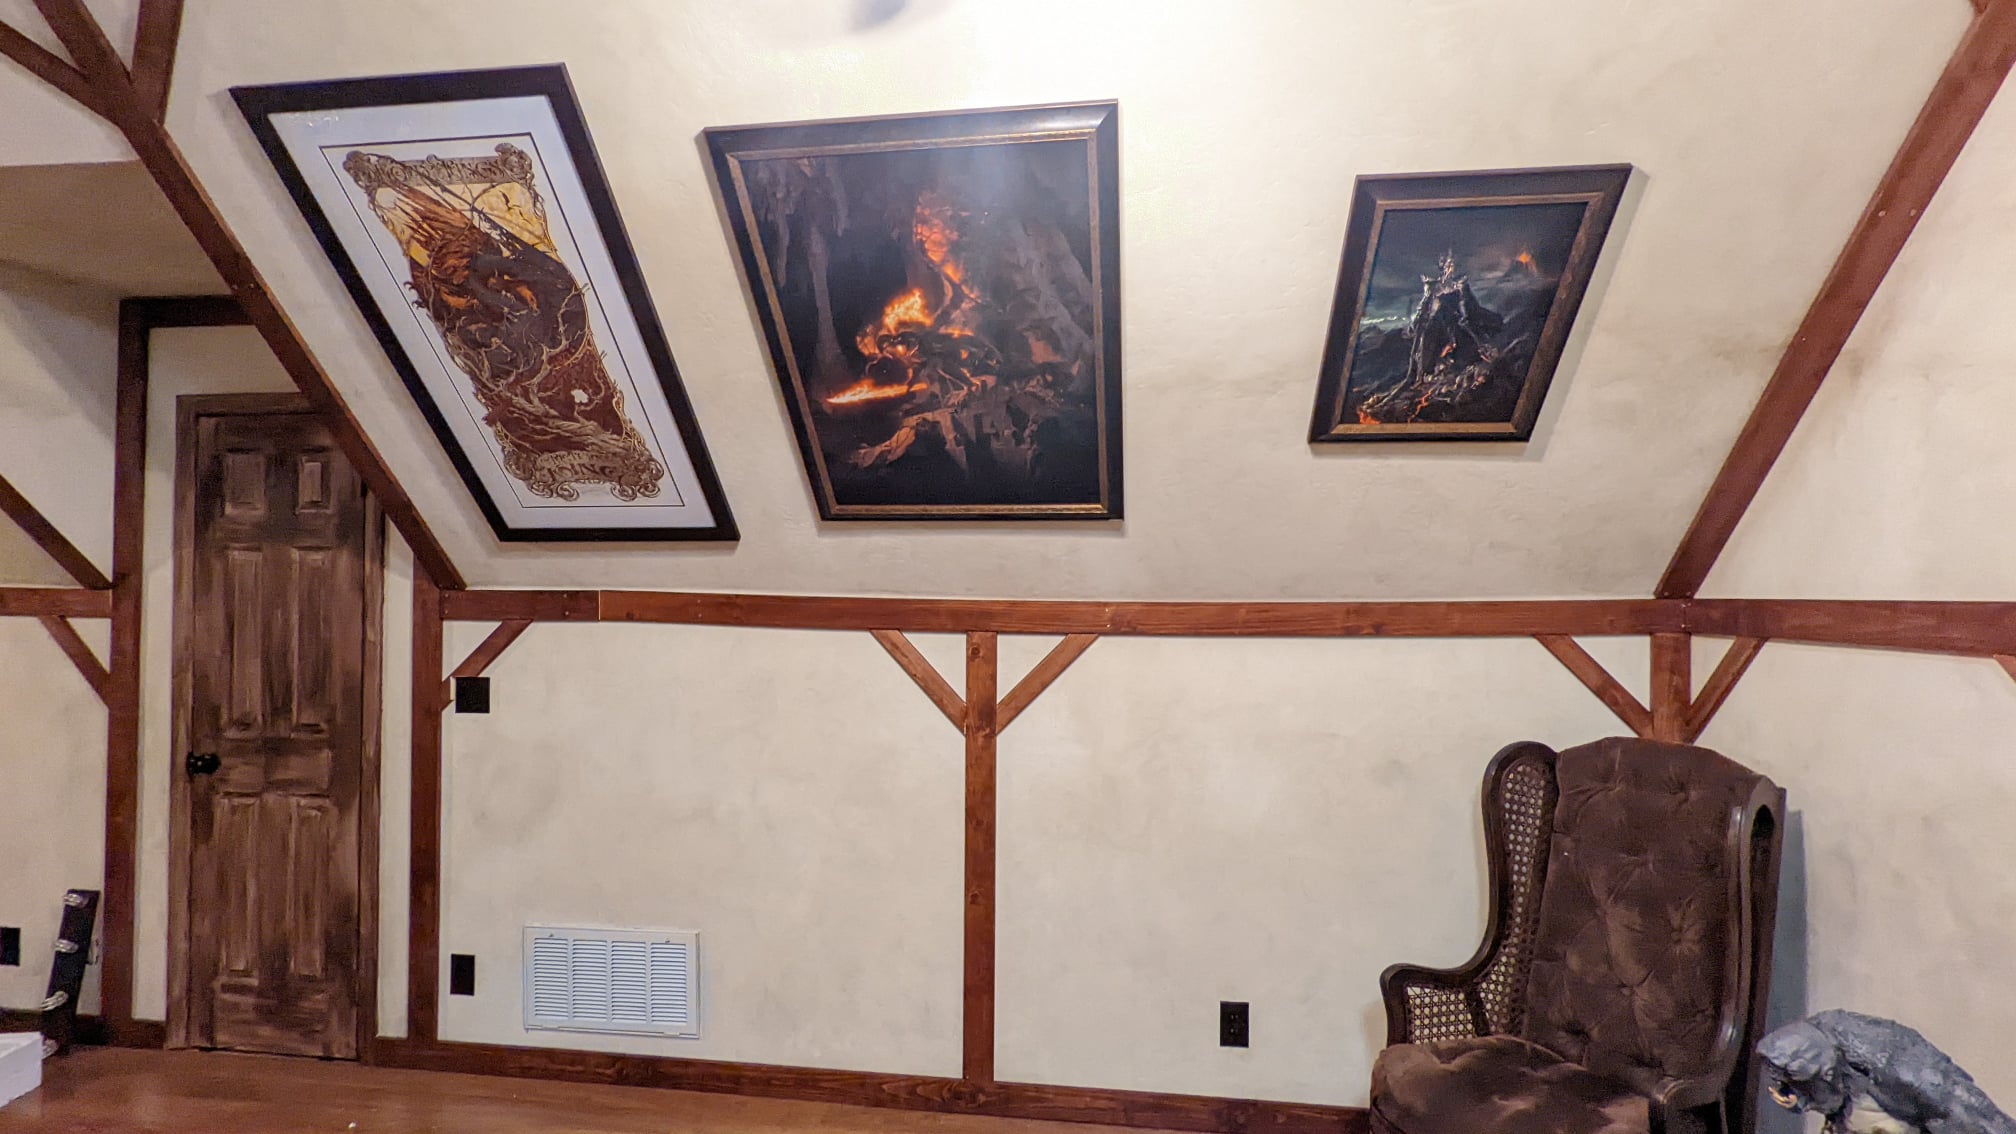
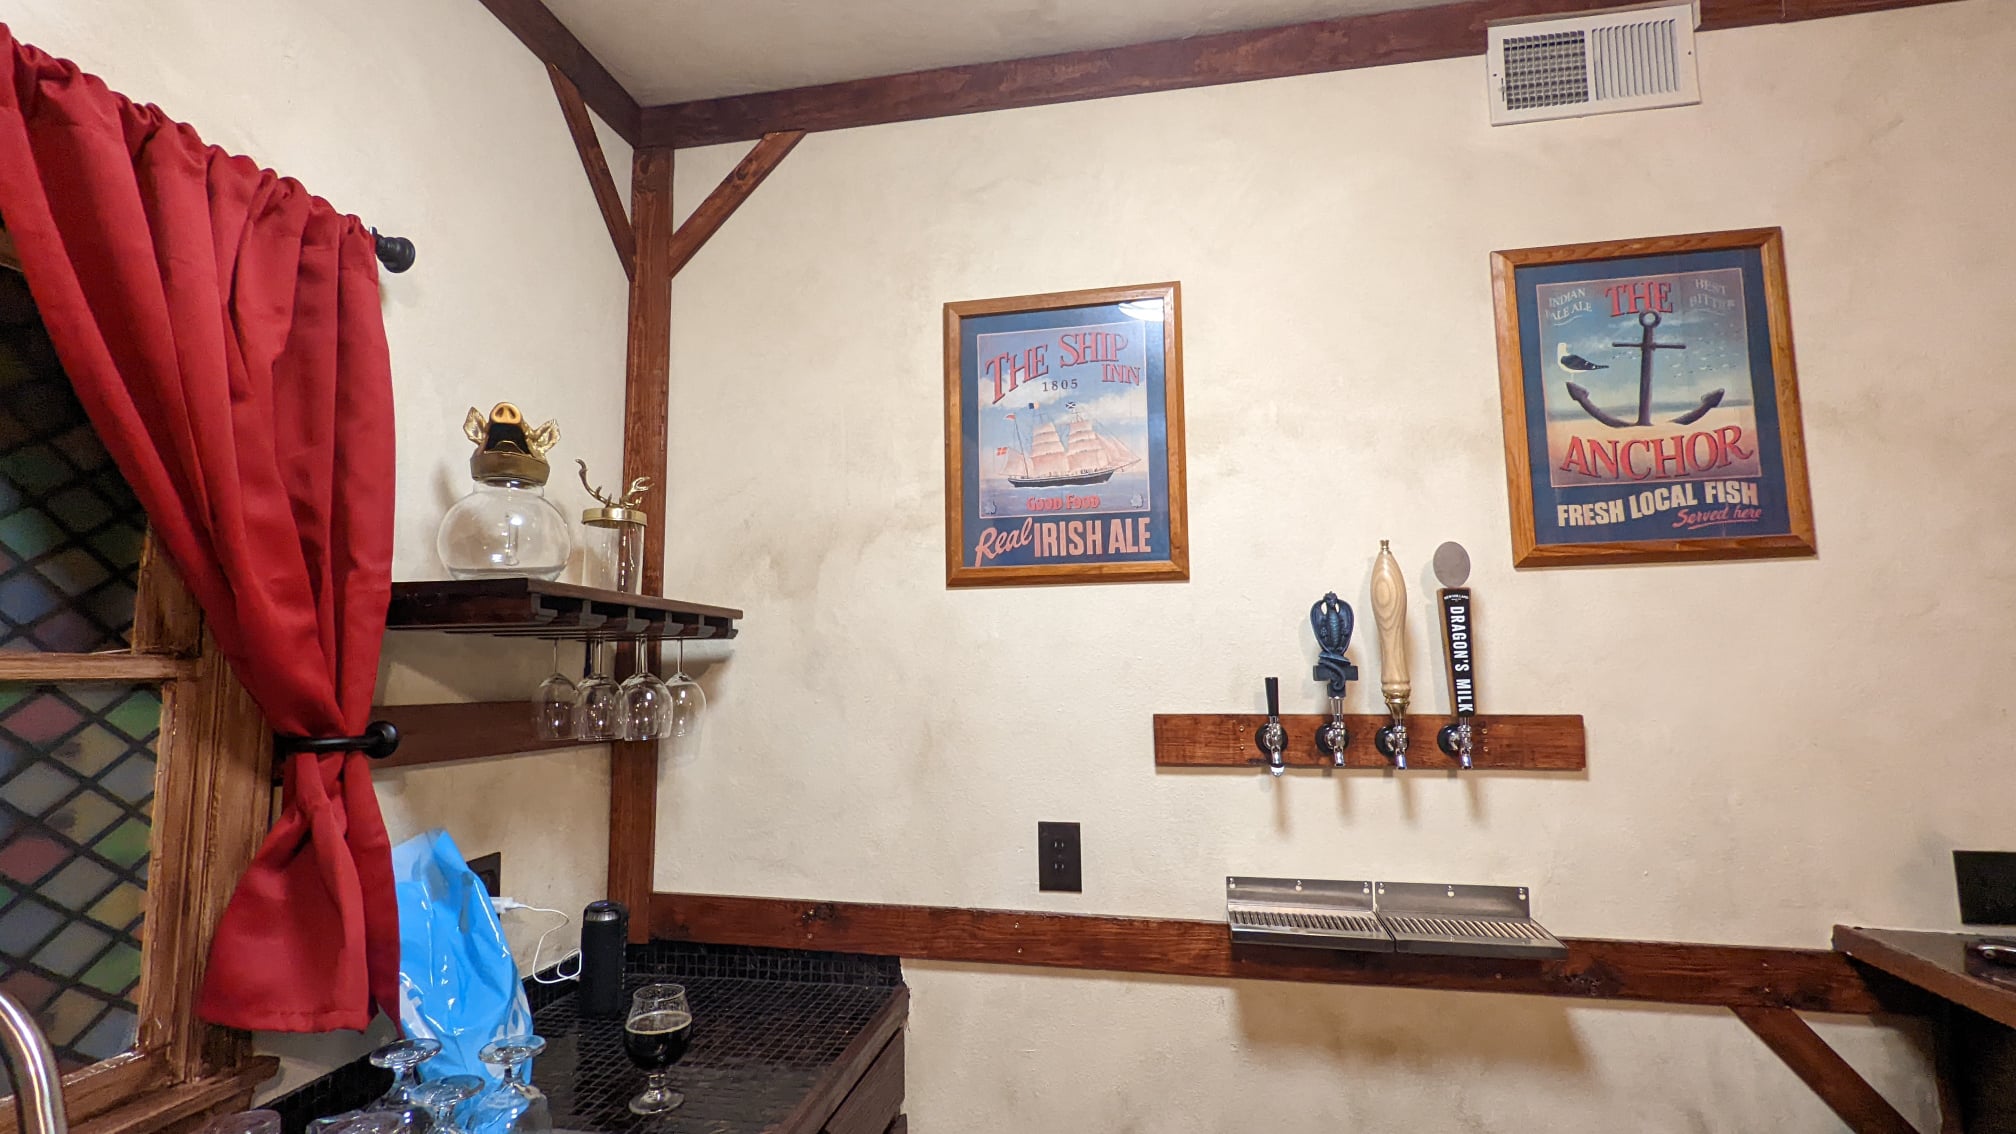
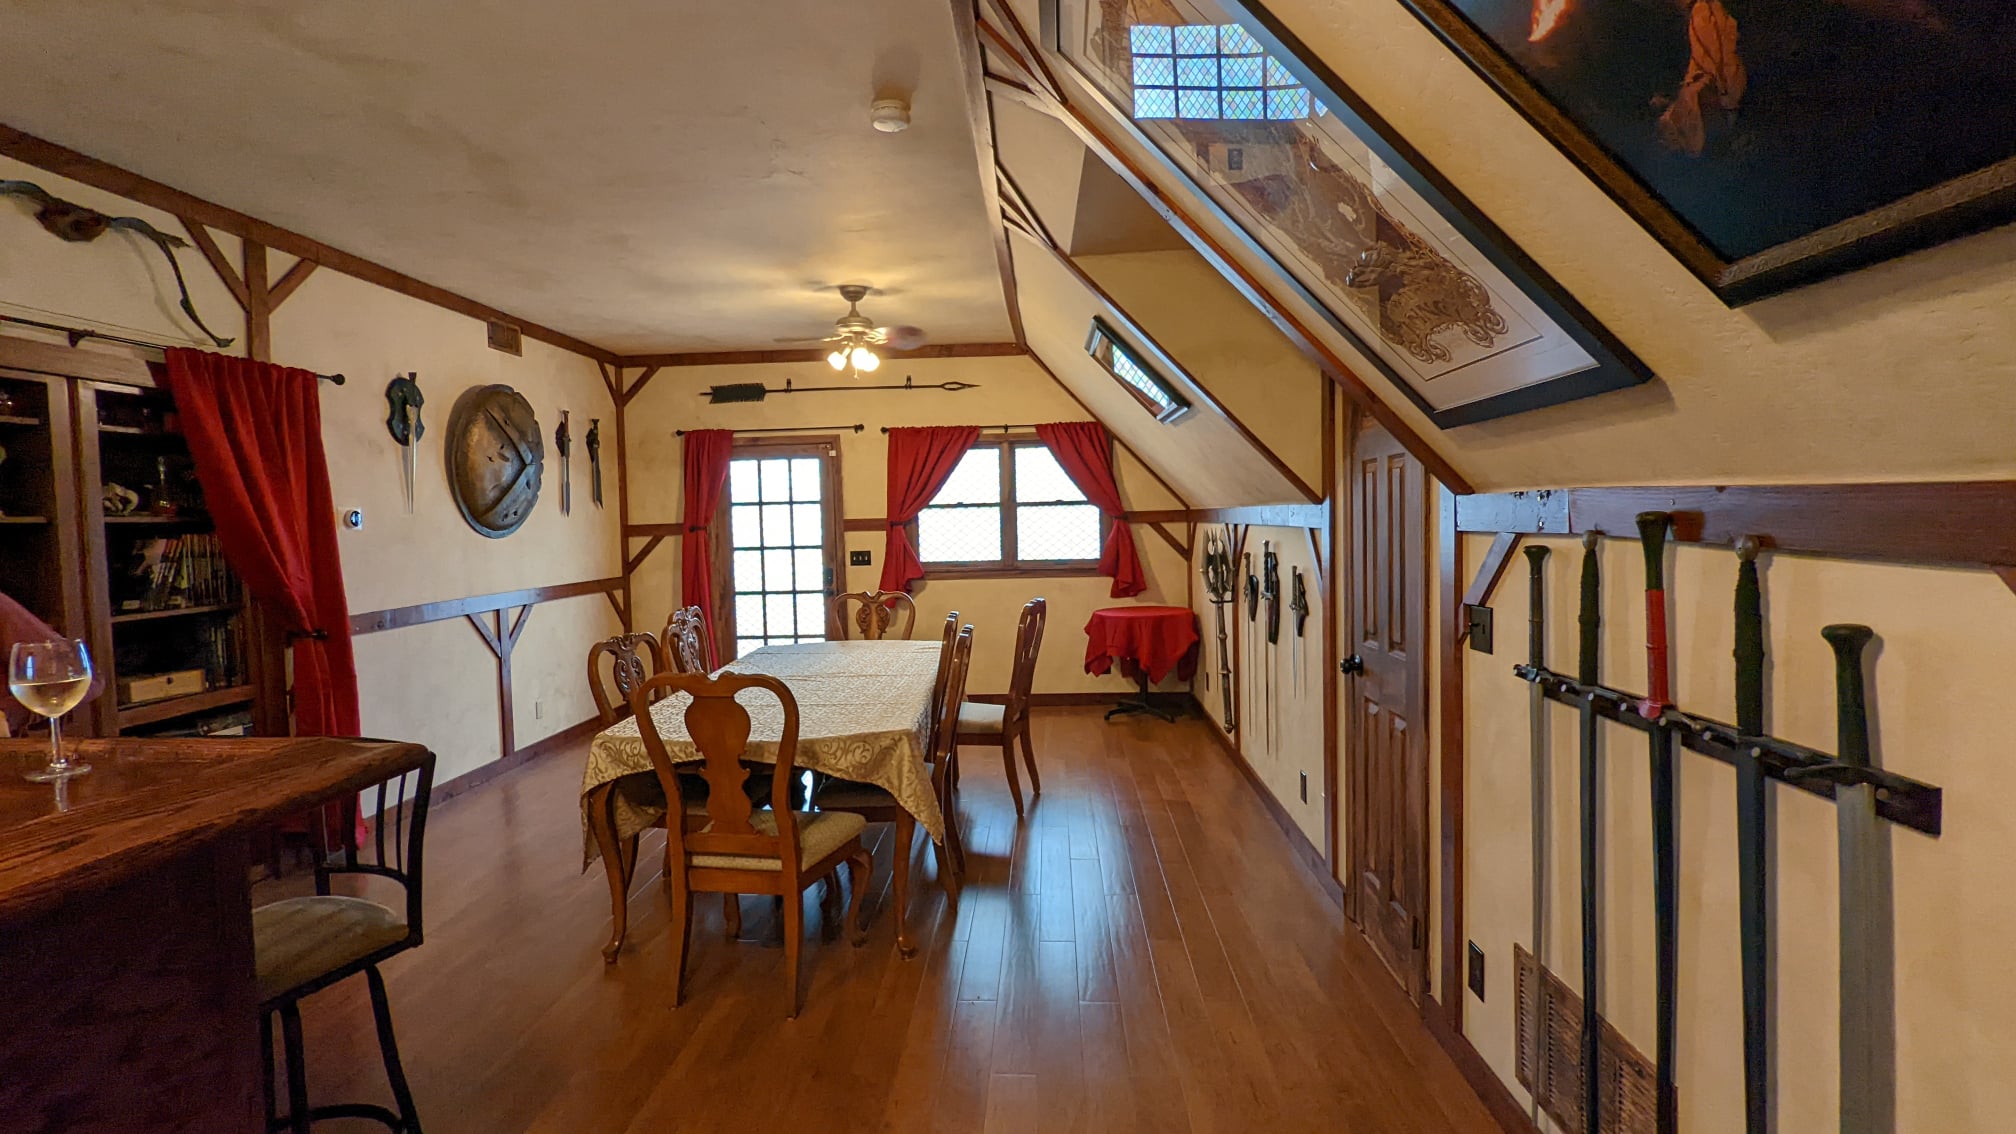
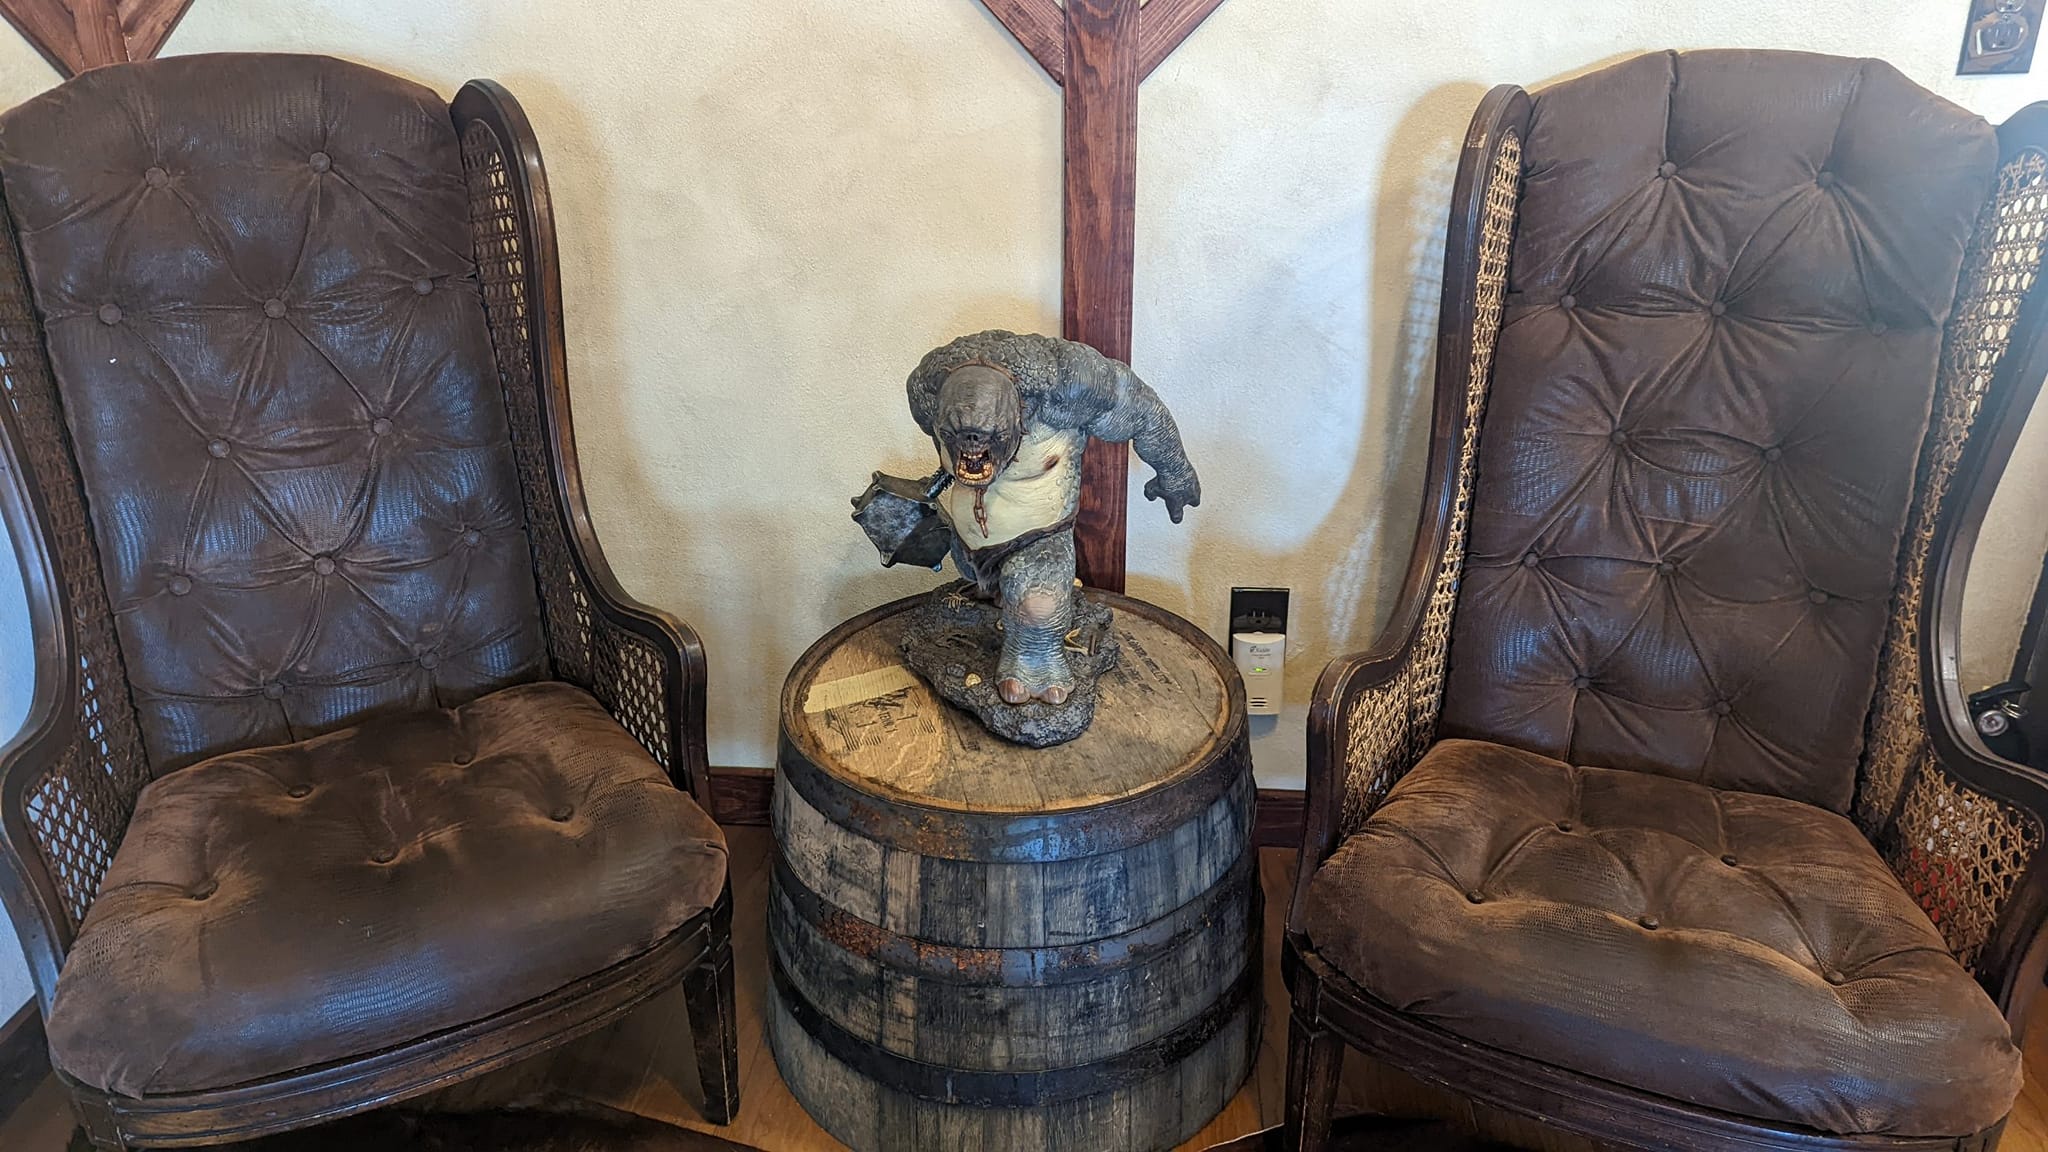
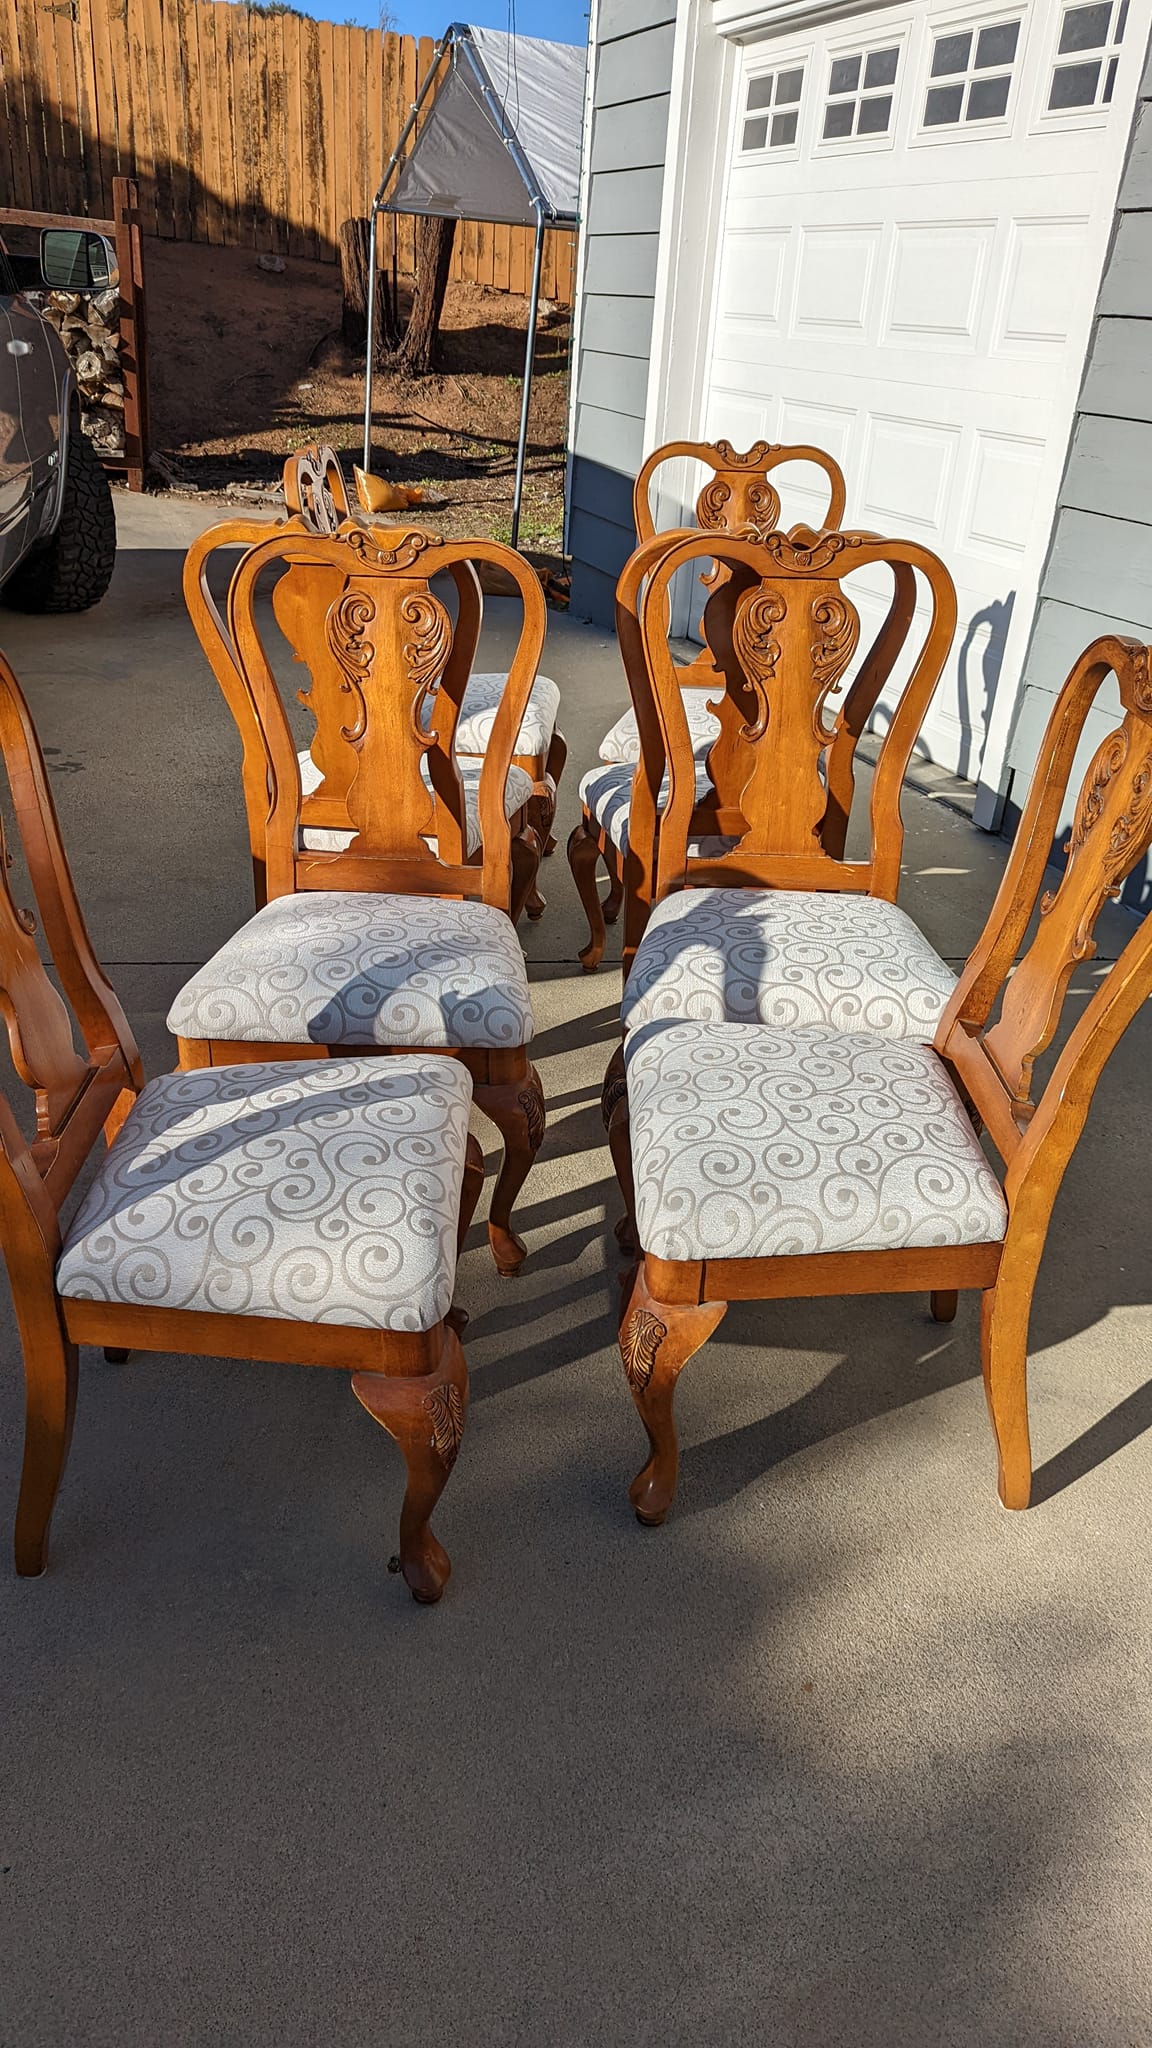
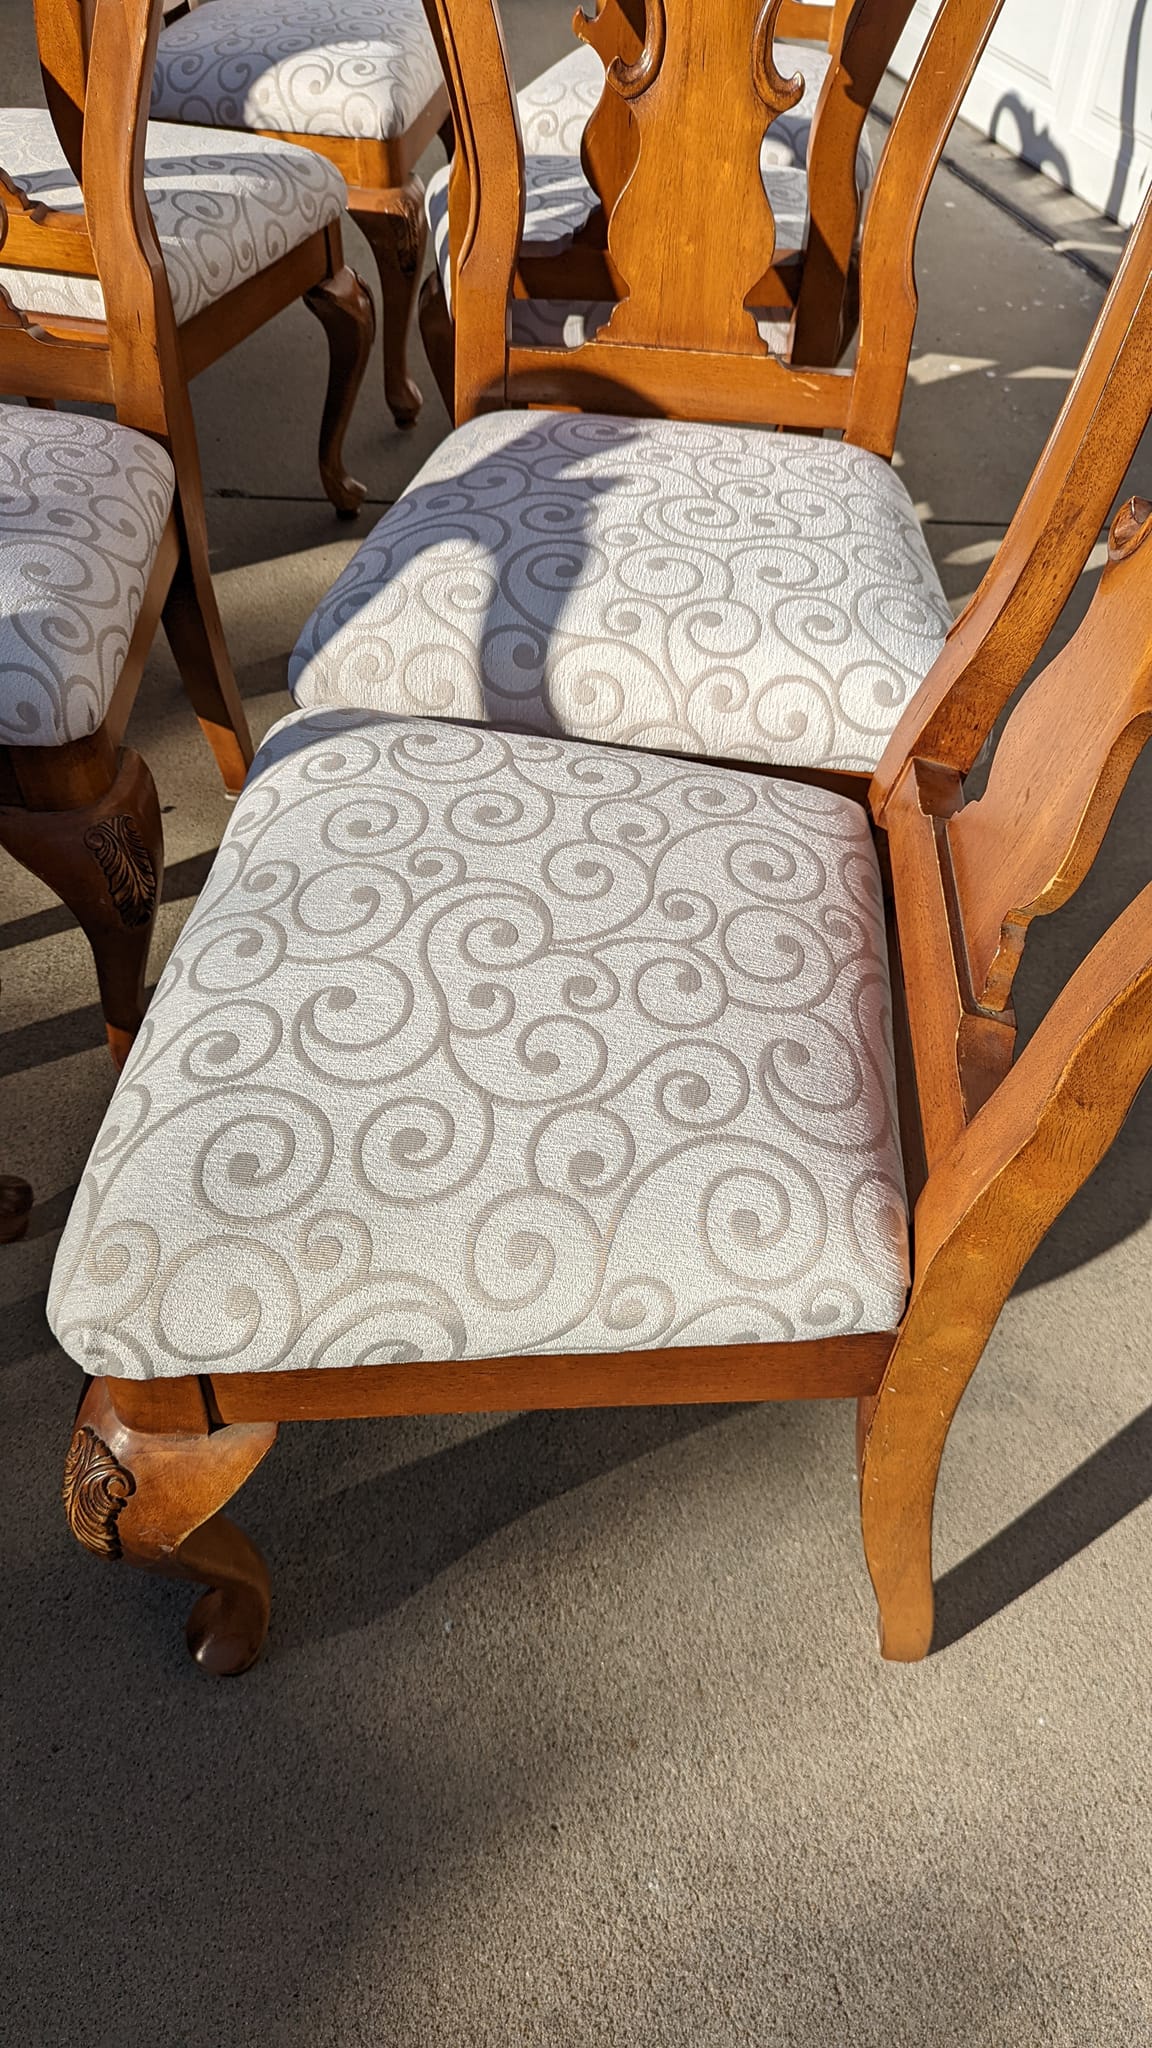
We eventually ordered more of the stained glass stickers and finished the door, then put up all the LOTR, Hobbit, Troy, 300, Harry Potter, King Arthur, and practice weapons up on the wall. Most were gifts over the years. The brown chairs are from a local antique store, and the barrel table is a half barrel planter from Home Depot. We left some spaces on the wall open with the expectation that we’ll be adding more as we go along (i.e. we’d like a few monster heads and more artwork).


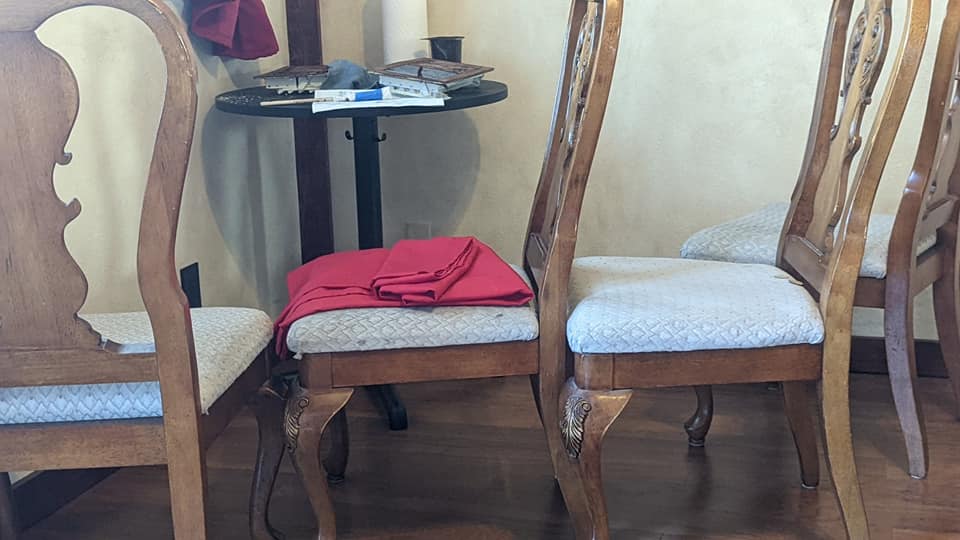
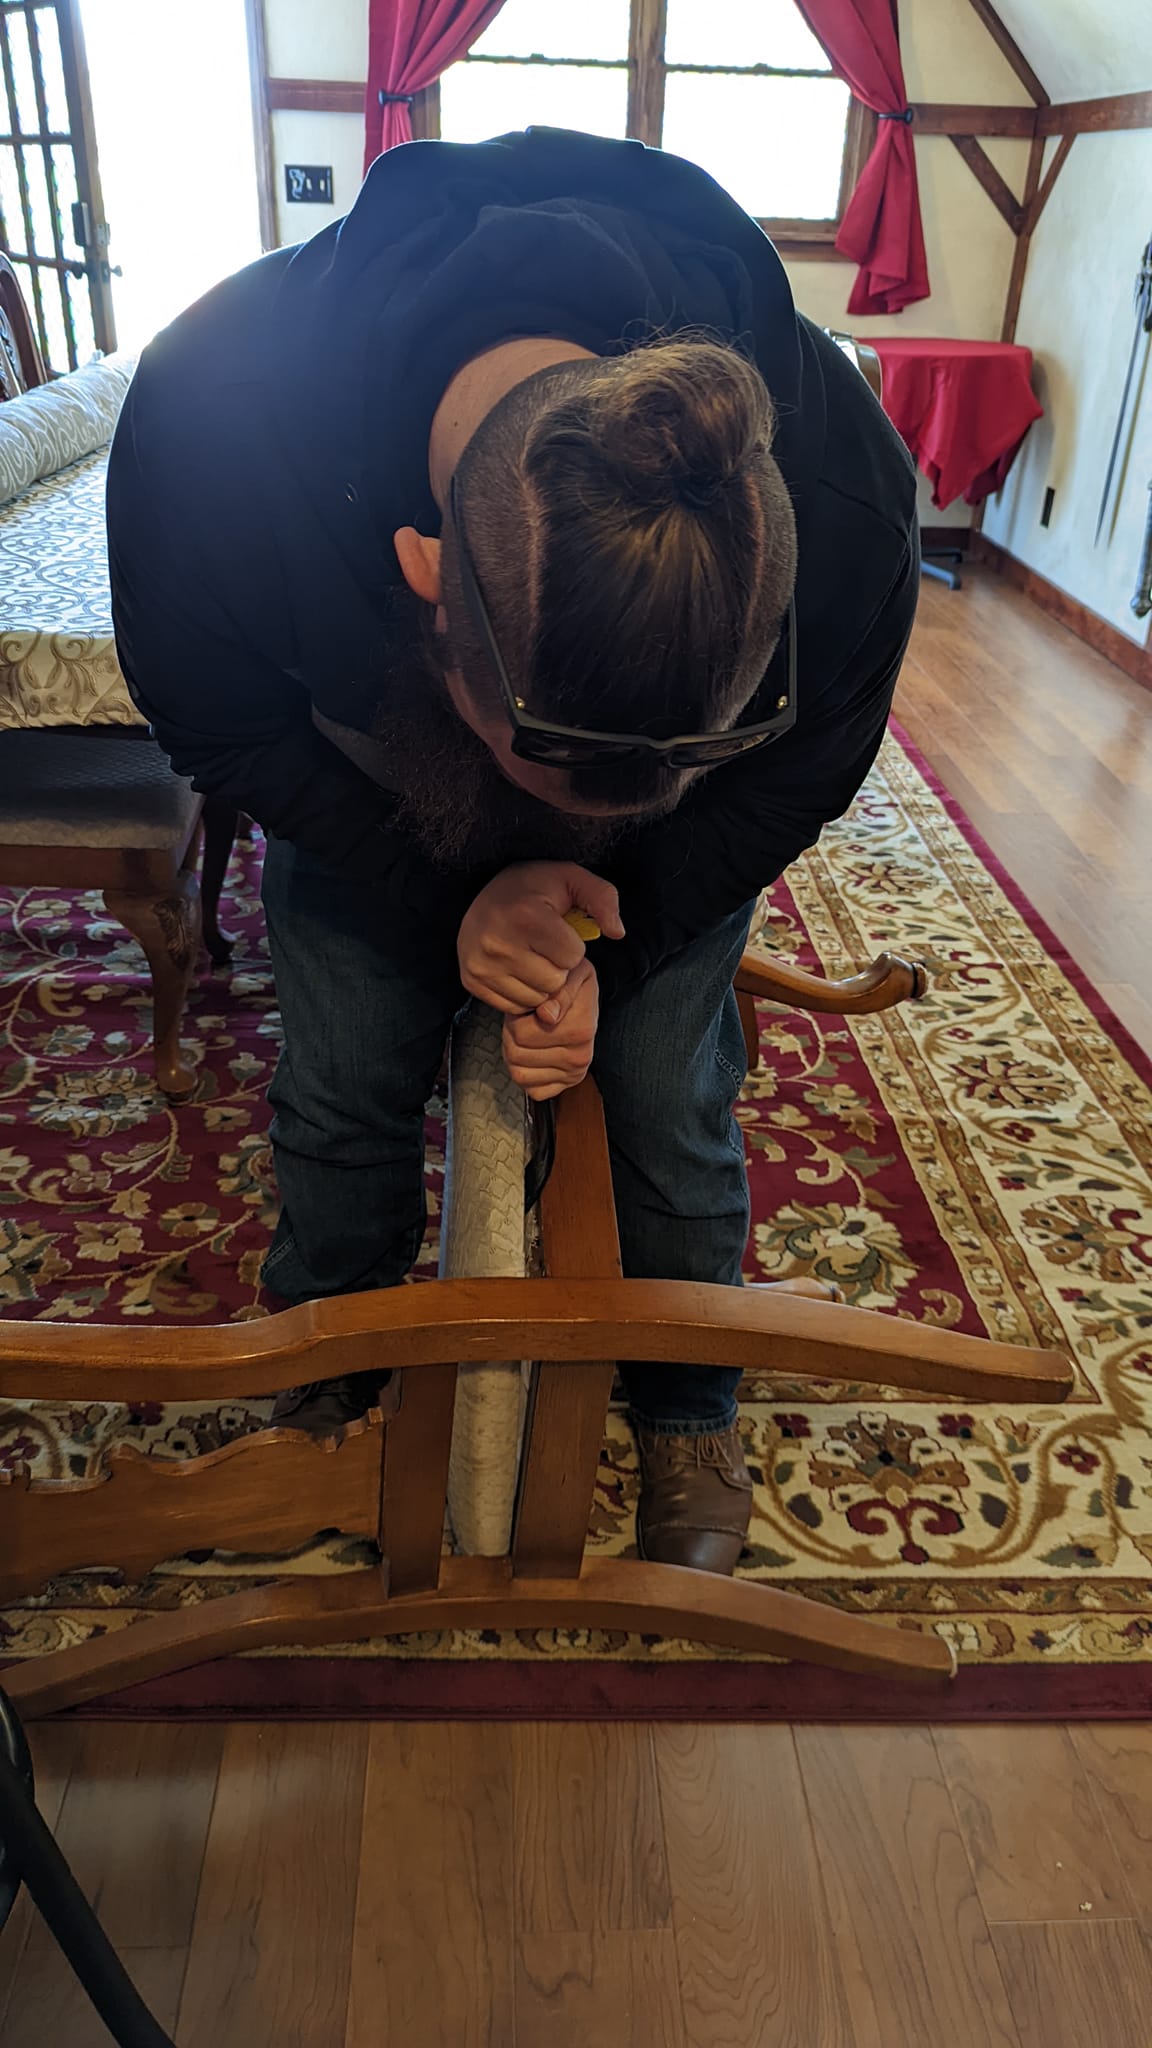
When we bought our large table and dining chairs, I’m pretty sure they were original owner and original material. We knew the chairs needed new fabric and the cushions were pretty compacted, so they were likely original too. We tried to do the reupholstery ourselves, but discovered that whomever did it before put about 3 rows of 12 or so staples per side of the seat. We didn’t really want to fight with the staples, let alone try to figure out how to get new cushions on there with the amount of fabric we bought. We estimated the whole process would likely have taken us about a couple months working in the evenings and weekends–and who wants to spend their free time doing that?
Anyway, if you’re looking for an upholstery guy, Rigo’s pretty dang good–got us the chairs back in a week! (I realized after the fact that I could have just removed the seats and brought those in, instead of the whole chairs, but…maybe that also helped get the job done sooner to avoid storing them). They also re-did the bottom part of the cushions for the antique chairs so you don’t feel like you’ll fall through the seat.
We also added a TV for bar-watching, and a cheap android tablet to control the lightbulbs and music system so we don’t have to use our phones and hear constant notifications through the music.


We’ll no doubt keep adding to our tavern, but I think we’re more or less *there* for now. We have plans for recessed lighting and speakers, and some other treats. Until then, we enjoy tavern music such that I could imagine bards playing in the corner.
Here’s a brief walk-through as of February 9, 2022.
Update as of April 28, 2022: We updated the beer taps & handles, added a 4th beer option, and installed a projector above the table.


")

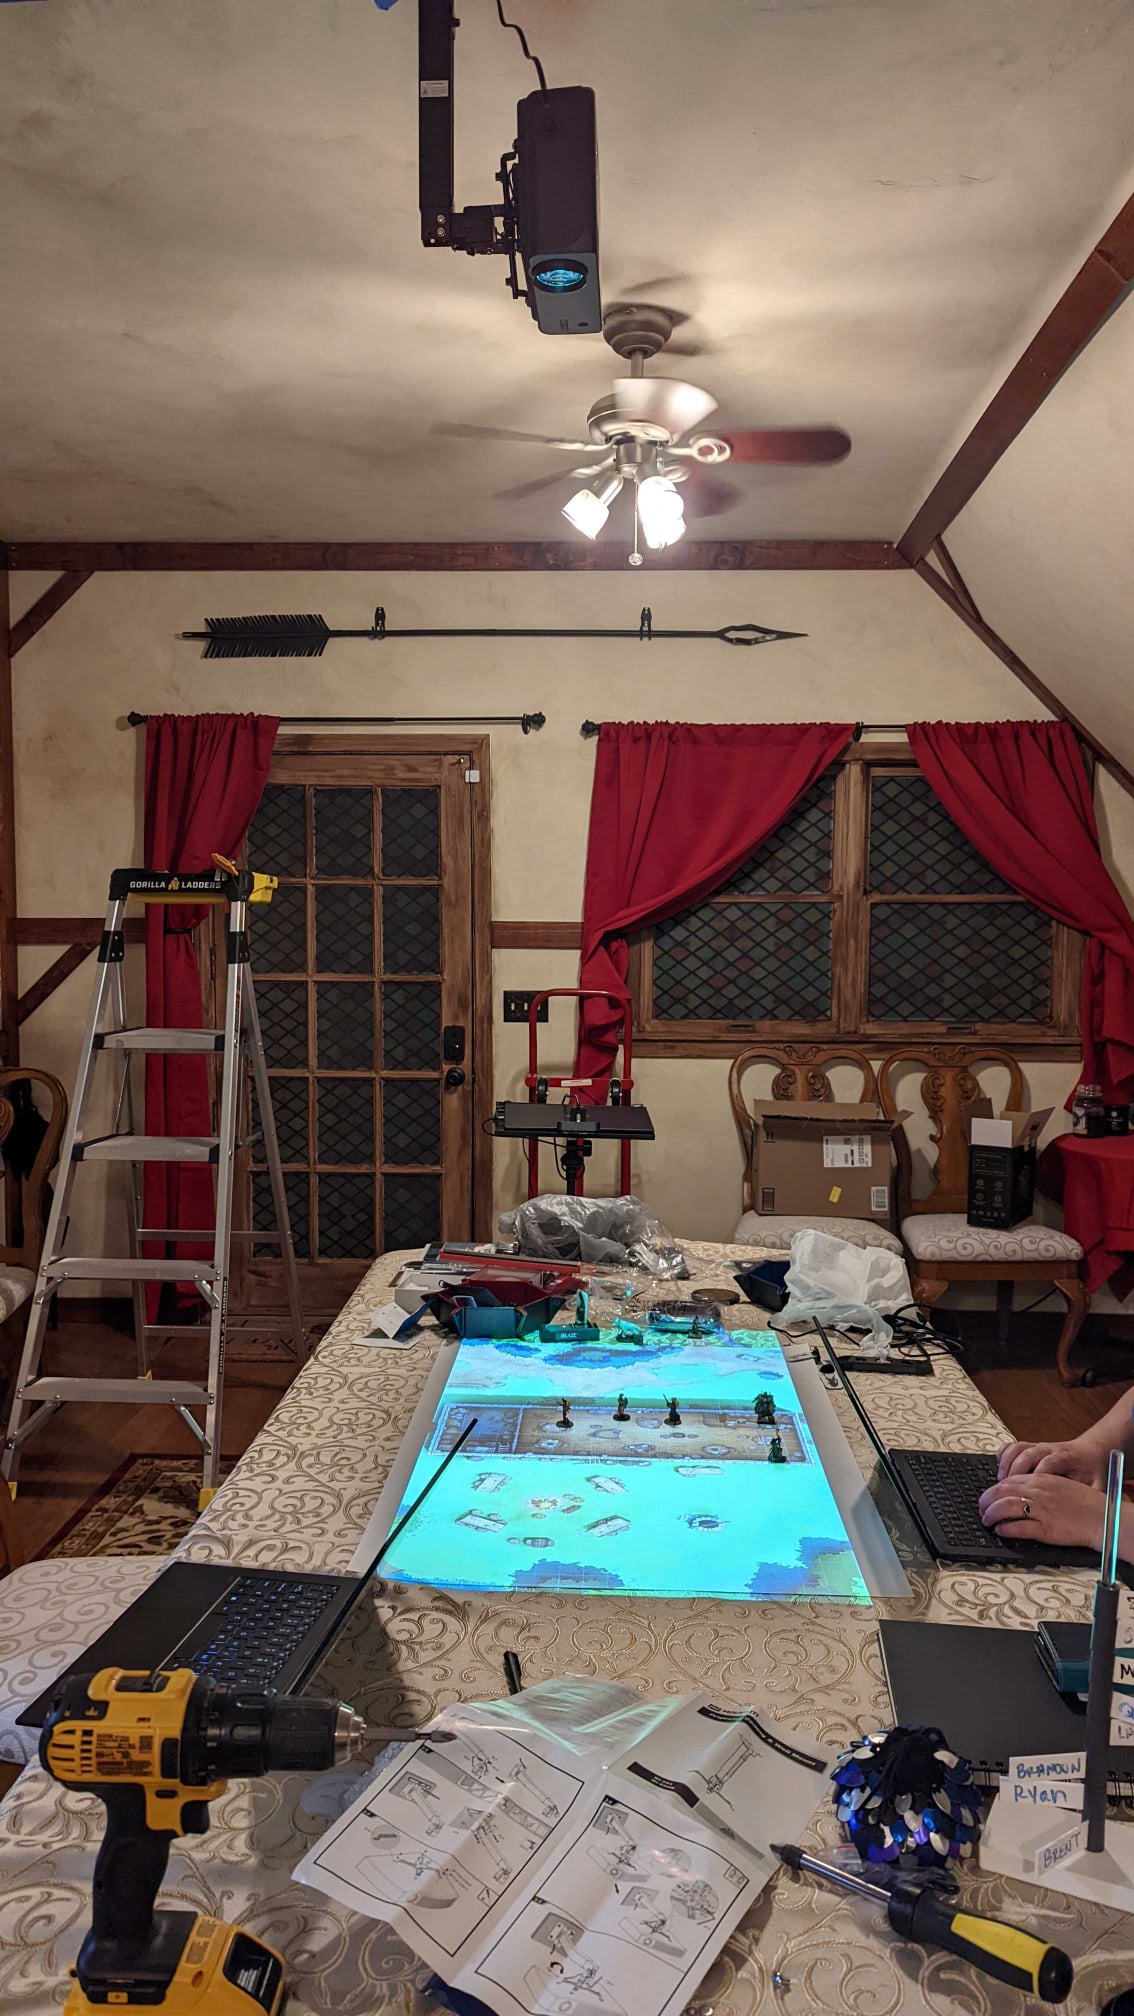


We’re going to get a friend to help us install a ceiling plug for the projector, and figure out how to keep it from shaking when the AC is on, but otherwise, it seems to work really well for when our DM has virtual maps. We also added a virtual presence device at the end of the table, with a laptop stand and high-def web cam so our remote players can still see us, see the map (via another phone looking only at the map), and see any virtual maps sent by the DM. We also have a conference microphone so that we can hear virtual players and they can hear all of us (even if we talk over each other) without echo issues. Now, we just need to make our closet more efficient for quick-storage if we switch to a non D&D game, and find better storage for our extra chairs. Always improving!